 30/5/06
I ordered kit 14 this morning.
30/5/06
I ordered kit 14 this morning.
30/5/06
I ordered kit 14 this morning.
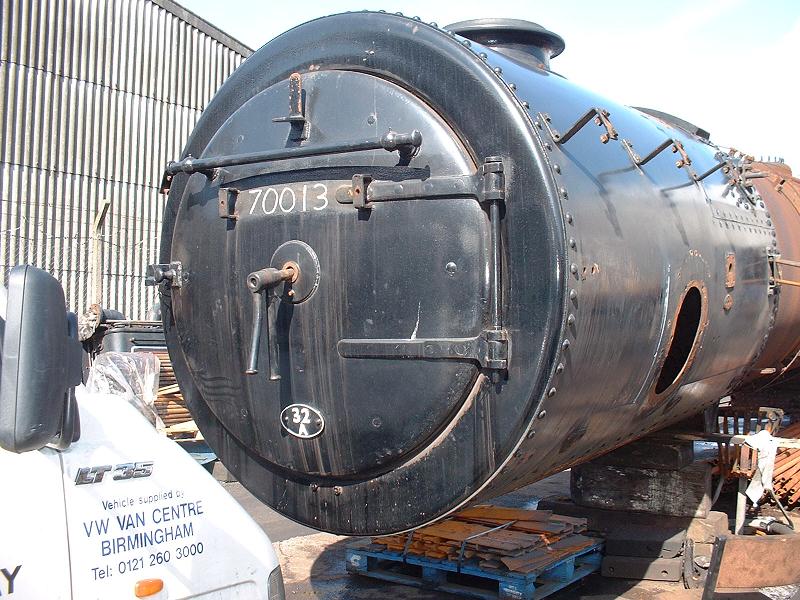
31/5/06 Kit 14 arrived at 8.15 this morning. It consists of the smokebox, smokebox door and fittings, petticoat, blastpipe nozzle, regulator spindle, cylinder steam pipes, oil pipes and check valves, snifter valve, and blower manifold. There are several other parts listed in the instructions but not present - the chimney, regulator cover, dart handles, and regulator bush. I know that other builders have had the same parts missing. Presumably they are castings made by a third party that were not delivered in time to be included in the kit. I'll contact Debbie to see when they will be delivered. The parts that are present are beautifully machined and very substantial - the smokebox is a turned steel tube, 6mm thick. It shouldn't take much time to assemble this kit. However, there is one little inaccuracy, pointed out at the recent owners' day - the two circles of rivet holes at the rear of the smokebox are in line, and should be staggered - see here. The earlier Winson version of the Britannia was correct in this regard. If it hadn't been pointed out I'd probably never have noticed, but now that I know about it, it will annoy me every time I look at it. I'll think about whether to do anything about this, and ask Modelworks whether they are prepared to drill a new set of holes for me. Update 26/8/06: I'm told that the ring of rivets at the front of the smokebox should be much closer to the front edge of the smokebox, as can be seen in the same photo.
 2/6/06
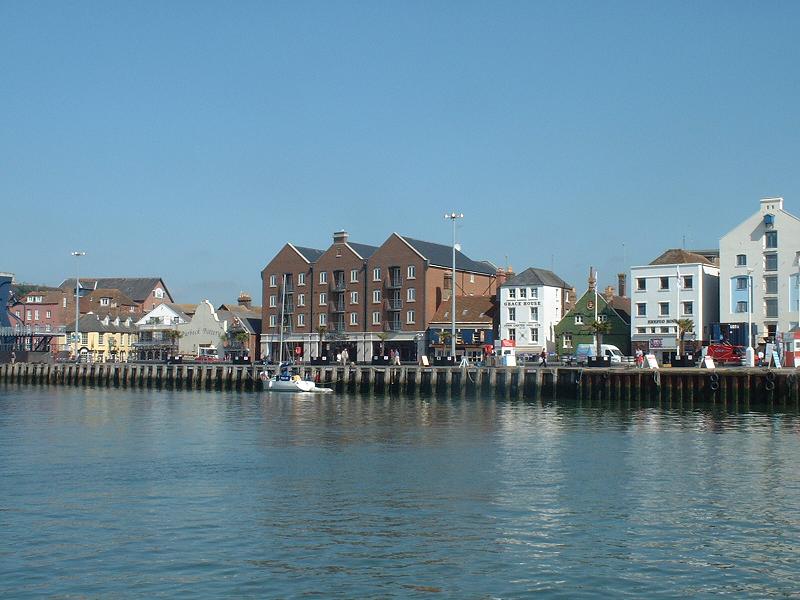
Just back from a couple of days sailing, or rather motoring since there wasn't much wind - we went to Poole harbour - the photo shows the town quay. Debbie emailed me yesterday saying that Modelworks will redrill the smokebox rivet holes, and they are sending a letter out to all builders with the details. They will need the smokeboxes back by the end of June with the incorrect holes filled, and they will schedule the work in batches from then on. This is good news and I will certainly take up the offer, although I guess that builders who have already assembled and painted the smokebox may feel that the modification is not worthwhile for them.
2/6/06
Just back from a couple of days sailing, or rather motoring since there wasn't much wind - we went to Poole harbour - the photo shows the town quay. Debbie emailed me yesterday saying that Modelworks will redrill the smokebox rivet holes, and they are sending a letter out to all builders with the details. They will need the smokeboxes back by the end of June with the incorrect holes filled, and they will schedule the work in batches from then on. This is good news and I will certainly take up the offer, although I guess that builders who have already assembled and painted the smokebox may feel that the modification is not worthwhile for them.
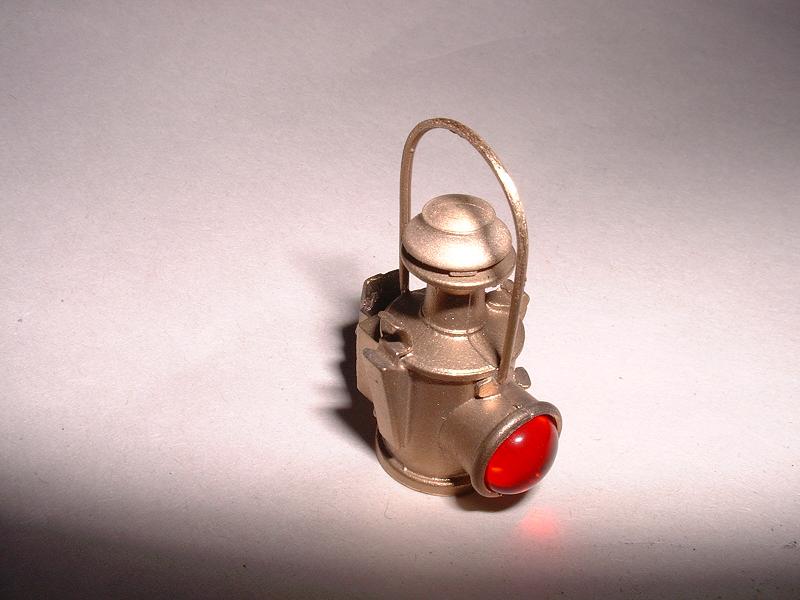
3/6/06 I've done a trial assembly of the smokebox door and fittings. The hinges fit nicely and the door fits into the smokebox ring accurately. Most of the smokebox door is finished to a high standard, but there was a small area near the central boss that was rather rough. I spun the door on a 6mm bolt in the electric drill in order to polish this out with successive grades of wet-and-dry. The lamp iron can be fitted either at the top of the door or on the right-hand side between the hinges - apparently the latter position was adopted by BR after electrification for safety reasons. However, the preserved locomotive reverted to the original top centre position, as seen here, so I shall do the same.
4/6/06 I polished and fitted the smokebox door hinges, handrail and lamp iron. I filed the lamp iron down to 4.5mm wide to fit the lamps that I bought last December. The lamps have a choice of clear or red lenses for the front or rear.
 5/6/06
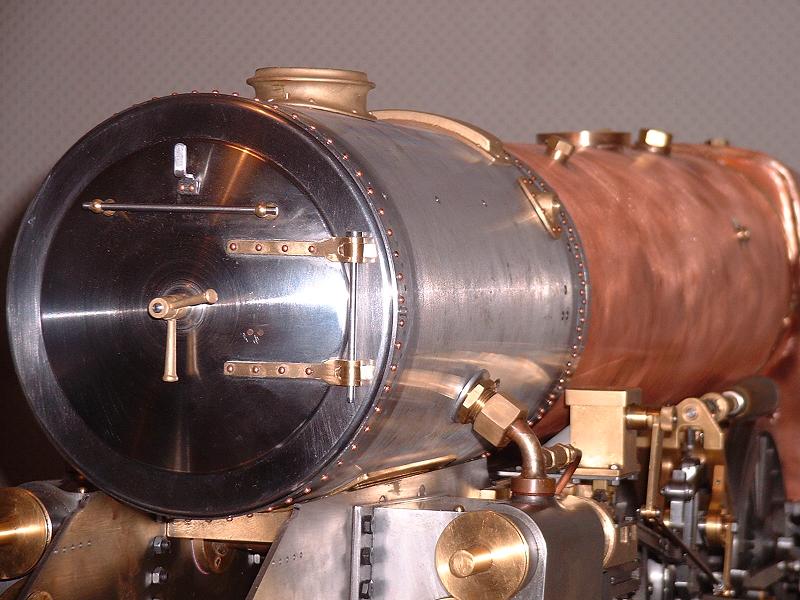
I polished and assembled the smokebox door ring, hinges, dart bars and brackets and fitted the door. The dart slots between the dart bars and turns through 90 degrees to latch. When the handles arrive, the inner one will fit on the square section of the dart to turn it, and the outer one fits on the screw thread to pull the door tight. The smokebox ring is glued into the smokebox and secured with a 3mm pin through each side, although I won't do this until the smokebox rivets have been sorted out. The pin holes on the left-hand side of the picture don't line up, and so I shall have to redrill them.
5/6/06
I polished and assembled the smokebox door ring, hinges, dart bars and brackets and fitted the door. The dart slots between the dart bars and turns through 90 degrees to latch. When the handles arrive, the inner one will fit on the square section of the dart to turn it, and the outer one fits on the screw thread to pull the door tight. The smokebox ring is glued into the smokebox and secured with a 3mm pin through each side, although I won't do this until the smokebox rivets have been sorted out. The pin holes on the left-hand side of the picture don't line up, and so I shall have to redrill them.
6/6/06 I trial fitted the smokebox to the saddle, and fitted the nut and nozzle to the blastpipe. Two thick aluminium washers are supplied for the blastpipe and, although the instructions don't mention this, they need glueing together and filing on the underside to match the curvature of the smokebox in order to give a good seal between the smokebox and the blastpipe nut. I also trial fitted the steam pipes. Each one fits into the threaded hole in the top of the cylinder, with a threaded extension fitting through the hole in the side of the smokebox, secured by nuts and washers inside and out. Again, these thick aluminium washers need filing to match the curvature of the smokebox. The steam pipes do not screw completely into the cylinders because their threads do not extend right up to the shoulders on the pipes, and also they need to be aligned so that the oil pipe connector faces backwards. I think the fitting would look better and be easier to make steamproof if a brass washer was fitted under the shoulder, filed to the correct thickness so that the oil pipe faces backwards when the screw is tight. I've asked Debbie's opinion on this.
7/6/06 I trial fitted the snifter valve into the left-hand side of the smokebox, and the blower manifold into the right-hand side. Contrary to what the instructions say, the body of the snifter valve needs to be bolted through the smokebox before the ball bearing and its retaining piece are fitted. The snifter valve prevents a vacuum forming in the cylinders when the regulator is closed while the engine is running - it admits air into the steam pipe between the regulator and the cylinders, and is closed again by steam pressure. I fitted the oil check valves onto the steam pipes - they are spring-loaded ball valves that prevent the oil being forced back by steam pressure during the return stroke of the lubricator piston. I've bought some JB Weld from Halfords to fill the incorrect rivet holes in the smokebox as recommended by Debbie, although I want to double check which ring of holes she wants filled before doing this.
8/6/06 I carefully eased the top turn of the screw thread in each of the cylinders with a fine file, so that the steam pipes now screw down further and are tight when the oil pipe is facing to the rear. The gap under each boss is now 1mm instead of 2.7mm, and I'll seal this with a metal or fibre washer. Ted tells me that the replacement reverse cranks etc are about to be shipped. I've had quite a few hits on the website in the past couple of days from a German model engineering forum, www.dampfbahner.net - Charles in Frankfurt posted this picture of his Modelworks Britannia. We're going sailing for the next few days, so there'll probably be no more updates until Sunday or Monday.
11/6/06 Just back from the boat after three days pottering around the creeks of the Solent in glorious weather. Debbie has kindly sent me some fibre washers, 19mm x 13mm x 0.5mm thick, and two of these on each steam pipe nicely seal the remaining gap between the cylinder and the pipe boss. There's not much more to do on this kit apart from the smokebox rivets and then the fixing of the smokebox door ring to the smokebox, so I'll continue with the wheel balance weights and some painting for the next week or so before ordering kit 15. Once I get kit 15, which is the ashpan and grate, I'll have caught up with Modelworks' production, and so I won't be able to continue at the rate of two kits per month for the remaining three kits. However, there's a lot of painting to keep me busy, along with testing the motion on air.
12/6/06 Debbie tells me that it's the front ring of rivet holes, nearer the chimney, that needs to be filled in, so I'll start on this. She also told me that the new reverse cranks and eccentric rods are ready to be dispatched - she's just waiting for new bearings to come in, presumably for the benefit of those who glued the bearings into the original eccentric rods. She also told me that the new batch of driving wheel castings has arrived, and is awaiting machining.
13/6/06 I filled some of the rivet holes with JB Weld, and the results look quite good. I also reassembled the painted components of the bogie and pony and etch-primed the fixings. I intend to airbrush a final coat of paint on the more visible parts, such as the bogie wheels and the pony side plates.
 15/6/06
I finished filling the rivet holes and prepared the bogie and pony for their final coat of paint. I bought a little tin of Humbrol no 69 gloss yellow for the axlebox covers, although I think it might turn out to be too bright - maybe the answer is to donate a tin to the Oliver Cromwell restoration team on my next visit in order to get the real locomotive to match my model. I've now joined the North London SME in addition to the St Albans club, and I went along to the Colney Heath track this afternoon and met some of the members.
15/6/06
I finished filling the rivet holes and prepared the bogie and pony for their final coat of paint. I bought a little tin of Humbrol no 69 gloss yellow for the axlebox covers, although I think it might turn out to be too bright - maybe the answer is to donate a tin to the Oliver Cromwell restoration team on my next visit in order to get the real locomotive to match my model. I've now joined the North London SME in addition to the St Albans club, and I went along to the Colney Heath track this afternoon and met some of the members.
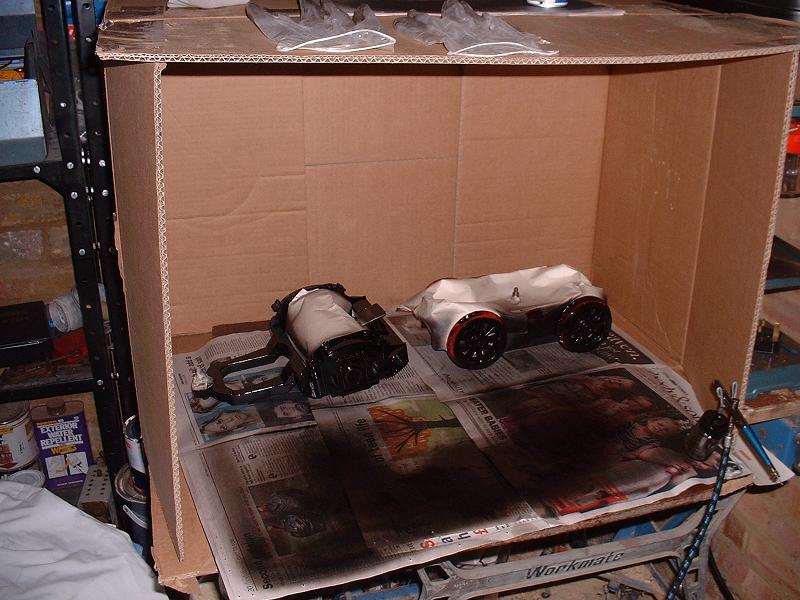
19/6/06 I ordered kit 15, the ashpan and grate, this morning. I also rigged up a spraying booth in the garage, which with the double door wide open on a warm day is a much more satisfactory arrangement than painting in the utility room as I was doing during the winter. The cardboard box is sandwiched between a chipboard base and a batten underneath which is gripped in the Workmate. Note the stand for the airbrush, fashioned from a bent coathanger - this is a great help. I was attempting to put a final coat on the bogie wheels and pony side plates, but it's so long since I did any airbrushing that I got the needle setting wrong and put too much paint on, resulting in a few sags, so I'll have to rub it down and do yet another 'final' coat.
 28/9/06
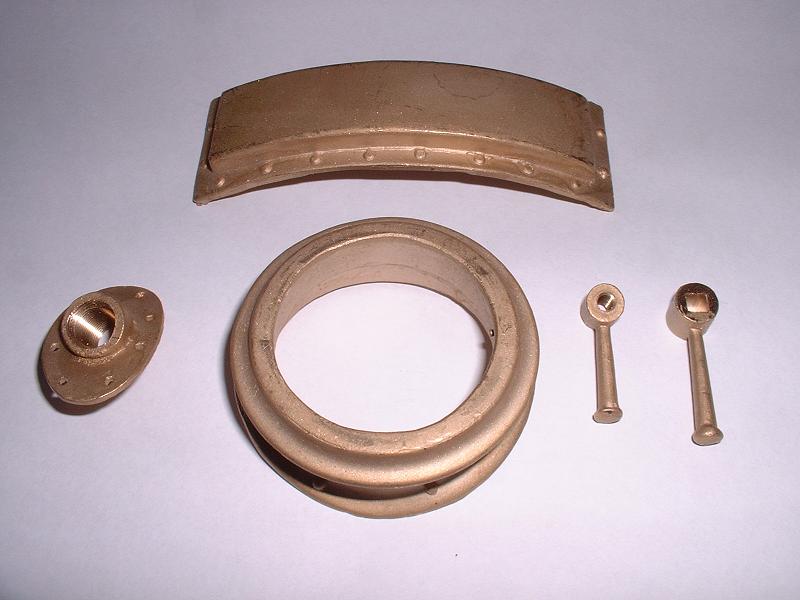
The castings omitted from the initial delivery arrived this morning - the chimney, regulator cover, dart handles, and regulator bush. The casting quality is very good. I think the
inside of the chimney should have been machined to accept the petticoat pipe, and I've emailed Debbie to ask about this.
28/9/06
The castings omitted from the initial delivery arrived this morning - the chimney, regulator cover, dart handles, and regulator bush. The casting quality is very good. I think the
inside of the chimney should have been machined to accept the petticoat pipe, and I've emailed Debbie to ask about this.
9/11/06 I visited Modelworks today to collect my boiler, and Debbie gave me a replacement chimney casting machined to accept the petticoat pipe. There are plenty of these machined chimneys in stock.
7/12/06 I visited Modelworks today to collect my smokebox which has had the rear rivet holes redrilled to a staggered pattern - see 31/5/06 above. Apparently only 6 builders had returned their smokeboxes, and all have now been redrilled.
9/12/06 I've started to trial-fit the castings to the smokebox. The chimney, petticoat pipe and regulator cover fit nicely, and the regulator bush just needs its hole in the side of the smokebox to be filed out a little - it hasn't been drilled to the full depth at the top of the slope. The dart handles work nicely, although the dart spindle might benefit from a pin cross-drilled immediately behind the smokebox door to prevent it pulling right forward when the latch is released from the dart bars. I'm going to try redrilling the rivet holes at the front of the smokebox to be nearer to the edge - see 31/5/06 above. Ian tells me that he has successfully redrilled the staggered holes at the rear of his smokebox by making a jig from a strip of metal with pins to locate in existing holes and a hole to guide the drill, and I'll try something similar for the front holes.
 11/12/06
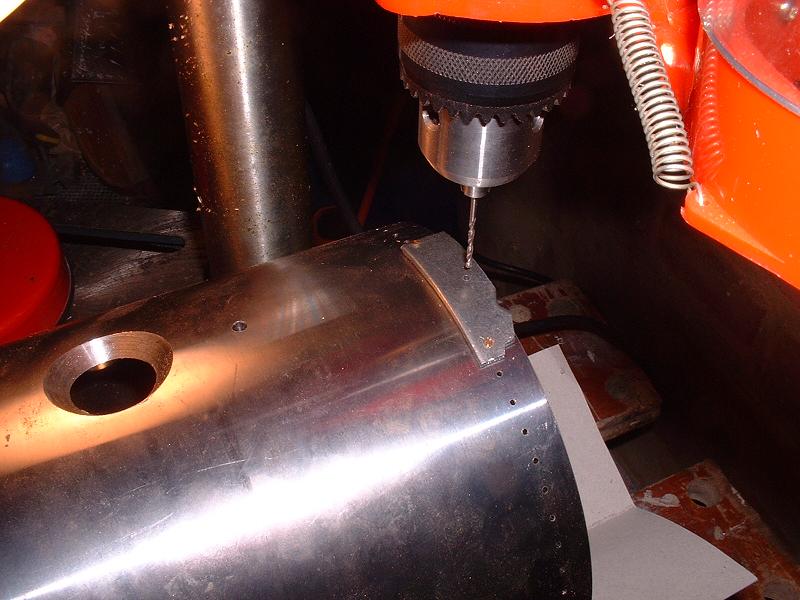
I've made a drilling jig from a strip of steel and started drilling a new ring of rivet holes 4mm from the front edge of the smokebox. I've staggered these holes relative to the existing ones so that they don't clash with the pins on each side that hold the smokebox door ring. The smokebox is supported in the open jaws of a machine vice bolted to the base of the bench drill, and a block of wood at the far end. Once the jig is made, it only takes a couple of minutes to drill each hole. I'll fill the old holes before putting the rivets in. Since the rivets are in the thinner section of the smokebox that holds the door ring, the inside of the holes will need to be countersunk so that the rivets can be hammered and filed flat.
11/12/06
I've made a drilling jig from a strip of steel and started drilling a new ring of rivet holes 4mm from the front edge of the smokebox. I've staggered these holes relative to the existing ones so that they don't clash with the pins on each side that hold the smokebox door ring. The smokebox is supported in the open jaws of a machine vice bolted to the base of the bench drill, and a block of wood at the far end. Once the jig is made, it only takes a couple of minutes to drill each hole. I'll fill the old holes before putting the rivets in. Since the rivets are in the thinner section of the smokebox that holds the door ring, the inside of the holes will need to be countersunk so that the rivets can be hammered and filed flat.
12/12/06 I've drilled all the new rivet holes at the front of the smokebox and filled the old ones with JB Weld, slightly countersinking the old holes inside and out to give the filler a better grip, and pressing the filler through from the inside to reduce the amount of cleaning up needed on the outside.
 14/12/06
I've put all the rivets into the new holes, hammering them down into the countersinks and filing them flat so that the smokebox door ring still fits. I've also glued a small brass collar onto the dart spindle close to the rear of the door, so that the spindle only pulls forward a couple of mm when the door is opened.
14/12/06
I've put all the rivets into the new holes, hammering them down into the countersinks and filing them flat so that the smokebox door ring still fits. I've also glued a small brass collar onto the dart spindle close to the rear of the door, so that the spindle only pulls forward a couple of mm when the door is opened.
16/12/06 I fitted the rivets around the rear of the smokebox, using Loctite since they were hardly long enough to rivet properly, and then made a trial fit of the smokebox to the boiler and frames including the steam pipes and superheater. It's quite tricky to get everything lined up, but it did eventually all go together nicely as shown in this photograph. I won't fix the smokebox door ring permanently until I have the final kit and can check that the regulator fits correctly.
19/12/06 I noticed that the smokebox was slightly skewed, and so I filed the saddle and slightly enlarged the bolt holes in the smokebox to correct this. I also plugged and redrilled the left-hand locating hole in the door ring, to correct the misalignment mentioned on 5/6/06 above.
 14/6/07
Stephen contacted me to suggest that I check the alignment of the blastpipe under the chimney, since his friend's Modelworks 9F had a problem with this. I'm pleased to say that it looks spot on. The 9F is presumably more complicated, since it has a double chimney. He also suggested checking the cone angle of the exhaust from the blastpipe up into the petticoat pipe and chimney. This is done by making a triangle of card with the end the diameter of the chimney and the length three times that diameter. If the point is placed in the blastpipe orifice, the top should then be somewhere within the petticoat pipe or chimney. I did this, and the cone comes just nicely up to the top of the belled section of the petticoat pipe.
14/6/07
Stephen contacted me to suggest that I check the alignment of the blastpipe under the chimney, since his friend's Modelworks 9F had a problem with this. I'm pleased to say that it looks spot on. The 9F is presumably more complicated, since it has a double chimney. He also suggested checking the cone angle of the exhaust from the blastpipe up into the petticoat pipe and chimney. This is done by making a triangle of card with the end the diameter of the chimney and the length three times that diameter. If the point is placed in the blastpipe orifice, the top should then be somewhere within the petticoat pipe or chimney. I did this, and the cone comes just nicely up to the top of the belled section of the petticoat pipe.
22/6/07 I've fixed the chimney casting to the smokebox. The two M3 threaded holes in the casting break through the top of the flange, and I've come to the conclusion that soft soldering is a much better way of filling such holes than filler paste - it's quicker, and it seems to file and sand down to a flatter finish (if I hadn't already put several coats of paint on the tender, I would definitely now use solder to fill the countersunk screws in the tender body). So instead of securing the chimney with bolts from inside the smokebox, I fitted M3 brass studs into the casting and soldered over their tops, and secured them with nuts inside the smokebox. I had to open out one of the screw holes in the smokebox slightly to get the chimney aligned exactly over the hole in the smokebox and allow the petticoat pipe to be inserted. It is a tight push fit and I don't intend to glue it in place, since I think it may need to be removed from time to time to facilitate access to the steam pipes.
| Next Kit | Previous Kit | Index |