 18/1/06
I ordered kit 6 today.
18/1/06
I ordered kit 6 today.
18/1/06
I ordered kit 6 today.
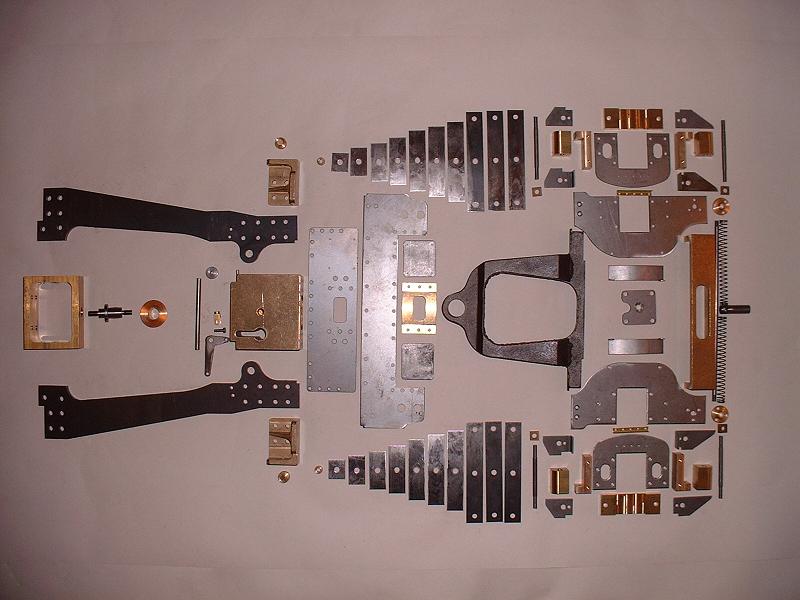
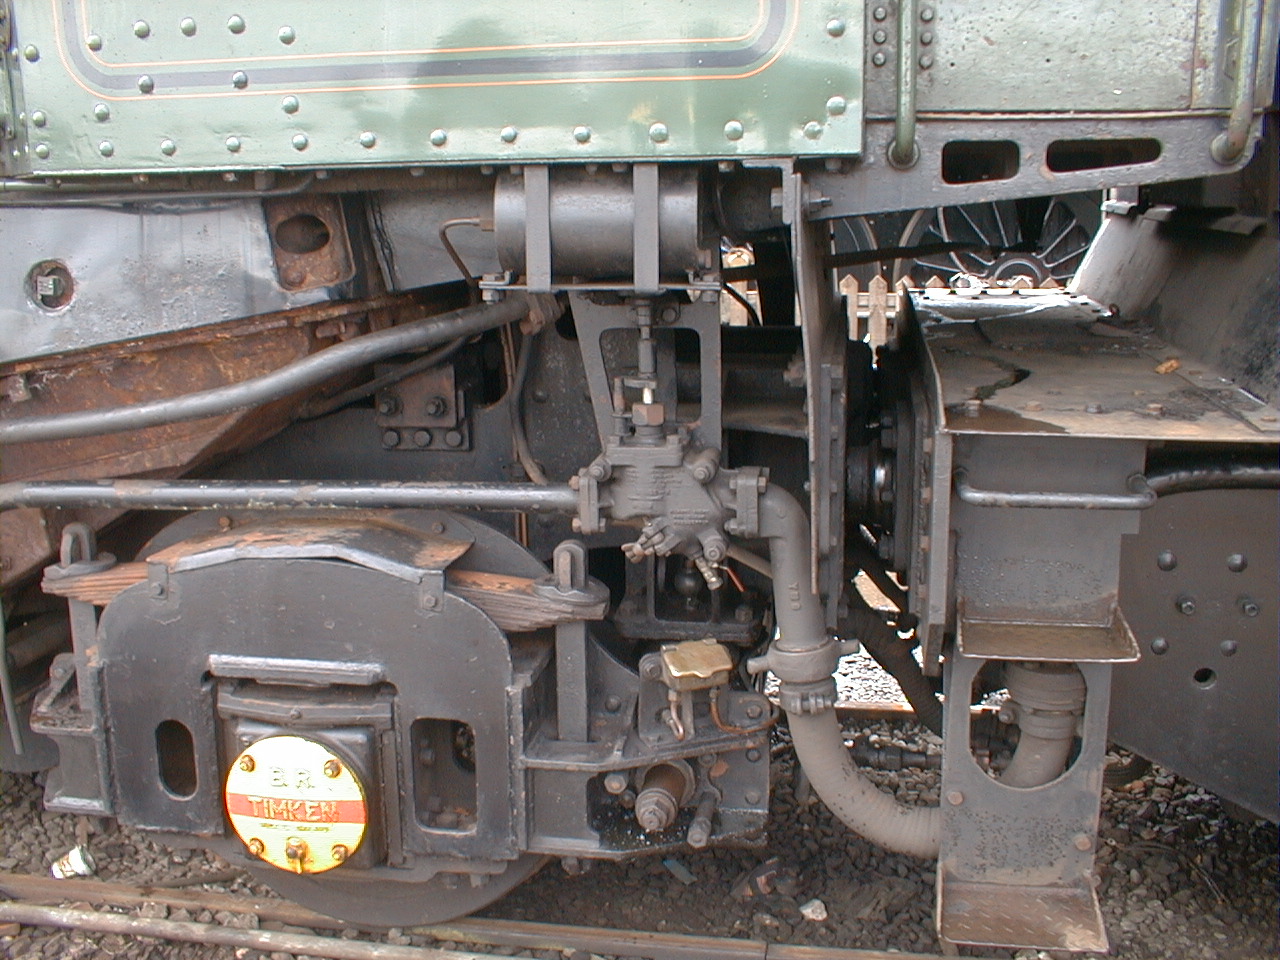
19/1/06 Kit 6 arrived at 8 o'clock this morning. It consists of the rear frame extensions, the drag frame and rear beam, and the pony truck assembly with its horn plates and springs. The pony truck pivots under the frames, with springs to control its sideways movement. This photograph shows the rear frame extensions on the left, the drag frame and rear beam in the centre, and the pony truck assembly on the right with the spring leaves above and below. All the parts seem present and correct as usual, and the kit should not take too much time to assemble. I'll bolt it together loosely first, and then dismantle it to clean the parts up properly.
22/1/06 I have now draw-filed, polished and assembled the rear frame extensions, the pony stretcher between the front of these frames, and the drag frame and pressure brackets at their rear end. The drag frame contains the operating crank and forks for the cylinder cock; there was a minor problem here in that the pivot pin holding the forks to the top arm of the crank was too long to fit in the opening in the drag frame, and shortening it would remove the hole for the split pin near its end. I concluded that the split pin is superfluous since the pivot pin cannot slide out of the forks once it is inside the opening in the drag frame, so I shortened it to fit the opening and dispensed with the split pin.
 23/1/06
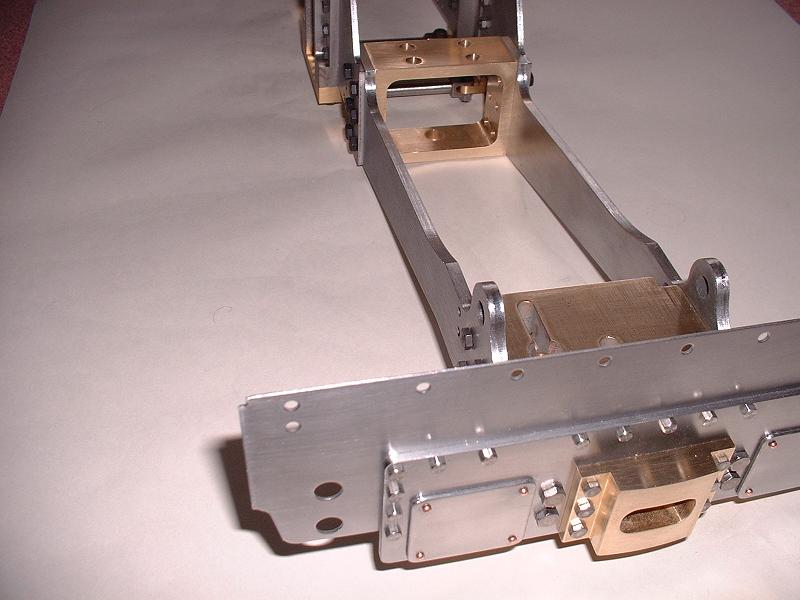
I rivetted the beam pads to the rear beam and bolted on the larger beam plate - I used small-headed 6BA bolts rather than the screws provided, and bolted the large plate to the front rather than the rear surface of the rear beam - this picture of Britannia shows both these detailed points. Update 17/9/07: I've had to move it back to the rear surface, to get the cab positioned correctly. I then bolted the rear beam and the coupling block to the rear of the drag frame, thus completing this fixed part of the rear end. I loosely assembled the pony truck, and will now dismantle it and file and polish the parts before final assembly.
23/1/06
I rivetted the beam pads to the rear beam and bolted on the larger beam plate - I used small-headed 6BA bolts rather than the screws provided, and bolted the large plate to the front rather than the rear surface of the rear beam - this picture of Britannia shows both these detailed points. Update 17/9/07: I've had to move it back to the rear surface, to get the cab positioned correctly. I then bolted the rear beam and the coupling block to the rear of the drag frame, thus completing this fixed part of the rear end. I loosely assembled the pony truck, and will now dismantle it and file and polish the parts before final assembly.
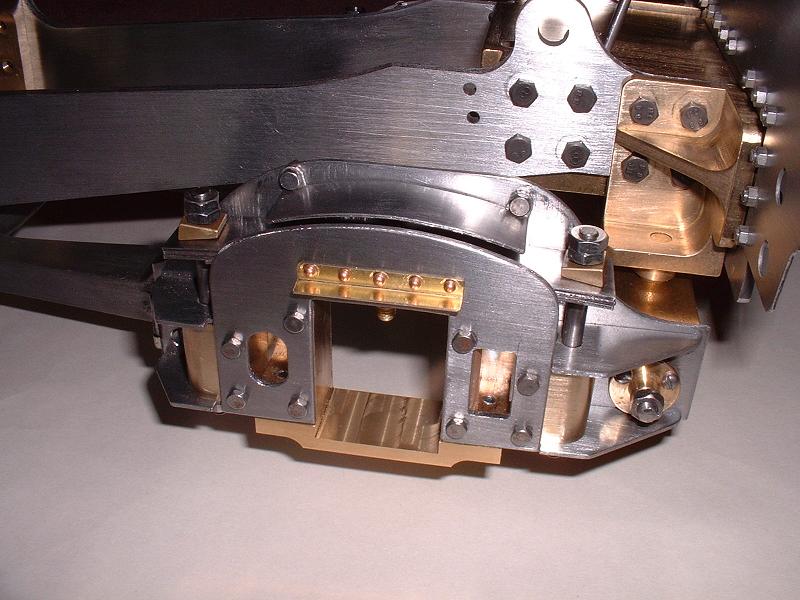
25/1/06 I have now filed, polished and assembled most of the pony truck, apart from the springs. Harry has pointed out that the outer horn plate should have a larger, more rectangular cutout to the rear of the axlebox - the kit has the same oval cutouts front and rear. This picture of Britannia shows the cutouts, and Harry has sent me a photo of Oliver Cromwell showing the same. Some later locos, eg 70038 Robin Hood, have the larger cutouts both front and rear. I have opened out the rear cutouts accordingly, and I have also filed the outer edges of the horn blocks to prevent them protruding into the cutouts. Update 26/8/06: Brian, who owns a Winson Britannia, tells me that the inner horn plates should also have cutouts, all four being the same size as the smaller front cutouts, and my photos of 70013 confirm this. I won't change my pony truck at this stage since I've finished painting it, but the point may be helpful to other builders.
 26/1/06
I assembled and fitted the springs and the spring guards, and attached the pony truck to the pony stretcher and drag frame, thus completing kit 6. However, I'd like to improve the spring supports - the large locknuts look rather unsightly, and the real locomotive has rectangular section bars with a pin through the top and bottom as shown here (the same picture as yesterday's). I'll probably use 3/16" square steel bar with 2mm pins, but I'll wait until I have the axle boxes in a later kit to check the required height. I'll now do a few more improvements to the tender, which I'll describe under kit 4, and I'll probably order kit 7, the front bogie, sometime next week.
26/1/06
I assembled and fitted the springs and the spring guards, and attached the pony truck to the pony stretcher and drag frame, thus completing kit 6. However, I'd like to improve the spring supports - the large locknuts look rather unsightly, and the real locomotive has rectangular section bars with a pin through the top and bottom as shown here (the same picture as yesterday's). I'll probably use 3/16" square steel bar with 2mm pins, but I'll wait until I have the axle boxes in a later kit to check the required height. I'll now do a few more improvements to the tender, which I'll describe under kit 4, and I'll probably order kit 7, the front bogie, sometime next week.
29/1/06 I've just been contacted by a new family of Britannia builders who have taken all 12 of the existing kits up front - Nichola and Nathan and their Dad, with Mum promising to start a website as soon as she gets her dining room table back, so welcome to them and I hope they get as much enjoyment from the build as I do.
31/1/06 I've bought some 3/16" square steel bar and some taper pins (tapering from 2.4 to 2.0mm) which I shall use to replace the spring supports. I'll do this next, since I can set the springs to the correct scale height and then later set the ride height by adjusting the collar under the springs.
 2/2/06
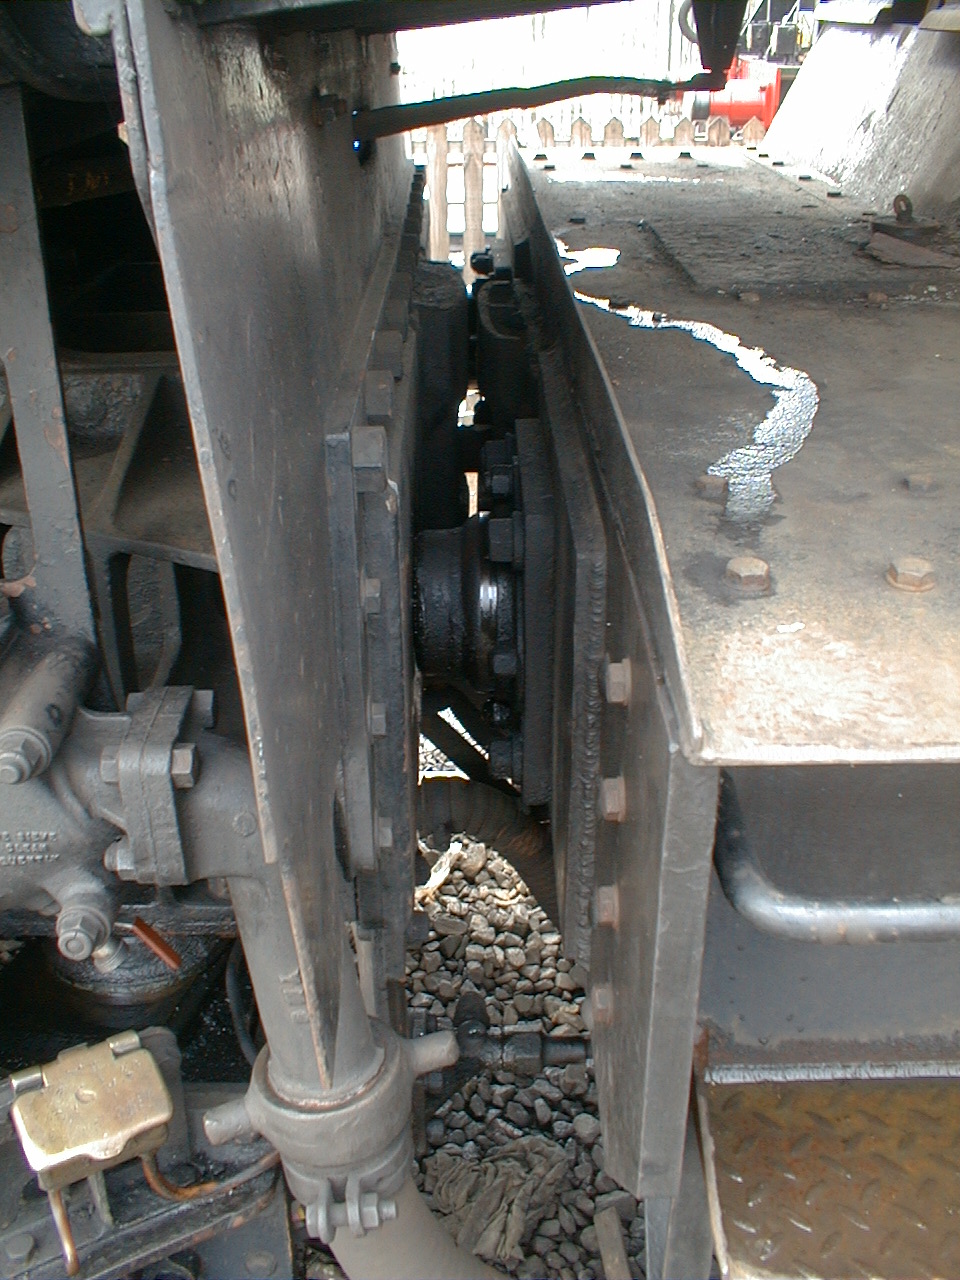
I ordered kit 7 this morning. I also started on the modification to the spring struts - I drilled one of the brass anchor blocks out to 6mm to take the 3/16" square steel bar, squared out the holes in the upper and lower anchor plates and the springs to fit, and adapted the brass wedge to support the pin. This photograph shows the new strut on the left and an old one on the right. I will drill the bottom pin and adapt the other three struts later.
2/2/06
I ordered kit 7 this morning. I also started on the modification to the spring struts - I drilled one of the brass anchor blocks out to 6mm to take the 3/16" square steel bar, squared out the holes in the upper and lower anchor plates and the springs to fit, and adapted the brass wedge to support the pin. This photograph shows the new strut on the left and an old one on the right. I will drill the bottom pin and adapt the other three struts later.
8/2/06 I have now modified the other three spring struts, apart from fitting the bottom pins which I'll do when I get the axleboxes in kit 9 and can check the ride height.
10/3/06 I fitted the bottom pins, setting the axleboxes just below the midpoint of their travel when not loaded.
| Next Kit | Previous Kit | Index |