Finishing - Detailing, Painting and Lining
27/8/08
I'm starting this new section to cover the final detailing, painting and lining of the engine and tender. I've already painted the tender, apart from a final coat on the green parts, and I've painted the bogie and pony. I've also already added a lot of detailing, particularly to the tender, cab and front end, described under Kit 4 and Kits 18a, b and c. The next step is to remove and paint the cab, running boards and smoke deflectors, since these are easy to remove and replace and are particularly susceptible to rust since they are made of steel rather than Zintec. I'll dismantle fully to paint everything else later. The cab has some superfluous holes to be filled and dummy rivets to be added around the sides, and it needs a false floor with wooden planks and chequerplate. The running boards need some holes filling and the nameplates need to be added to the smoke deflectors. An AWS battery box needs to be fabricated and fitted to the right hand running board, but I'll probably leave this until later.
 30/8/08
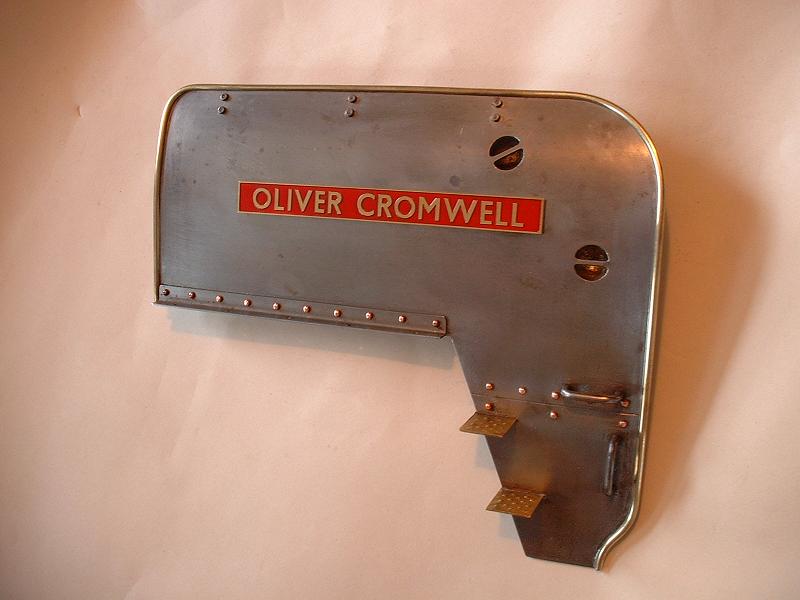
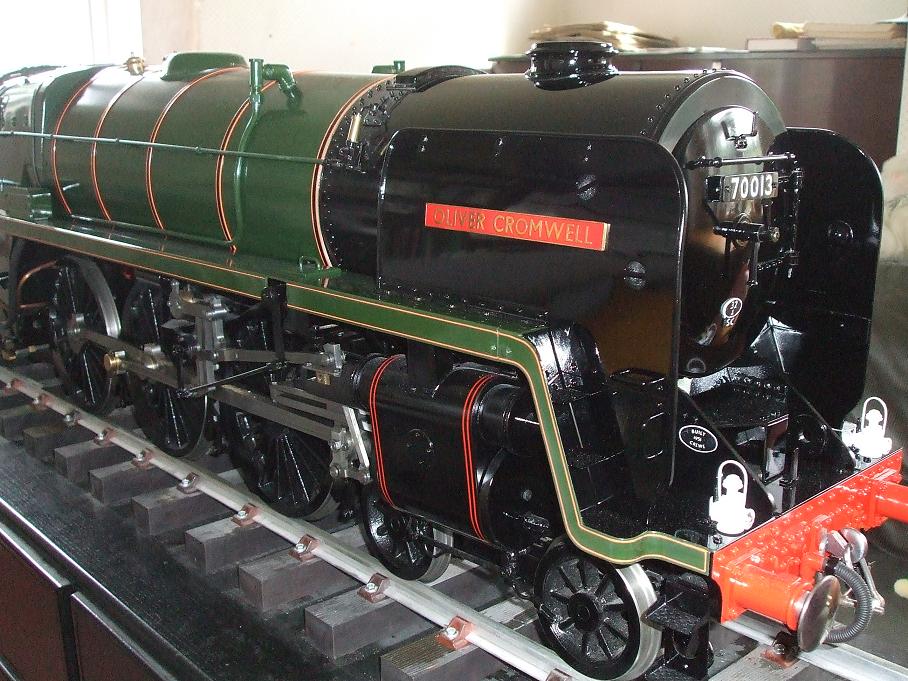
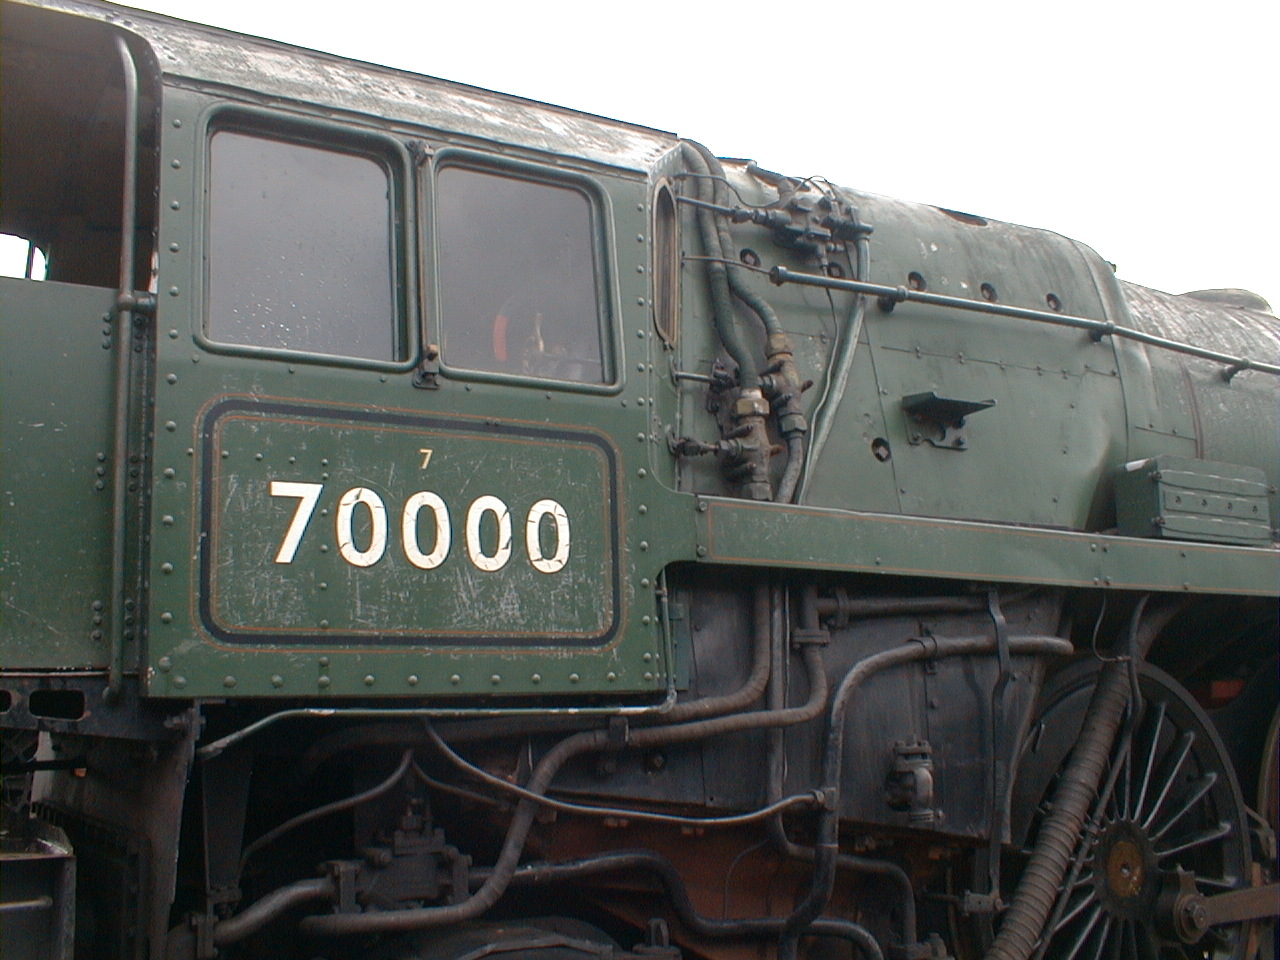
I've removed the right hand smoke deflector and cleaned it up with steel wool, and filled the superfluous hole for the whistle which I mounted out of sight under the running board. The 'Oliver Cromwell' name plates are quite thin and flexible and I didn't want to glue them permanently to the smoke deflectors, nor could I fix them with tiny bolts in the corners since the smoke deflector is slightly curved at the appropriate height midway between the running board and the top of the deflector. I therefore cut a length of 1/2"x1/16" brass strip and fixed this to the smoke deflector with three countersunk 10BA screws and nuts along the centreline, soldering the heads of the screws to lock them, and glued the nameplate on top with Loctite. The thicker plate looks more realistic and will not flex, and can be removed to paint the smoke deflector. It's slightly annoying to see that 70013 has been restored with black nameplates, even though they were red when it arrived in Loughborough from Bressingham. I know that some but not all of the Britannias had red nameplates in service, before they were removed in the final years of steam to outwit the trophy hunters. Incidentally the red paint looks a lot better than in this photograph - reducing the resolution of the digital photo seems to introduce a spurious mottled effect.
30/8/08
I've removed the right hand smoke deflector and cleaned it up with steel wool, and filled the superfluous hole for the whistle which I mounted out of sight under the running board. The 'Oliver Cromwell' name plates are quite thin and flexible and I didn't want to glue them permanently to the smoke deflectors, nor could I fix them with tiny bolts in the corners since the smoke deflector is slightly curved at the appropriate height midway between the running board and the top of the deflector. I therefore cut a length of 1/2"x1/16" brass strip and fixed this to the smoke deflector with three countersunk 10BA screws and nuts along the centreline, soldering the heads of the screws to lock them, and glued the nameplate on top with Loctite. The thicker plate looks more realistic and will not flex, and can be removed to paint the smoke deflector. It's slightly annoying to see that 70013 has been restored with black nameplates, even though they were red when it arrived in Loughborough from Bressingham. I know that some but not all of the Britannias had red nameplates in service, before they were removed in the final years of steam to outwit the trophy hunters. Incidentally the red paint looks a lot better than in this photograph - reducing the resolution of the digital photo seems to introduce a spurious mottled effect.
3/9/08
Mike M has kindly sent me the following background on the nameplate colours: "When the original batches of Britannias were introduced in 1951 and 1952,
the newly-formed BR decreed that all nameplates for Brunswick Green
locomotives would have a red background. This policy was officially changed
around 1953-54, with a decision to have black backgrounds to all nameplates,
and the last batch of Brits started with black plates as they were named.
As locomotives became due for works visits, various workshops eventually
went their own way with nameplate colours, with some reverting to red plates
and one or two Britannias even running for a while with blue or emerald green
coloured plates. The nameplates were gradually removed from around 1965
onwards to avoid theft by 'trophy hunters' but several locomotives later
appeared with their names painted onto the smoke deflectors or with
temporary 'hand made' wooden and even plastic plates.
Indeed, pictures from 1968 show Oliver Cromwell running with red nameplates
on August 4th 1968, yet it ran a week later with black coloured plates on
the August 11th last steam special.
I think the red plates were a set of very good facsimiles presented to the
loco by one of the railway societies, the black set a week later being the
loco's original plates, but I'm not entirely sure if this was the reason." So it may be that the original black plates have been in safe keeping all the time that the loco was at Bressingham, and have only now been restored. Anyway, I shall stick with the red plates, since they look prettier.
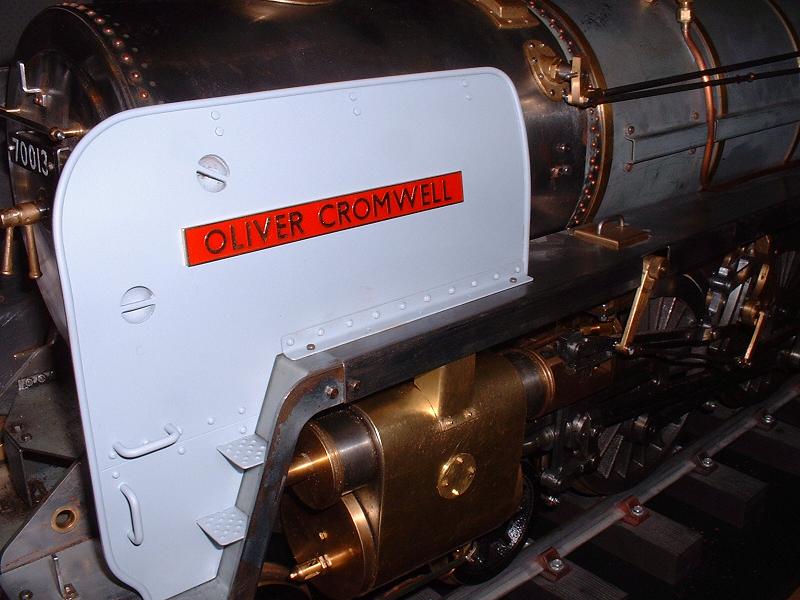
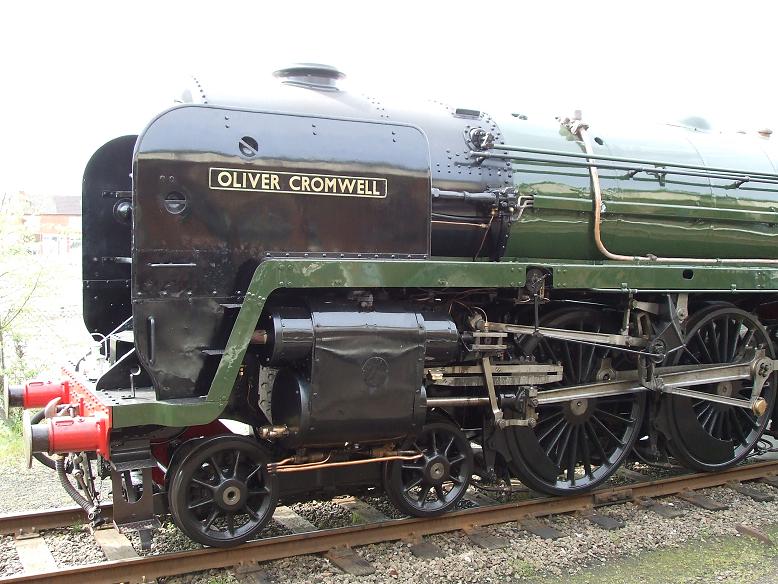
I've started to clean up the running boards, which were pitted with rust - I've learnt the hard way that flux can cause quite bad corrosion if not cleaned off properly after soldering. I intend to paint the tops of the running boards green rather than black, even though they are black on most models that I've seen - they are green on the restored 70013, as shown in this photo, and it avoids the challenge of getting a straight edge along the turn of the flange.
12/9/08
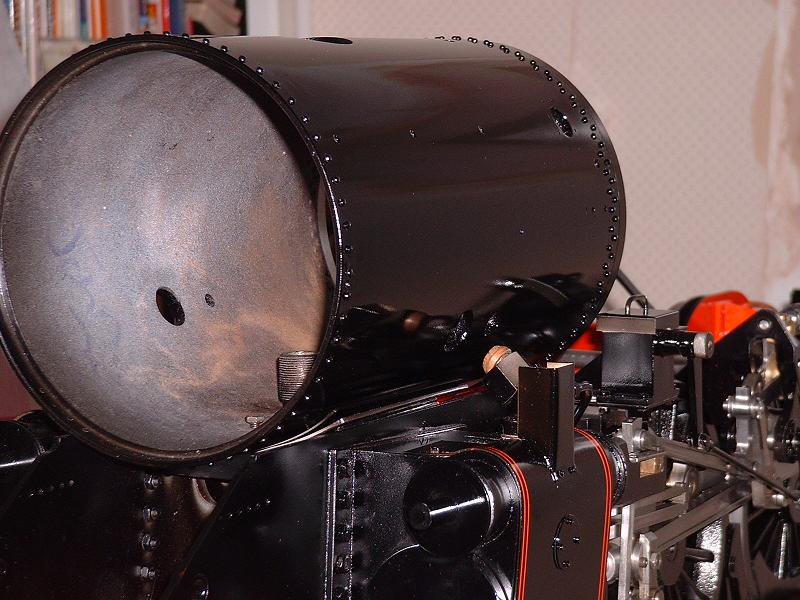
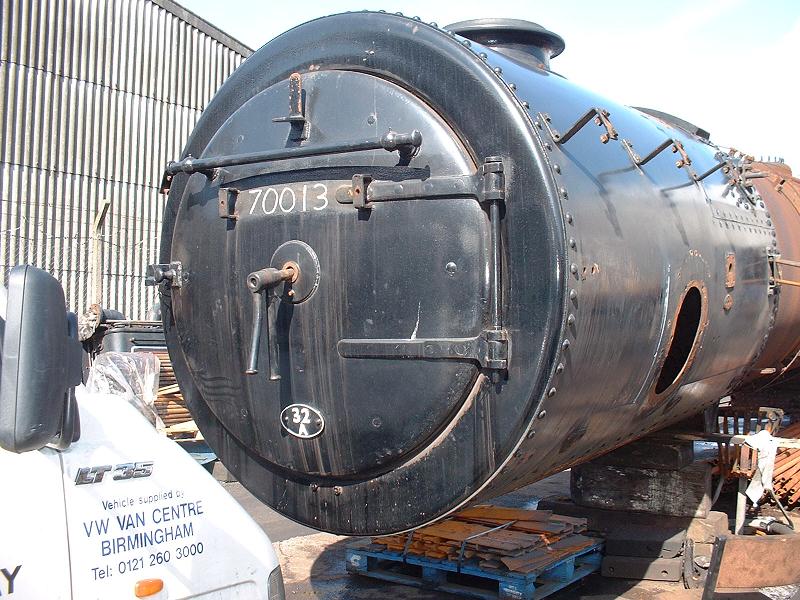
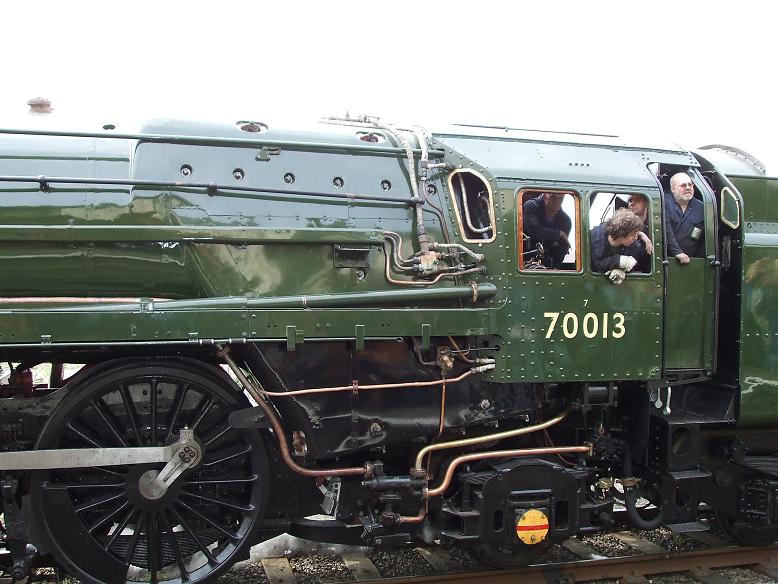
I've been busy with other things for the past fortnight, so I haven't made much progress - I'm still cleaning up the running boards and the other smoke deflector. The next step is to remove the smokebox door and ring and clean them up and fit the number plate. I haven't fixed the smokebox ring permanently into the smokebox tube with Loctite and pins as per the instructions, and I think I'll just fix it with grub screws so that I can remove it in the future for better access to the smokebox pipework. No brackets have been supplied to mount the number plate on the smokebox, so I'll need to make these - I'll probably make a U-shaped bracket for each end and silver solder 8BA bolts on the legs to pass through holes drilled in the smokebox door. This photo shows the brackets on the (unrestored) prototype. I might also make the support bracket on the left hand side of the door.
 21/9/08
I've fitted the number plate as shown in the photo. I made up brackets from 1mm steel strip bent and filed to match the profile of the door, but I couldn't solder 8BA bolts to the legs of the brackets because the door was too thick for standard 1/2" bolts, so I just fitted 10BA bolts through the plate and brackets and into holes tapped in the door. The 1.4mm tapping drill snapped off in the left hand hole, which could have been disastrous, but fortunately there was just enough depth above the broken end to allow me to tap a few turns after grinding off the pointed end of the tap.
21/9/08
I've fitted the number plate as shown in the photo. I made up brackets from 1mm steel strip bent and filed to match the profile of the door, but I couldn't solder 8BA bolts to the legs of the brackets because the door was too thick for standard 1/2" bolts, so I just fitted 10BA bolts through the plate and brackets and into holes tapped in the door. The 1.4mm tapping drill snapped off in the left hand hole, which could have been disastrous, but fortunately there was just enough depth above the broken end to allow me to tap a few turns after grinding off the pointed end of the tap.
13/10/08
I haven't made much progress recently because I've been busy with other things, and we'll be away on holiday for a week from Wednesday, but I'll soon be ready to start painting some parts. It's now probably too cold to spray the gloss outdoors, so I'll leave that until the spring, but I'm thinking of etch-priming everything with spray cans of U-Pol from Halfords, which I'm told is very good. I'll probably then apply undercoat from a spray can, if I can find one that's compatible with U-Pol and with Precision Paint's enamel. I'm also planning to buy a Kite half-size spray gun to paint the large areas because I found it difficult to get a band-free finish on the tender using the airbrush. I need to decide which nozzle size to get - 0.5, 0.8 or 1mm - and I'd appreciate advice on this, and on the choice of undercoat.
27/10/08
We're back from a week in the sunshine, just in time for the first frosts of the winter. I've ordered the Kite spray gun with a 0.5mm nozzle from Toolbay Direct, along with a 33' hose and a water filter. I chose the 0.5mm nozzle because John B said that it gave a fan spray wide enough to paint the frames of his 3.5" Britannia in a single pass, and I'm concerned that my small compressor might not drive a bigger spray. The compressor will probably run for much of the time but with a 33' hose I can put it far enough away to minimise the distraction. John pointed me to this supplier - they are quite a bit cheaper than Precision Paints for the identical product, and do online ordering.
12/11/08
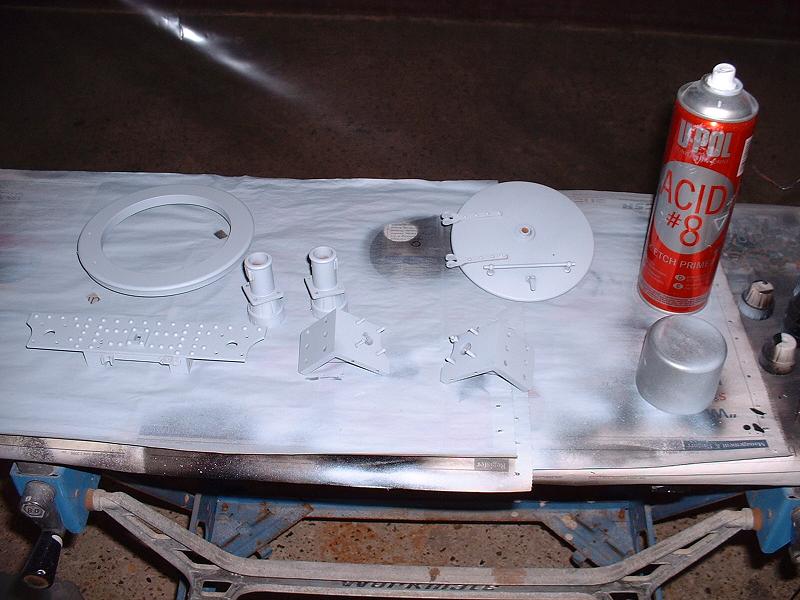
The Kite spray gun arrived the day after I ordered it, and it looks very nice. I've bought a spray can of U-Pol #8 acid etch primer from Halfords and sprayed one of the smoke deflectors this morning to see how well it works. I applied two coats at 5 minute intervals, as per the instructions, and it gives a solid grey finish, much denser than the 2-part etch primer from Precision Paints. I'll now leave it for a day and see how well it has stuck to the steel and brass before trying out the new spray gun with the Precision black enamel - I won't bother with undercoat since the U-Pol instructions say that it can be covered directly with the finishing paint. I also bought a proper respirator mask from Halfords, which seems much more effective than the disposable paper masks that I've been using so far - I can't even smell the cellulose thinners through it.
17/11/08
The U-Pol has stuck well to the smoke deflector - it resists being scratched off by fingernail - and so I proceeded to spray the back of the smoke deflector with black gloss using my new Kite spray gun. I'm going to need more practice with the spray gun to get a good finish, but the gloss has stuck well, so I'll continue using the U-Pol to prime further parts. Ted tells me that he's used U-Pol in combination with Precision gloss on some parts of his engine, and Chris Vine tells me that he's successfully used U-Pol with Precision undercoat and gloss on some small parts of 'Bongo', although he mainly used Trimite SAP3 2-part etch primer. I'm going to make a spray tent about 6' square in the garage from PVC sheeting and wooden battens - the little PVC greenhouse that I bought last year is not really big enough. When I've primed the running boards I'll start on the cab, which still needs the rivets fitting to the sides.
 1/12/08
I started making the new spraying booth today - progress has been slow because I'm also busy decorating our new extension. I made a 6' square frame for the top, with a central batten suspended by hooks from the garage door opener track, and four 6'6" vertical wooden battens for the corners, each with a sawn-off screw in the top registering in a hole in the corner of the top frame. Tomorrow I plan to staple PVC sheeting over the top and a separate piece around the four walls, so that the walls can be rolled away and the top can be stored flat against the garage wall when not in use. The cheap PVC dust sheets that I've bought from the DIY shop (about �5 for 3 12'x9' sheets) look rather flimsy, but we'll see how they last.
1/12/08
I started making the new spraying booth today - progress has been slow because I'm also busy decorating our new extension. I made a 6' square frame for the top, with a central batten suspended by hooks from the garage door opener track, and four 6'6" vertical wooden battens for the corners, each with a sawn-off screw in the top registering in a hole in the corner of the top frame. Tomorrow I plan to staple PVC sheeting over the top and a separate piece around the four walls, so that the walls can be rolled away and the top can be stored flat against the garage wall when not in use. The cheap PVC dust sheets that I've bought from the DIY shop (about �5 for 3 12'x9' sheets) look rather flimsy, but we'll see how they last.
15/12/08
The dust sheets turned out to be far too fragile, so I bought some thicker PVC sheeting on eBay and finished the spraying booth as shown in the photo. It can be assembled and dismantled in a matter of minutes. I've also brought the engine back into the study - it had been languishing in the garage since the last steaming - as I want to recheck the fit of the running boards before painting them.
26/12/08
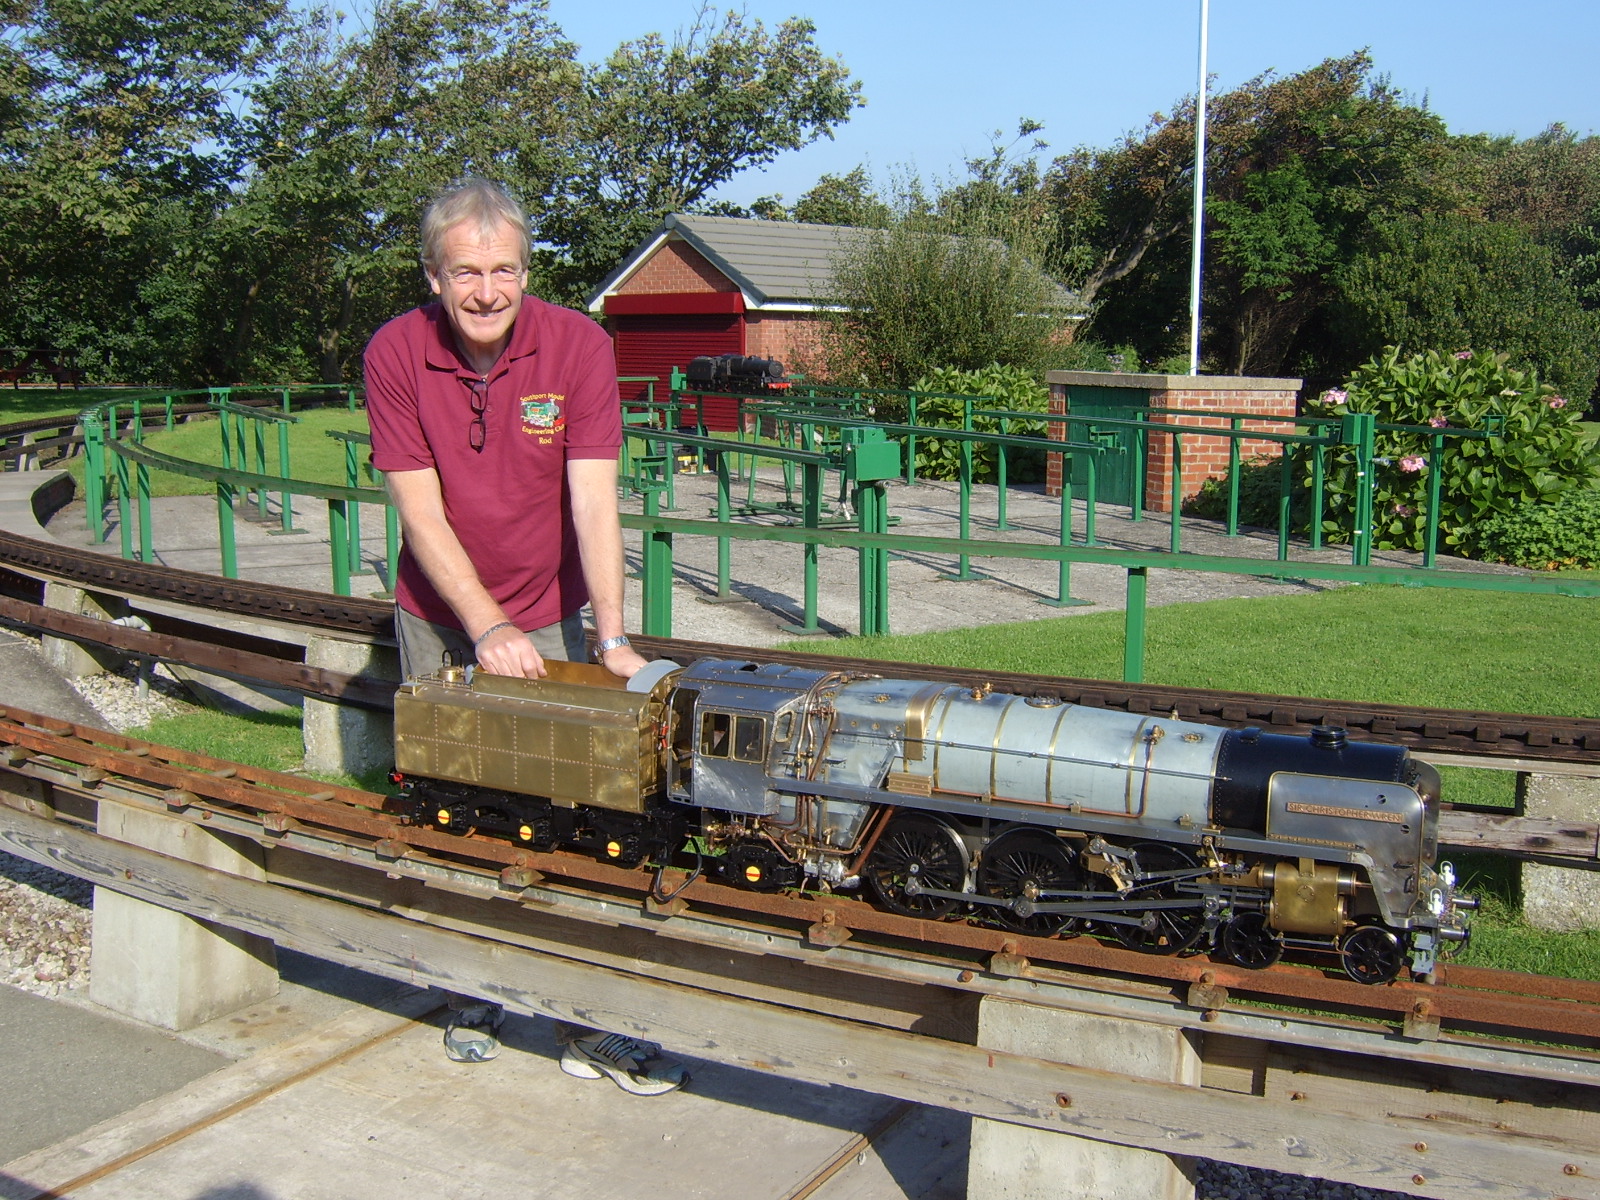
I've refitted the running boards and smoke deflectors and made final adjustments ready for painting. I've decided not to fit the correct scale bolts on the edges of the running boards since it would be difficult to apply the orange lining over the bolts - see this picture of 70013 before the lining was applied. I'll just keep the single small-headed M3 bolts centrally positioned between the orange lines at the front and rear joints. I also intend to make covers for the steam pipes, running upwards from the cylinders to the underside of the running boards, and fit circular inspection covers to the cylinder cladding. These extra details are both shown in this picture of Rod's Britannia. I'll fit the brass cylinder cladding supplied by Modelworks to simplify the attachment of these pieces - I'd originally planned not to fit the cladding, since I'd spent so much time polishing the cast iron cylinders. I'll attach the steam pipe covers just to the cylinder cladding, so I don't need to make these before painting the running boards. Interestingly the covers have been left off the restored 70013, and I've seen photos of other Britannias without them.
 5/1/09
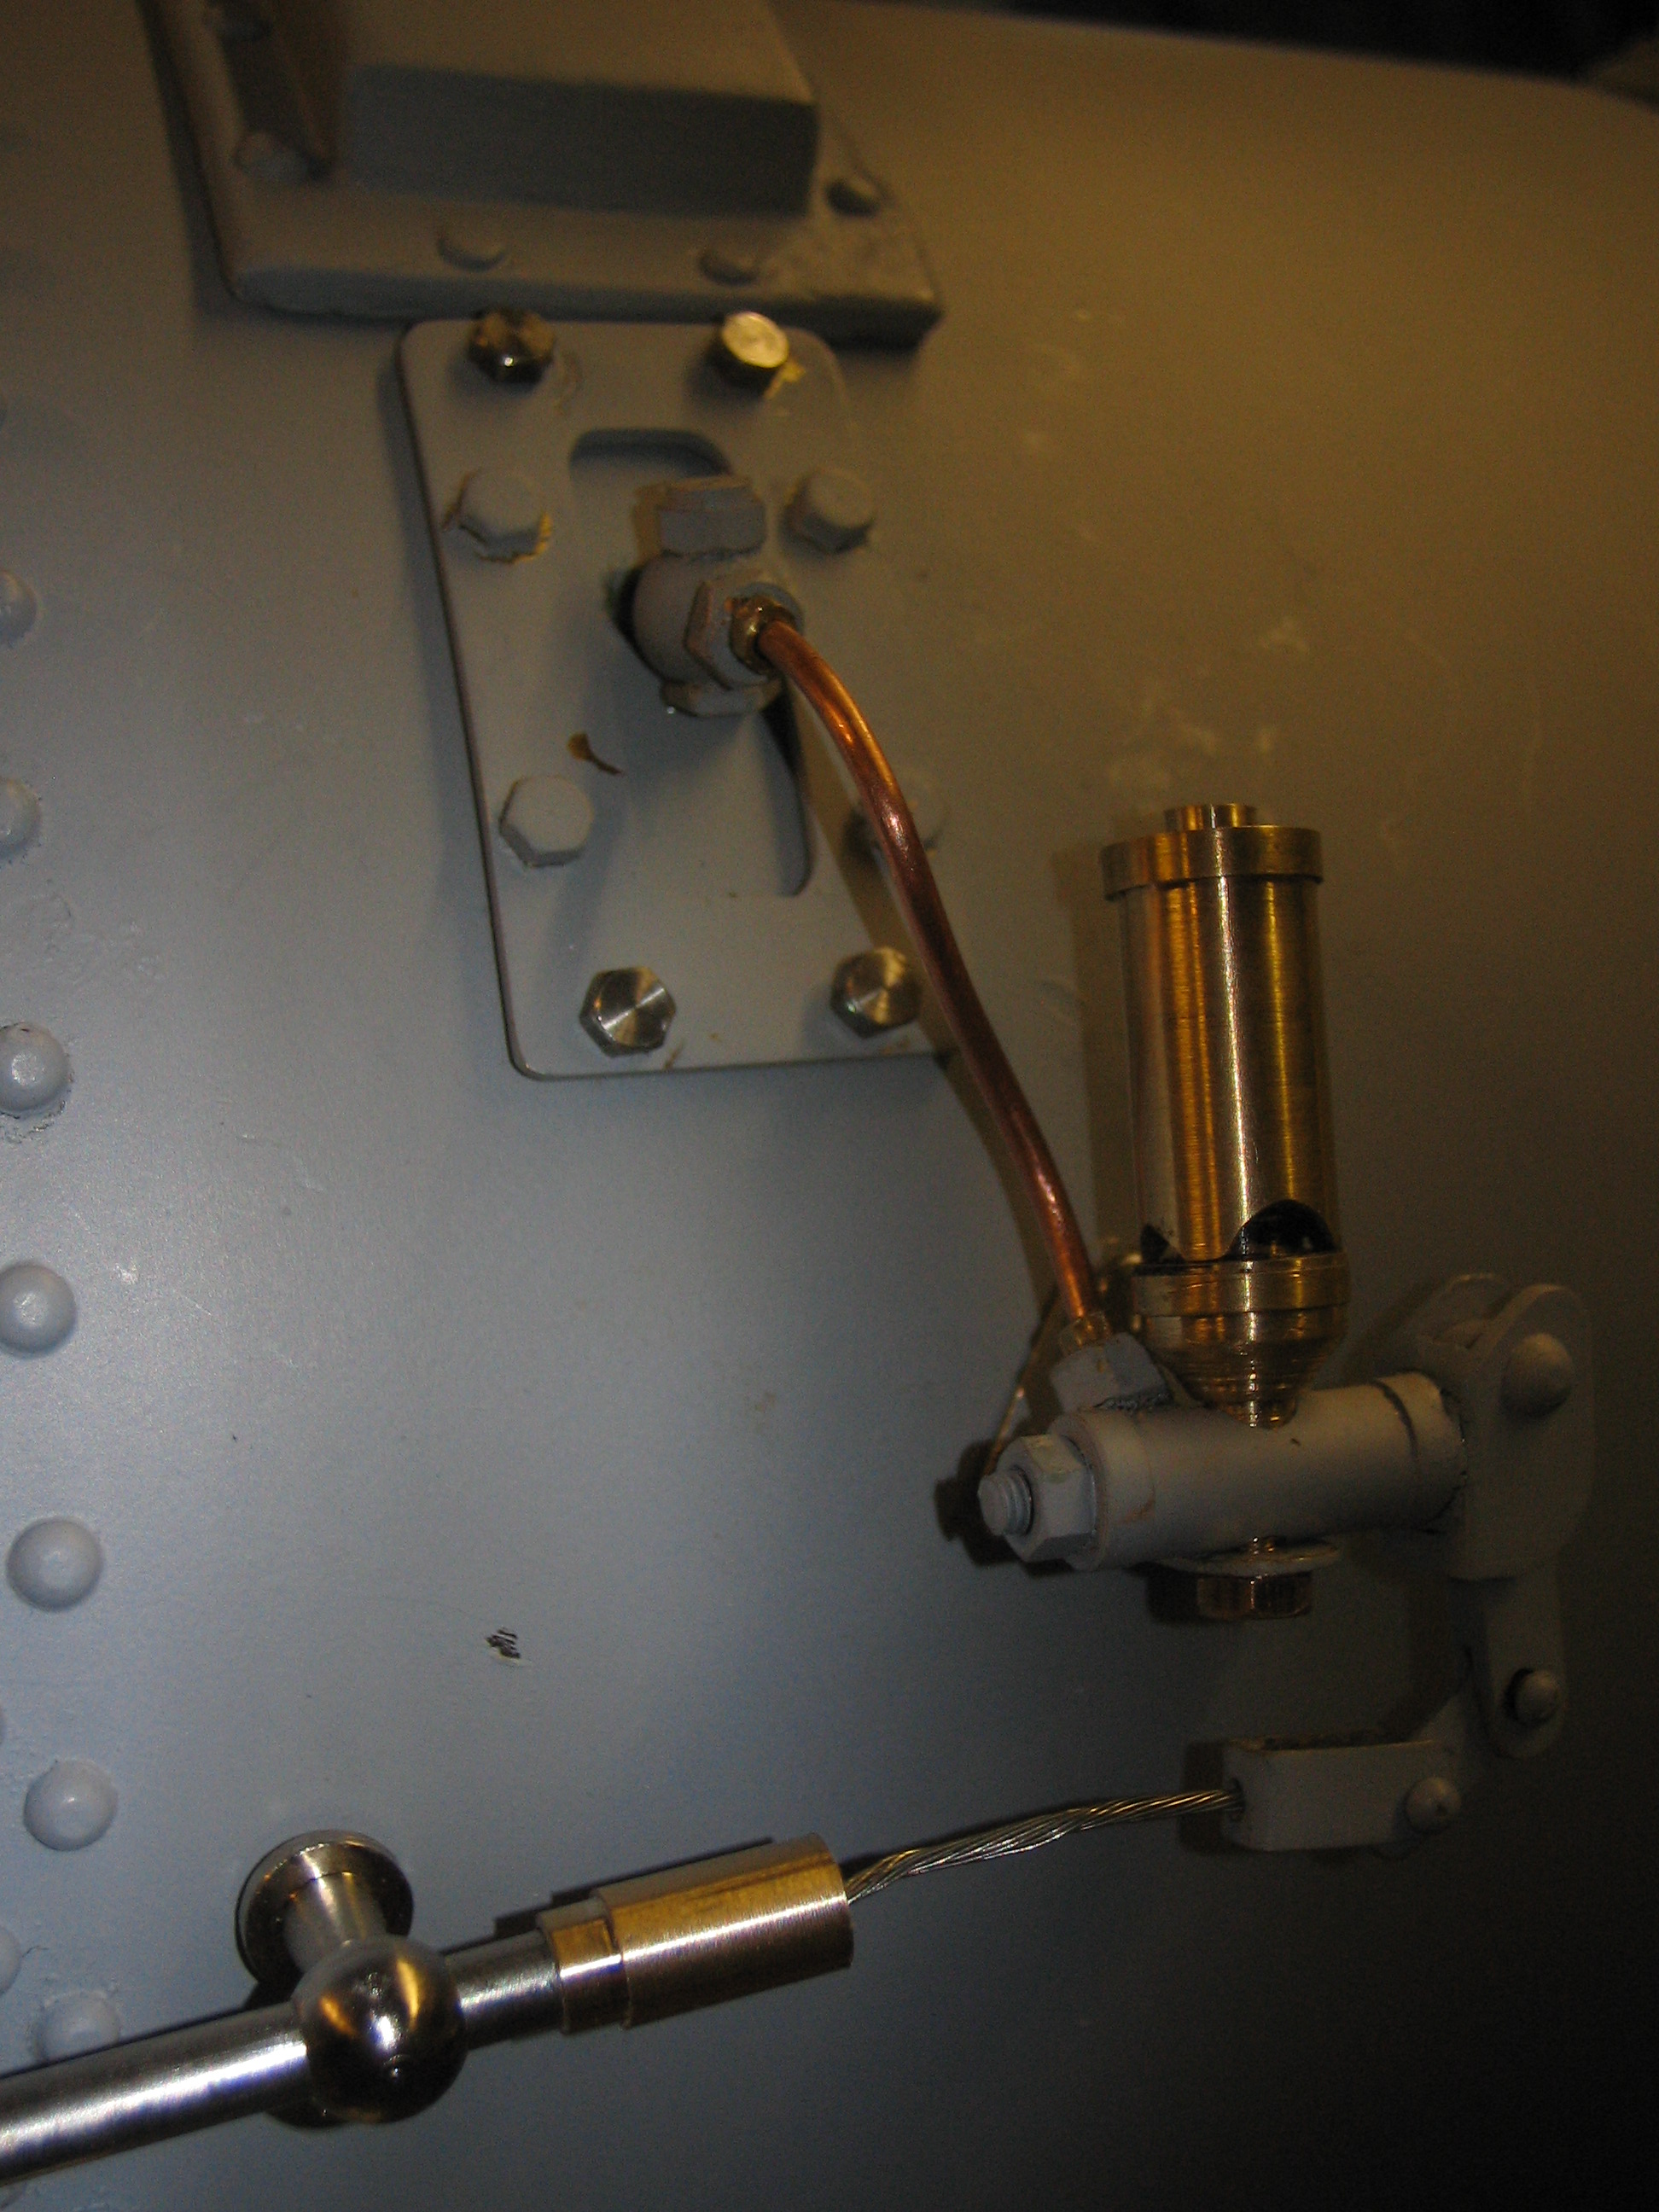
Another year gone by, and still a lot of work to do. It's far too cold to do any more painting at the moment, so I've fitted the left hand cylinder cladding and made the inspection cover and steam pipe cover from 0.9mm brass, fixed with 12BA countersunk screws from the inside. I'll also run some solder into the joint for the steam pipe cover, since 12BA brass screws are not very strong. The cylinder cladding needed a bit of adjustment to get it to lie flat against the cylinder, but it does now look better than the plain cast iron. Note also the etch-primed smoke deflector, and the handle that I made for the lubricator lid.
5/1/09
Another year gone by, and still a lot of work to do. It's far too cold to do any more painting at the moment, so I've fitted the left hand cylinder cladding and made the inspection cover and steam pipe cover from 0.9mm brass, fixed with 12BA countersunk screws from the inside. I'll also run some solder into the joint for the steam pipe cover, since 12BA brass screws are not very strong. The cylinder cladding needed a bit of adjustment to get it to lie flat against the cylinder, but it does now look better than the plain cast iron. Note also the etch-primed smoke deflector, and the handle that I made for the lubricator lid.
21/1/09
I've now also fitted the cladding on the right hand cylinder. The next job is to fit the dummy rivets to the cab sides and spectacle plates. I'm only planning to fit rivets around the edges of the cab sides and probably the outer edges of the spectacle plates - I think the rivets in the central area of the cab side (most of them only on the driver's side) look a bit untidy and will interfere with the lining and numbers, and there isn't enough room for rivets on the inner edge of the spectacle plates between the firebox cladding and the window. There are 12 rivets along the bottom of the cab side, 14 on the front edge up as far as the rain strip, and 13 on the rear edge. I'll just drill the sides and fix short rivets with Loctite - there's no room to get a hammer in to rivet them properly.
10/2/09
I've fitted the rivets to the left-hand side of the cab, including the front of the side roof and the outer edge of the spectacle plate - a total of 58 holes to be drilled. I got fed up of replacing individual 1/16" drills when they snapped, so I bought a pack of 10 for �3.60 inc P&P on eBay. The next job after rivetting the other side is to make up the cab floor covering, and then I'll paint the cab.
15/2/09
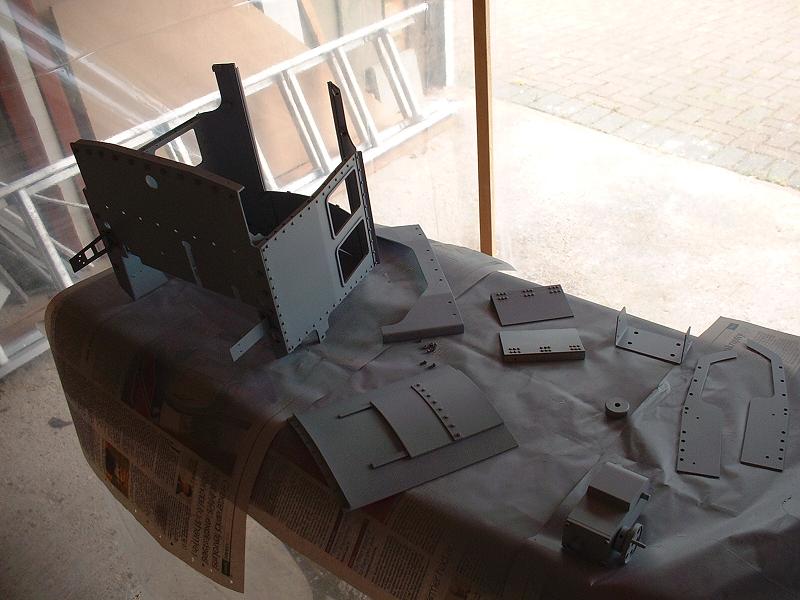
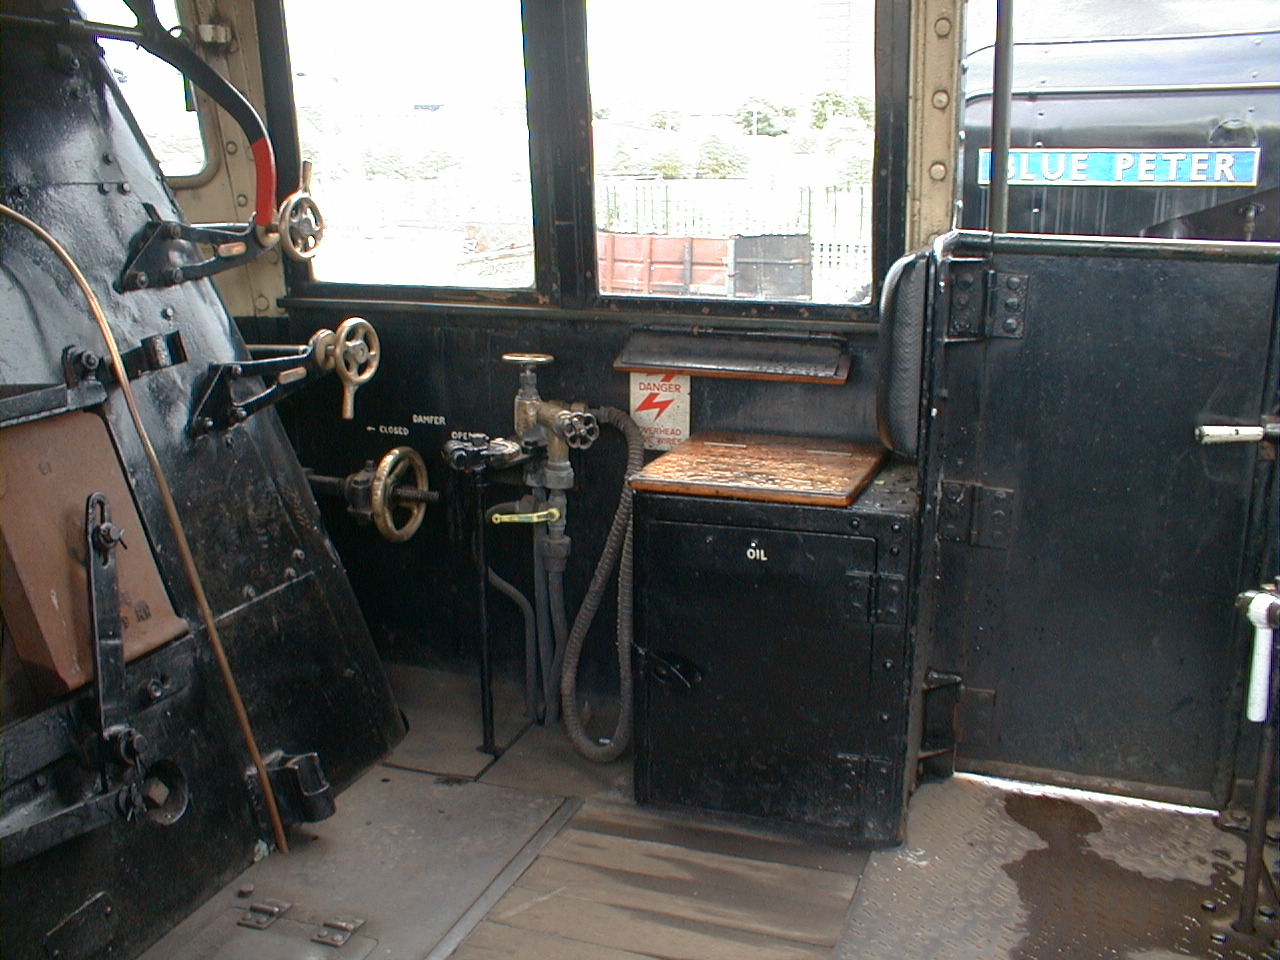
I've now finished the cab rivetting - a tedious job, and the 10 drills that I bought on eBay turned out to be a very mixed bag, some nice and sharp and some totally blunt. I've removed the cab bulkhead and rear guard plate so that I can clean up the rust that formed on the inside of the cab when steaming. I've decided to cut away the top of the bulkhead to improve access to the controls, since the cab sides seem perfectly rigid without it (see earlier comments on 15/8/08 and 24/8/08). I'll make the cab 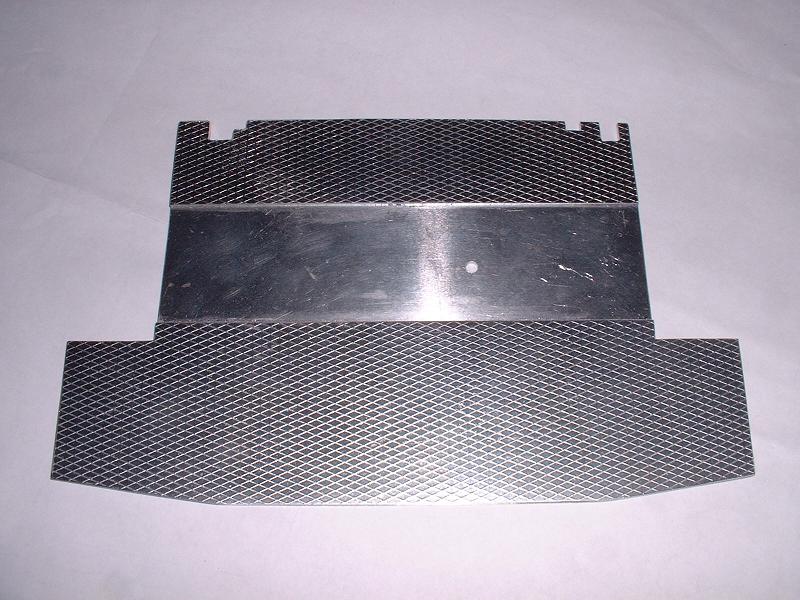 floor covering in two drop-in pieces - one behind the bulkhead and one in front. Each piece will be cut from 16g aluminium sheet faced with a combination of chequerplate and wood veneer - the chequerplate being immediately below the firebox cladding and also across the area behind the bulkhead. This picture gives an idea of the layout - the area between the seats is planked, and the pieces in front of the fireman's seat appear to be sheets of plywood. The floor covering will serve to hide the various superfluous holes in the floor resulting from my repositioning of the injector water valves and pump bypass, and will cover the gap of about 7mm between the front of the floor and the firebox cladding.
11/3/09
I've made the central section of the cab floor covering - I just need to find some suitable veneer or thin planking to fill in the gap between the two areas of chequerplate. I also need to make wooden side pieces to cover the areas on either side of this central section. This layout is slightly different to the one envisaged above, to make it easier to install. This more or less completes the cab detailing - we're away on holiday next week, and I hope that after we get back it will soon be warm enough to start painting in earnest.
 10/4/09
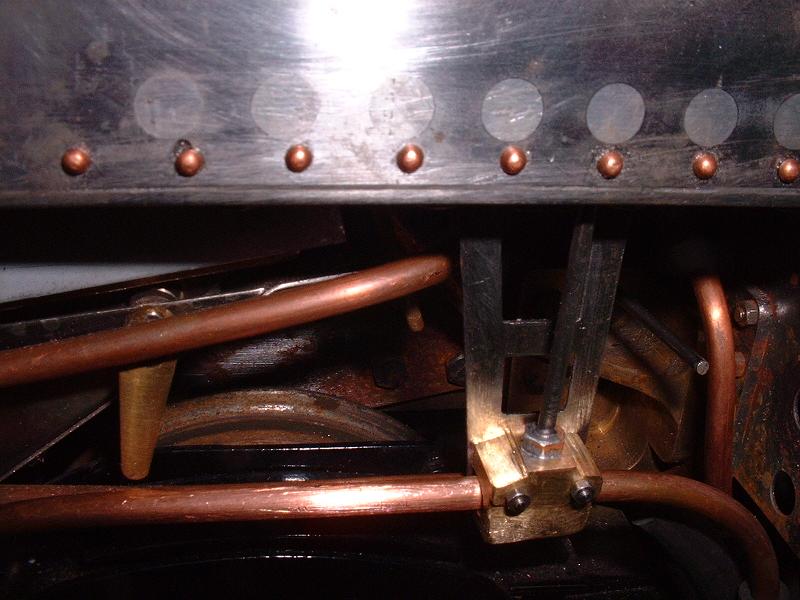
The rear ends of the injector water inlet pipes and the water pump inlet pipe under the cab sides were not properly supported, so I've made a steel bracket and a dummy water valve to clamp the left-hand pipes, and will do the same on the right. This photo shows just how much rust has formed on the frames as a result of steaming, so the sooner I can start dismantling and cleaning it up the better. The steel rod sticking out at the right of the picture is fixed to the head of the drawbar pin so that I can lift it up to uncouple the tender.
10/4/09
The rear ends of the injector water inlet pipes and the water pump inlet pipe under the cab sides were not properly supported, so I've made a steel bracket and a dummy water valve to clamp the left-hand pipes, and will do the same on the right. This photo shows just how much rust has formed on the frames as a result of steaming, so the sooner I can start dismantling and cleaning it up the better. The steel rod sticking out at the right of the picture is fixed to the head of the drawbar pin so that I can lift it up to uncouple the tender.
1/6/09
I've finally run out of excuses for not getting on with the painting - the weather is certainly warm enough now, and my wife is away this week so we can't go sailing (although we had a brilliant sail at the weekend). So I've been polishing up the cab components today, and I'll etch-prime them tomorrow.
3/6/09
I've etch-primed the cab components using the U-Pol #8 spray can and my spraying booth shown at 15/12/08 above. I took a photograph, but my daughter seems to have run off with the USB cable for my camera, probably mistaking it for her iPod cable, so I'll need to retrieve that before I can upload it. I'll paint the interior of the cab black next, using the airbrush rather than my new spray gun since there are some awkward corners to get into. Incidentally I see from a recent photo that the restored 70013 now has a red nameplate on the right hand side and a black one on the left - see discussion on 30/8/08 and 3/9/08 above - they're obviously hedging their bets.
 7/6/09
The photo is now included. I've been re-learning how to use the airbrush and also testing my new Kite spraygun with varying degrees of success - the airbrush is giving reasonably good results, but the back of the smoke deflectors and underside of the cab roof that I've been using to test the spraygun don't look very good - there seems to be quite a bit of dust being drawn onto the painted surface by the more intense airflow, and there are some small depressions which may be caused by contamination. I'll persevere.
7/6/09
The photo is now included. I've been re-learning how to use the airbrush and also testing my new Kite spraygun with varying degrees of success - the airbrush is giving reasonably good results, but the back of the smoke deflectors and underside of the cab roof that I've been using to test the spraygun don't look very good - there seems to be quite a bit of dust being drawn onto the painted surface by the more intense airflow, and there are some small depressions which may be caused by contamination. I'll persevere.
9/6/09
I've started to paint the running boards and front platework using the Kite spraygun. I suspended the running boards vertically from the top of the spraying booth and sprayed the undersides black, and this looks quite good - I'm getting the hang of the controls on the spraygun and getting a uniform gloss surface, without the banding that tends to occur with the airbrush. My small compressor seems quite adequate to drive the spraygun, which only has a 0.5mm nozzle. I filtered the thinned paint through a piece of kitchen paper towel into the cup of the spraygun to eliminate any possibility of bits in the paint - I tried a coffee filter cone first, but this took forever. Although the vertical running boards suspended relatively high up were more or less dust free, there was still significant dust drawn onto the other pieces that I sprayed on the workbench, and I've concluded that the dust on the garage floor - of which there is quite a lot - is being drawn up by the draught from the spraygun; it's not a problem when using the airbrush. I'll brush and then wet the floor before the next session. I'm feeling more confident that I'll get a good result with the spraygun soon. It does use a lot of paint, though.
11/6/09
I ordered 6m of 1/4" x 22g brass boiler band from Maidstone Engineering's online shop yesterday, and it arrived this morning. I'm going to use it to replace the existing five bands on the boiler barrel which are too wide at 5/16", and also fit the two bands to the firebox which were not included in the kit. I've also ordered my third 250ml tin of black paint from Phoenix, along with 125ml of Signal Red for the inside of the main frames. I've cleaned the garage floor and put another coat of black on some of the components - the dust was reduced, but not entirely eliminated.
 14/6/09
Today I dismantled and cleaned and primed the smokebox door and ring and the front buffer beam. That's used up my first can of U-Pol, to cover the cab, running boards, smoke deflectors and these latest parts. It will probably take 3 or 4 cans to do the whole locomotive, but it's very good stuff. I'll use the Phoenix 2-part etch primer applied with a brush for small or fiddly parts since the spray can is quite wasteful on these. This new photo is taken with my usual camera - I've finally got the cable back.
14/6/09
Today I dismantled and cleaned and primed the smokebox door and ring and the front buffer beam. That's used up my first can of U-Pol, to cover the cab, running boards, smoke deflectors and these latest parts. It will probably take 3 or 4 cans to do the whole locomotive, but it's very good stuff. I'll use the Phoenix 2-part etch primer applied with a brush for small or fiddly parts since the spray can is quite wasteful on these. This new photo is taken with my usual camera - I've finally got the cable back.
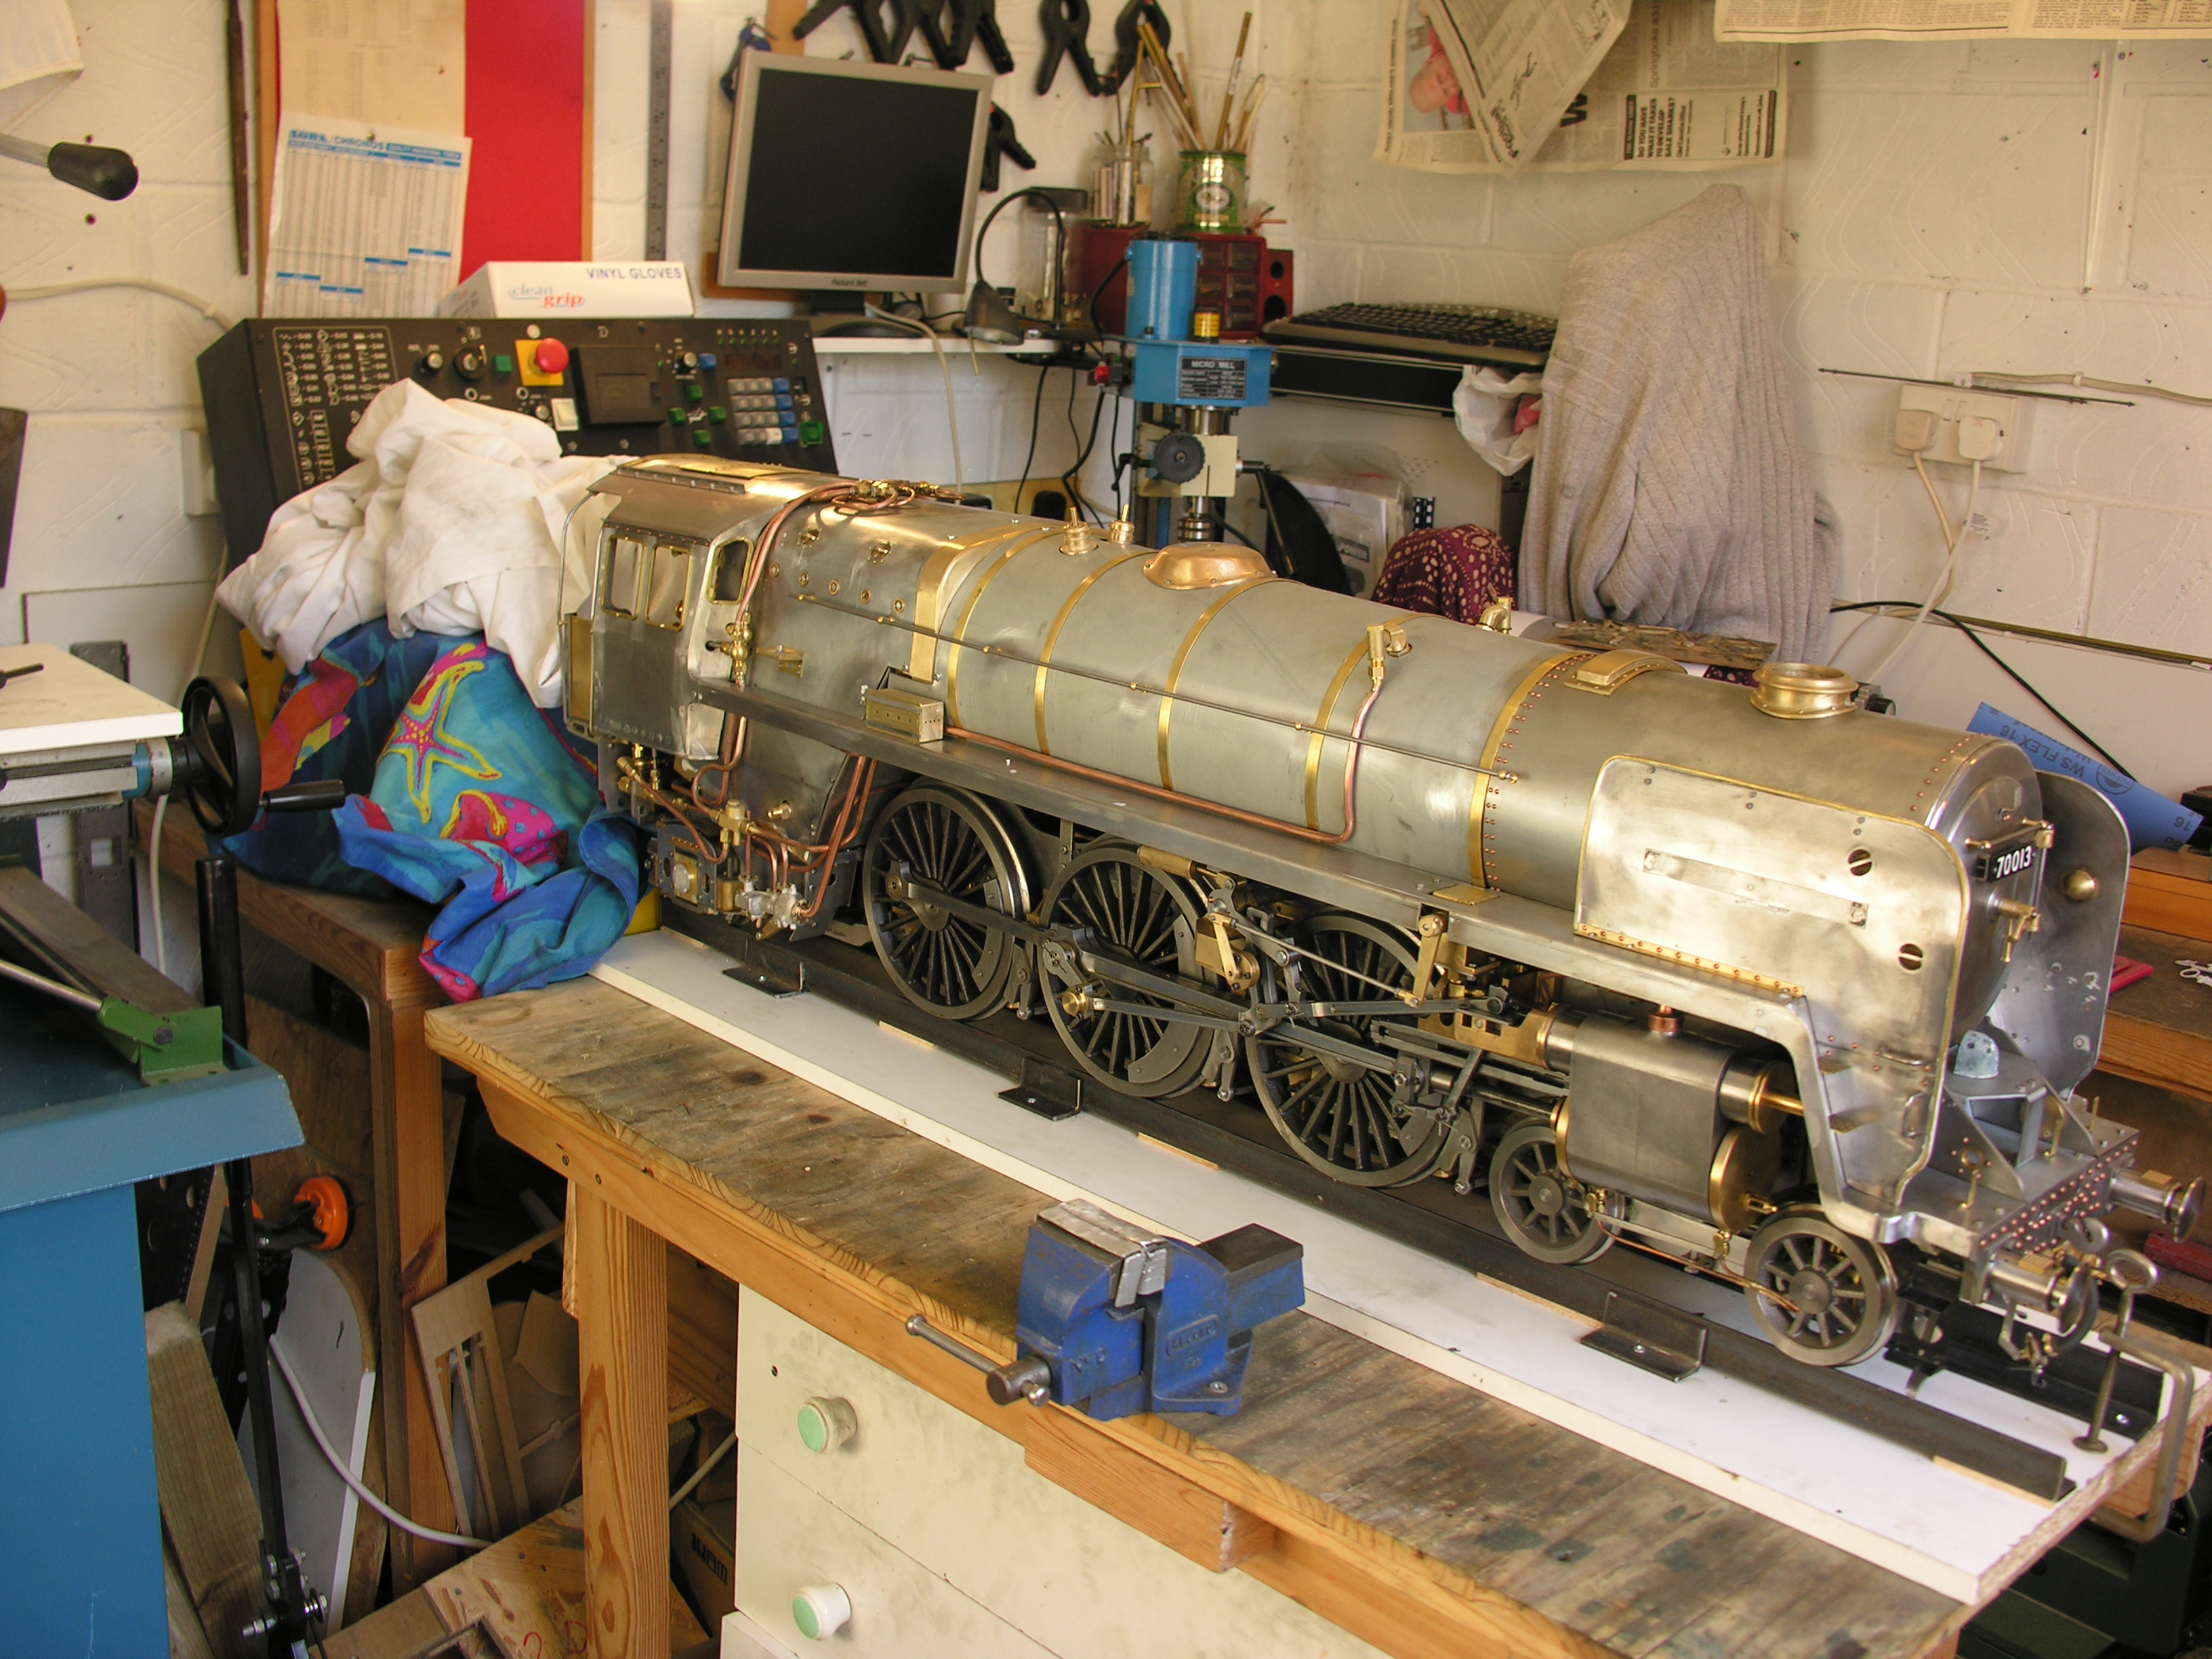
28/6/09
I'm now starting to dismantle the main structure of the locomotive - I'll remove the boiler, smokebox, ashpan, motion gear, wheels, brakes and springs and then paint the frame assembly complete with cylinders and motion brackets. I'll leave the final painting of the more conspicuous parts - boiler cladding, smokebox, cab etc - until later, so that I can continue to gain more experience with the spraygun on the frames.
1/7/09
I've removed the left-hand motion gear, which came off almost in one piece after the rather recalcitrant roll pin that secures the lifting arm to the weighshaft had been driven out. The inside of the valve cylinder looks nicely polished in the areas around the ports where the valve piston rings slide, and the main cylinder bore also looks very smooth with no sign of rust. I've ordered dummy ejector and exhaust steam injector castings from Doug Hewson which should complete the detailing of the locomotive, apart from the battery box which I'll probably fabricate from sheet brass. I've also put the first coats of red paint on the front buffer beam.
 4/7/09
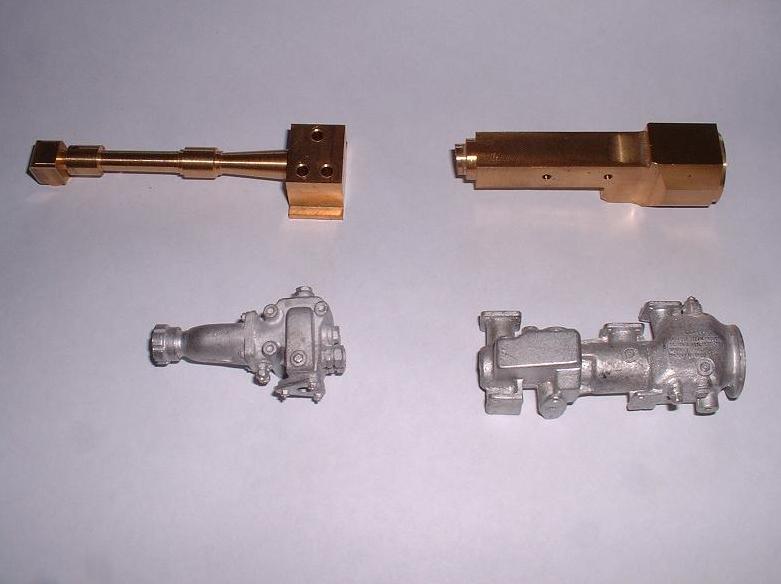
The ejector and exhaust steam injector castings arrived from Doug this morning. The photo shows them along with the machined brass Modelworks components for comparison. I'll probably adapt the left-hand end of the brass ejector pipe to fit the casting - it's largely hidden by the smoke deflector. I'm not yet sure how best to fit the exhaust steam injector low on the right hand side of the ashpan since I currently have a real injector there - it's difficult to run pipework to both real and dummy injectors without it looking cluttered. Harry L contacted me today and sent this photo of the magnificent dummy whistle that he's fabricated for his smokebox. If any other builders out there are still following my diary it would be nice to hear how you are progressing - I'm still only aware of three Modelworks Britannias having been steamed - mine, Ted's and Rod's.
4/7/09
The ejector and exhaust steam injector castings arrived from Doug this morning. The photo shows them along with the machined brass Modelworks components for comparison. I'll probably adapt the left-hand end of the brass ejector pipe to fit the casting - it's largely hidden by the smoke deflector. I'm not yet sure how best to fit the exhaust steam injector low on the right hand side of the ashpan since I currently have a real injector there - it's difficult to run pipework to both real and dummy injectors without it looking cluttered. Harry L contacted me today and sent this photo of the magnificent dummy whistle that he's fabricated for his smokebox. If any other builders out there are still following my diary it would be nice to hear how you are progressing - I'm still only aware of three Modelworks Britannias having been steamed - mine, Ted's and Rod's.
6/7/09
I've had some reader feedback, thanks. Brian B is building the 7 1/4" Winson/Modelworks Britannia, and the Modelworks 7 1/4" A3 and A4, and tells me that Wilkev who took over the A3 and A4 have provided all the parts to finish the A3 and should soon deliver the parts for the A4, so that's very good news for the people building these magnificent machines. Mark T has completed his Britannia and tested it on air, but plans to dismantle and paint it before steaming it - he sent me this picture. Note that Mark has used the adjustable return cranks and seems to have full travel of the radius rod in the expansion link slot. Terry J is building a Winson Britannia which he bought half-completed, to add to his Winson A4 and 9F. Richard P has other projects on the go but is determined to finish his Britannia sooner or later. Keep the feedback coming!
I've now removed the rest of the motion gear and the boiler and smokebox - getting the boiler out from the smokebox is an awkward job at the best of times, and very messy once the smokebox is full of soot. I discovered when pulling the weighshaft out that the boiler was pressing very heavily on it - I'll have to cut away the cladding and lagging at that point. I now just need to remove the ashpan and then I'll be able to turn the chassis over and remove the brake gear and axles.
 8/7/09
I've turned the chassis over and started to remove the brake gear and axles. The rust resulting from steaming is not too bad, and the process of dismantling doesn't take too long so I don't feel that I've lost too much by steaming before painting. It's nice to see how smoothly everything turns after a little running in. I'll remove the spring hangers and probably the front and pump stretchers to simplify painting, but I won't disturb the hornblocks or the main horizontal stretcher. Reg S phoned me yesterday and said that he'd steamed his Britannia successfully on the rolling road last week, so he's nearly ready for a track test.
8/7/09
I've turned the chassis over and started to remove the brake gear and axles. The rust resulting from steaming is not too bad, and the process of dismantling doesn't take too long so I don't feel that I've lost too much by steaming before painting. It's nice to see how smoothly everything turns after a little running in. I'll remove the spring hangers and probably the front and pump stretchers to simplify painting, but I won't disturb the hornblocks or the main horizontal stretcher. Reg S phoned me yesterday and said that he'd steamed his Britannia successfully on the rolling road last week, so he's nearly ready for a track test.
13/7/09
I've completed the dismantling and etch-primed the frames. I'll next spray the outside of the frames black, and then paint the inside red in the area from the front of the horizontal stretcher as far back as the steam brake stretcher. I'll leave the axle pump and steam brake in brass. I'll use a brush for the red paint since masking the frames would be too complicated. I removed the axle pump stretcher to simplify painting - I was able to do this without disturbing the weighshaft brackets because I had the foresight to leave out the top two countersunk screws that are covered by the brackets. I've now also sawn about 5mm off the top of this stretcher to allow the top pipe to be fitted without disturbing it. If the pump has to be removed for maintenance at any point in the future, it should be possible to do so by unbolting the stretcher and sliding it down with the pump still attached, after removing some of the brake gear.
 15/7/09
I've now done two sessions of black gloss on the main frames and they are starting to look quite good - one or perhaps two more sessions will be needed to get a really deep gloss. I've been using the airbrush rather than the spraygun because there are a lot of intricate areas around the brackets and cylinders, and no really large flat areas. Even so I may need to touch in a few nooks and crannies with a brush. Harry L has very kindly made me a dummy whistle for my smokebox, shown here along with the front pipe that I've fabricated for the ejector casting.
15/7/09
I've now done two sessions of black gloss on the main frames and they are starting to look quite good - one or perhaps two more sessions will be needed to get a really deep gloss. I've been using the airbrush rather than the spraygun because there are a lot of intricate areas around the brackets and cylinders, and no really large flat areas. Even so I may need to touch in a few nooks and crannies with a brush. Harry L has very kindly made me a dummy whistle for my smokebox, shown here along with the front pipe that I've fabricated for the ejector casting.
22/7/09
I've finished the black gloss on the frames, including the rear extensions and dragbox, so I'll now bring the frames in from the garage and start applying the red gloss to the inside faces with a brush. In parallel with this I'll airbrush the wheels, springs etc and then I'll be ready to reassemble the chassis and motion gear. I need to decide how to paint the stainless steel ashpan - I don't think that the acid in the etch primer is strong enough to etch into this. Perhaps the ordinary Phoenix rust-stabilising primer would be better? I bought a tin of this at the outset and have hardly used it so far.
 1/8/09
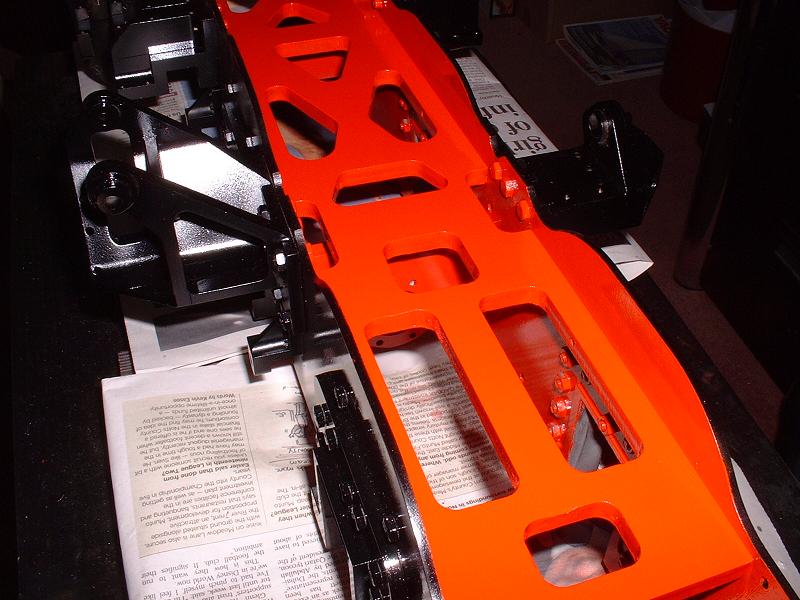
I've painted the inside of the frames red as shown in this photo, and started spraying the spring hangers, horn keeps etc. I've also masked up the first set of driving wheels ready for priming.
1/8/09
I've painted the inside of the frames red as shown in this photo, and started spraying the spring hangers, horn keeps etc. I've also masked up the first set of driving wheels ready for priming.
5/8/09
I've finished painting the rear driving wheels and their springs - I dismantled the springs and painted the individual leaves to prevent them rusting. After etch priming the wheels I brush-painted the spokes because it's difficult to get the airbrush into the narrow gaps. I then supported the axleboxes on blocks and turned the wheels against the stationary airbrush to get a uniform coating on the rims and the axle, continuing to turn the wheels for a few minutes while the paint dried to avoid any risk of it running.
13/8/09
I've completed painting the middle driving wheels and I've reinstalled the middle and rear axles in the frames, along with the water pump. I've left the pump and eccentric strap in brass. Harry W tells me that he is making slow but steady progress - he has sorted out his valve gear and will then dismantle the chassis for painting. We're off sailing from this weekend, aiming to get to St Malo if the weather holds, so probably no more updates for a couple of weeks.
 31/8/09
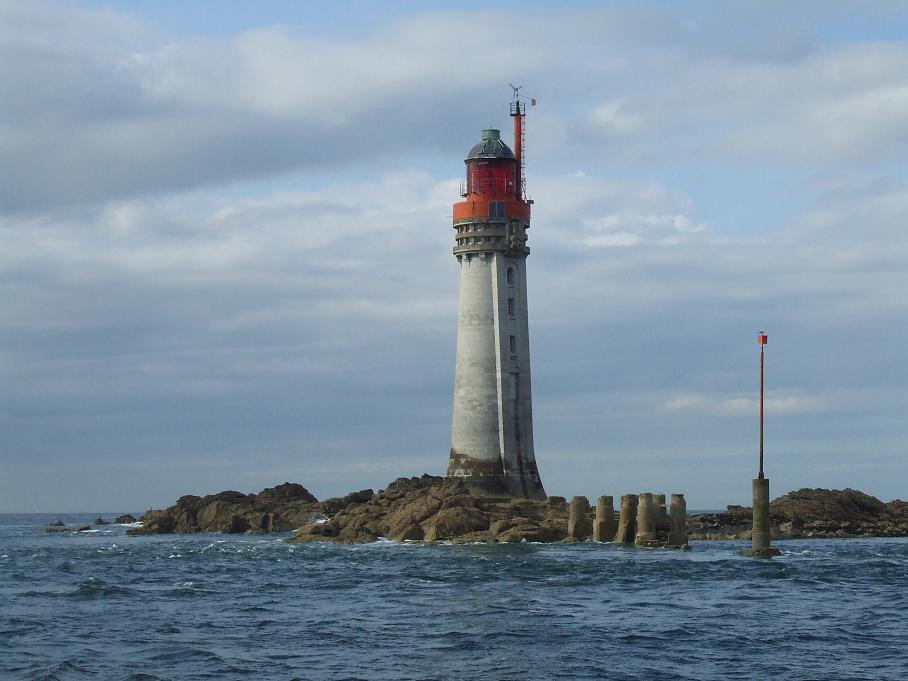
Just back from a 2-week sailing holiday to the Channel Isles and St Malo - our longest cruise so far, and brilliant weather apart from a rather bumpy Channel crossing from Cherbourg on Saturday. Here's a photo of the lighthouse at the entrance to St Malo to prove it! I'll resume the painting this week and should soon be ready to reassemble the motion gear.
31/8/09
Just back from a 2-week sailing holiday to the Channel Isles and St Malo - our longest cruise so far, and brilliant weather apart from a rather bumpy Channel crossing from Cherbourg on Saturday. Here's a photo of the lighthouse at the entrance to St Malo to prove it! I'll resume the painting this week and should soon be ready to reassemble the motion gear.
5/9/09
I've painted and reinstalled the front driving wheels along with the cylinder end caps and gland covers, slide bars, coupling rods and connecting rods. I've started painting the brake gear and drain cock linkage and when these parts are refitted I'll be ready to turn the chassis over and fit the valve gear and the lubricators. I'll take a picture of the underside before I do so. I've also cleaned up the bogie and pony truck, which I painted a long time ago prior to steaming. There are a few chips on the black paint on the pony frame, but the etch primer is still there - this is the Phoenix 2-part etch, which I used before I discovered the U-Pol spray cans. I've read elsewhere that the etch primer sticks to the metal better than the paint sticks to the etch primer.
 8/9/09
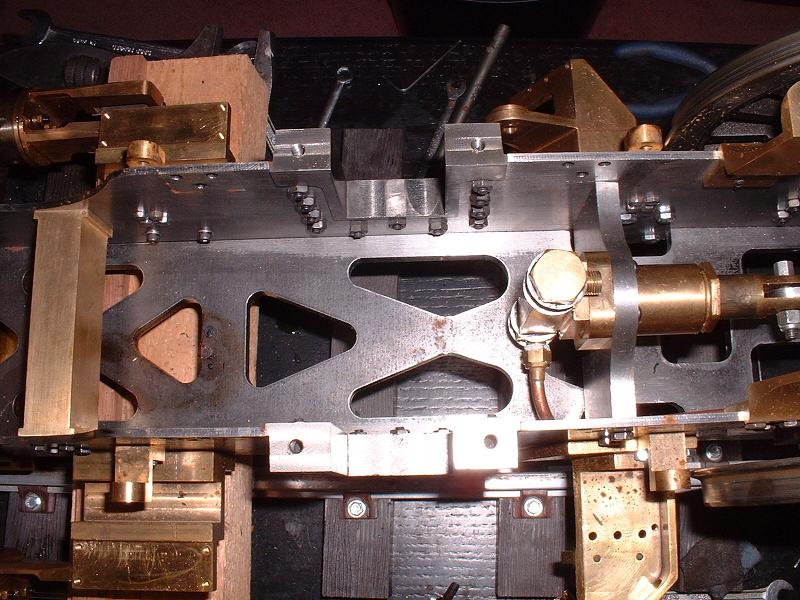
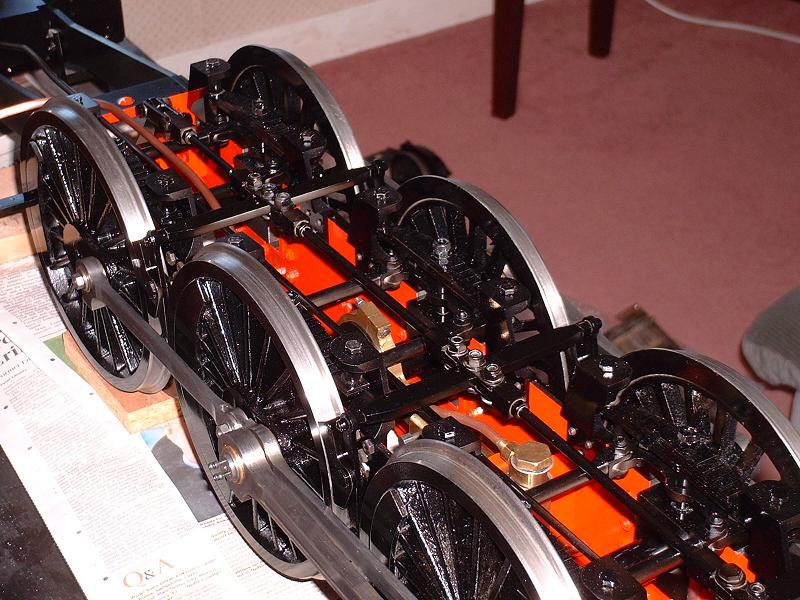
This picture shows the underside of the frames with the driving wheels and brake gear reinstalled. The next step is to turn it over and refit the valve gear, and then paint and fit the lubricators, cylinder cladding and drain cocks, then paint the smokebox and ashpan. It's interesting that some parts in the photo look rather grey even though they look black to the naked eye - I assume that the black coat must be rather thin in places and the flash is reflecting from the underlying grey etch primer.
8/9/09
This picture shows the underside of the frames with the driving wheels and brake gear reinstalled. The next step is to turn it over and refit the valve gear, and then paint and fit the lubricators, cylinder cladding and drain cocks, then paint the smokebox and ashpan. It's interesting that some parts in the photo look rather grey even though they look black to the naked eye - I assume that the black coat must be rather thin in places and the flash is reflecting from the underlying grey etch primer.
11/9/09
I've refitted all the valve gear. I replaced the two pins that link the weighshaft lifting arms to their vertical links, since the ones supplied by Modelworks were quite a loose fit - 4.6mm pins in 5mm holes. I used 5mm steel rod with a washer and split pin at either end.
15/9/09
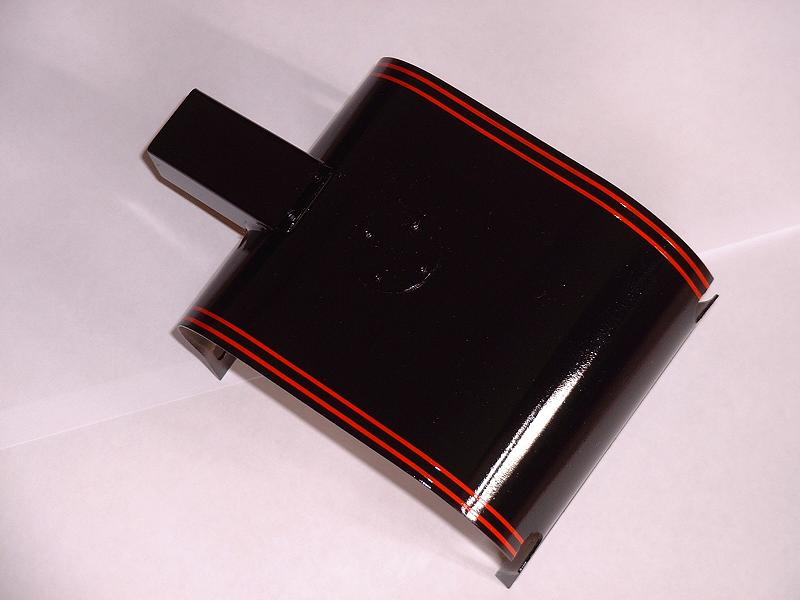
I've painted the cylinder covers and they look very good - my airbrushing technique is steadily improving. I think the most important thing I've learned is to shine a really strong light on the work and watch carefully as the paint goes on, adjusting the speed of movement to get the right coverage so that it just flows. I work with a small reading lamp in one hand and the airbrush in the other. I now need to add the double red pinstripe lines at each end of the covers. I've got some red vinyl striping which I bought to red-line the pressure gauge - it has various widths on a 2.5m reel, and is intended for decorating model aeroplanes - I got it from the local model shop. This is easy to apply in a straight line since it can be laid down under tension, and I achieved a neat double line by temporarily applying a 2.5mm strip with 0.8mm strips on either side. It looks very good, but the downside is that it can be displaced if accidentally scraped by a fingernail etc, and also I'm not sure how heat resistant the adhesive will be. On the other hand it could quite easily be replaced without damaging the underlying paint, unlike a transfer. Before I settle on using this I've ordered some double pinstriping tape on Ebay - this consists of parallel strips of masking tape on a backing tape. The backing tape is peeled back to leave lines of the chosen width and spacing which are then painted before removing the strips of masking tape.
 19/9/09
The pinstriping tape arrived this morning and after practising on an old paint tin I've used it successfully on the cylinder covers. It's Finesse tape from Pinstriping UK, who also sell on Ebay. I bought the F43 tape which has two 1/32" lines spaced 3/32" apart. It's easy to apply and sticks down firmly when rubbed with a fingernail, so the paint doesn't creep underneath and the tape peels off to leave very sharp edges. I used the Precision red paint unthinned, applied it fairly liberally to get a dense coverage in one coat, and pulled the tape off as soon as I'd finished painting.
19/9/09
The pinstriping tape arrived this morning and after practising on an old paint tin I've used it successfully on the cylinder covers. It's Finesse tape from Pinstriping UK, who also sell on Ebay. I bought the F43 tape which has two 1/32" lines spaced 3/32" apart. It's easy to apply and sticks down firmly when rubbed with a fingernail, so the paint doesn't creep underneath and the tape peels off to leave very sharp edges. I used the Precision red paint unthinned, applied it fairly liberally to get a dense coverage in one coat, and pulled the tape off as soon as I'd finished painting.
23/9/09
I've painted and refitted the drain cocks and lubricators, and refitted the front bogie which I painted literally years ago. Jon M has raised the question of the sandbox lids on the running boards - are there 2 or 3 on each side, and are they raised above the level of the boards? I'd rather overlooked these, but on consulting my copy of 'Locomotives in detail - Riddles Class 6/7 Standard Pacifics' (ISBN 0-7110-3177-0), available from Amazon, it seems that Britannias 70000 - 70029 had 2 on each side and the later ones had 3, and all the locos originally had lids flush with the running boards but some were later fitted with raised lids. Fortunately both 70013 and Jon's 70007 remained with flush lids throughout their lives, so we don't need to splash out on Doug's castings!
30/9/09
I've completed the painting of the chassis by touching in all the nuts and bolts with a brush. The next job is the smokebox. I plan to paint this with the usual Phoenix black gloss, rather than special high-temperature paint - Chris Vine used it successfully on Bongo's smokebox, and the very thick steel of the Modelworks smokebox should ensure that the heat is spread evenly. Prior to starting painting, I've been fitting Harry's whistle (see 15/7/09 above) and I'll also drill the holes for the ejector fitting.
 6/10/09
I'm now in the process of painting the smokebox. Ian T tells me that he had his Britannia ready for steaming in March, but decided to dismantle and paint it first. He says that he gave up using the Phoenix black paint and has used enamel paint from Halfords at only �5 for the same size tin - he finds it much easier to paint with - it flows out nicely without runs. He painted his smokebox using high temperature engine paint in satin finish, again from Halfords, and used the gloss version to paint the ash pan - no primer required, and he says that it gave a lovely finish.
6/10/09
I'm now in the process of painting the smokebox. Ian T tells me that he had his Britannia ready for steaming in March, but decided to dismantle and paint it first. He says that he gave up using the Phoenix black paint and has used enamel paint from Halfords at only �5 for the same size tin - he finds it much easier to paint with - it flows out nicely without runs. He painted his smokebox using high temperature engine paint in satin finish, again from Halfords, and used the gloss version to paint the ash pan - no primer required, and he says that it gave a lovely finish.
12/10/09
I've finished painting the smokebox and started on the chimney and other fittings. I used my new Kite spraygun for the first time in a while (see 9/6/09 above) for the final coat on the smokebox, and got a very good uniform almost glass-like finish with only a few specks of dust. We're away on holiday for a week soon, so no more updates for a while.
22/10/09
We're back from holiday now. Just before we went I tried to paint the chimney and other smokebox fittings using a spray can of black gloss from Phoenix - I bought this a while ago because I thought it would be more convenient than the airbrush for painting small items. However, it was a bit of a disaster - it sprayed far too much paint at too high a pressure, leaving external and internal angles uncovered and paint dripping everywhere. Ironically it would probably have worked well on larger flat items if sprayed from a greater distance, but I'm in no mood to try. I'll start again with the airbrush.
30/10/09
Apologies for the interruption to service while Yahoo migrated my website from their old Geocities service. I've now sprayed the smokebox fittings with the airbrush and refitted them. I also bought a tin of the Halfords high temperature black gloss engine paint - only �5 for 250ml - and used it to paint the stainless steel ashpan. I applied it directly to the bare metal with my Kite spraygun, thinned with the usual Phoenix quick air-drying thinners, and it has given an excellent finish, just as smooth and shiny as the Phoenix black gloss.
19/11/09
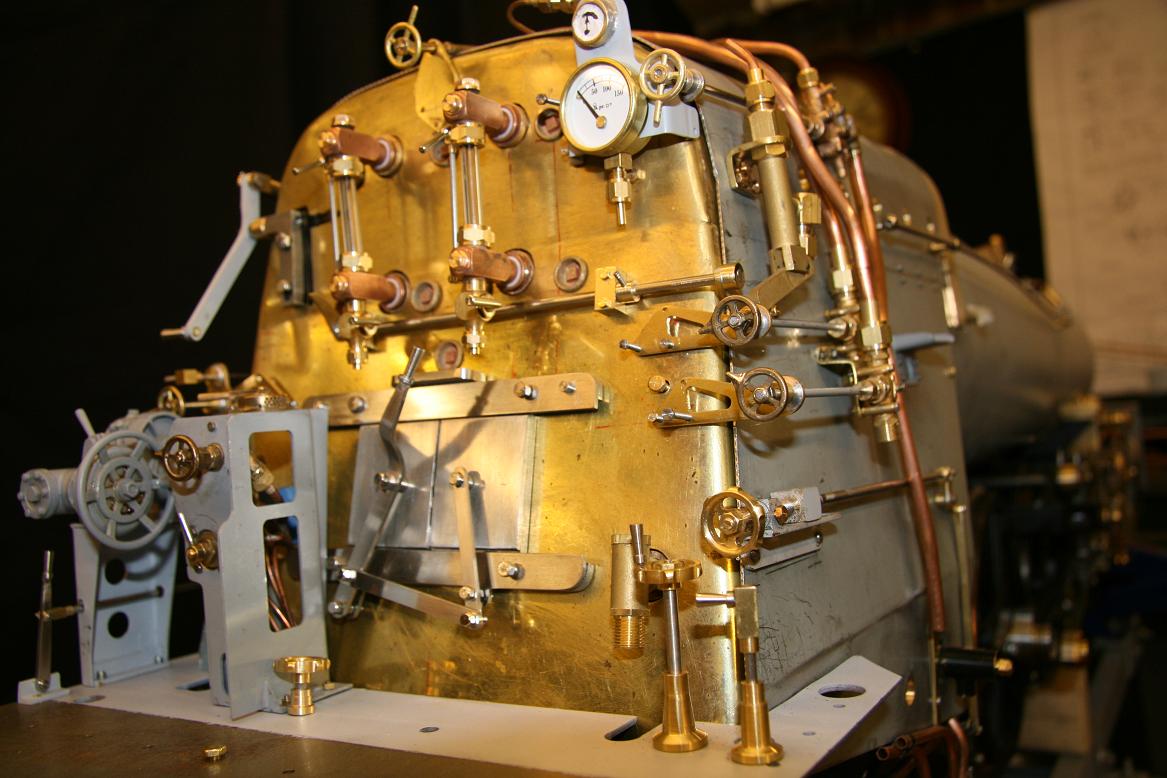
Apologies again for the lack of updates - I've been rather busy with other things, but also not making much headway with the painting because of problems with dust being picked up by the spraygun. I've had to do a lot of rubbing down of the smokebox door, smoke deflectors etc to rectify this, and I'll have to give the garage a thorough clean before I try again. Harry L sent me this photo of his superb cab interior - note among other things the backhead cladding, reversing gearbox, driver's pedestal, whistle controls, 3-valve water gauges, and injector controls. I also heard from Harry W, who has tested his Brit on compressed air and found, as I did, that there is a fair amount of leakage past the valves. He is taking it to Doug Hewson to have PTFE valve rings fitted, which hopefully should cure the problem. And I also heard from Rod A, who has dismantled his Brit for painting and is now slightly ahead of me, having started on the boiler cladding. He sent me this photo of the 'spit' he has made to turn the boiler while painting.
19/12/09
I've painted and refitted the front platework, but it's far too cold in the garage at the moment to do any more painting. I still need to put a final coat of black on the smokebox door and smoke deflectors, and then start on the green parts. While waiting for a warmer spell I'll make the new boiler bands (see 11/6/09 above) and also try to improve the profile of the brass throatplate cladding, in preparation for painting the boiler. I'm also going to try to buy a replacement for the regulator valve, which is a standard plumbing fitting, because the current one sticks slightly at the point where it just closes. I think that the PTFE body in which the ball turns has acquired a slight lip from being left in one position for too long - it has been like this ever since I've had it. I also need to get some 4mm steel rod to make a stronger regulator linkage, and with these changes I may be able to revert to the standard length of regulator arm on the outside of the smokebox.
 5/1/10
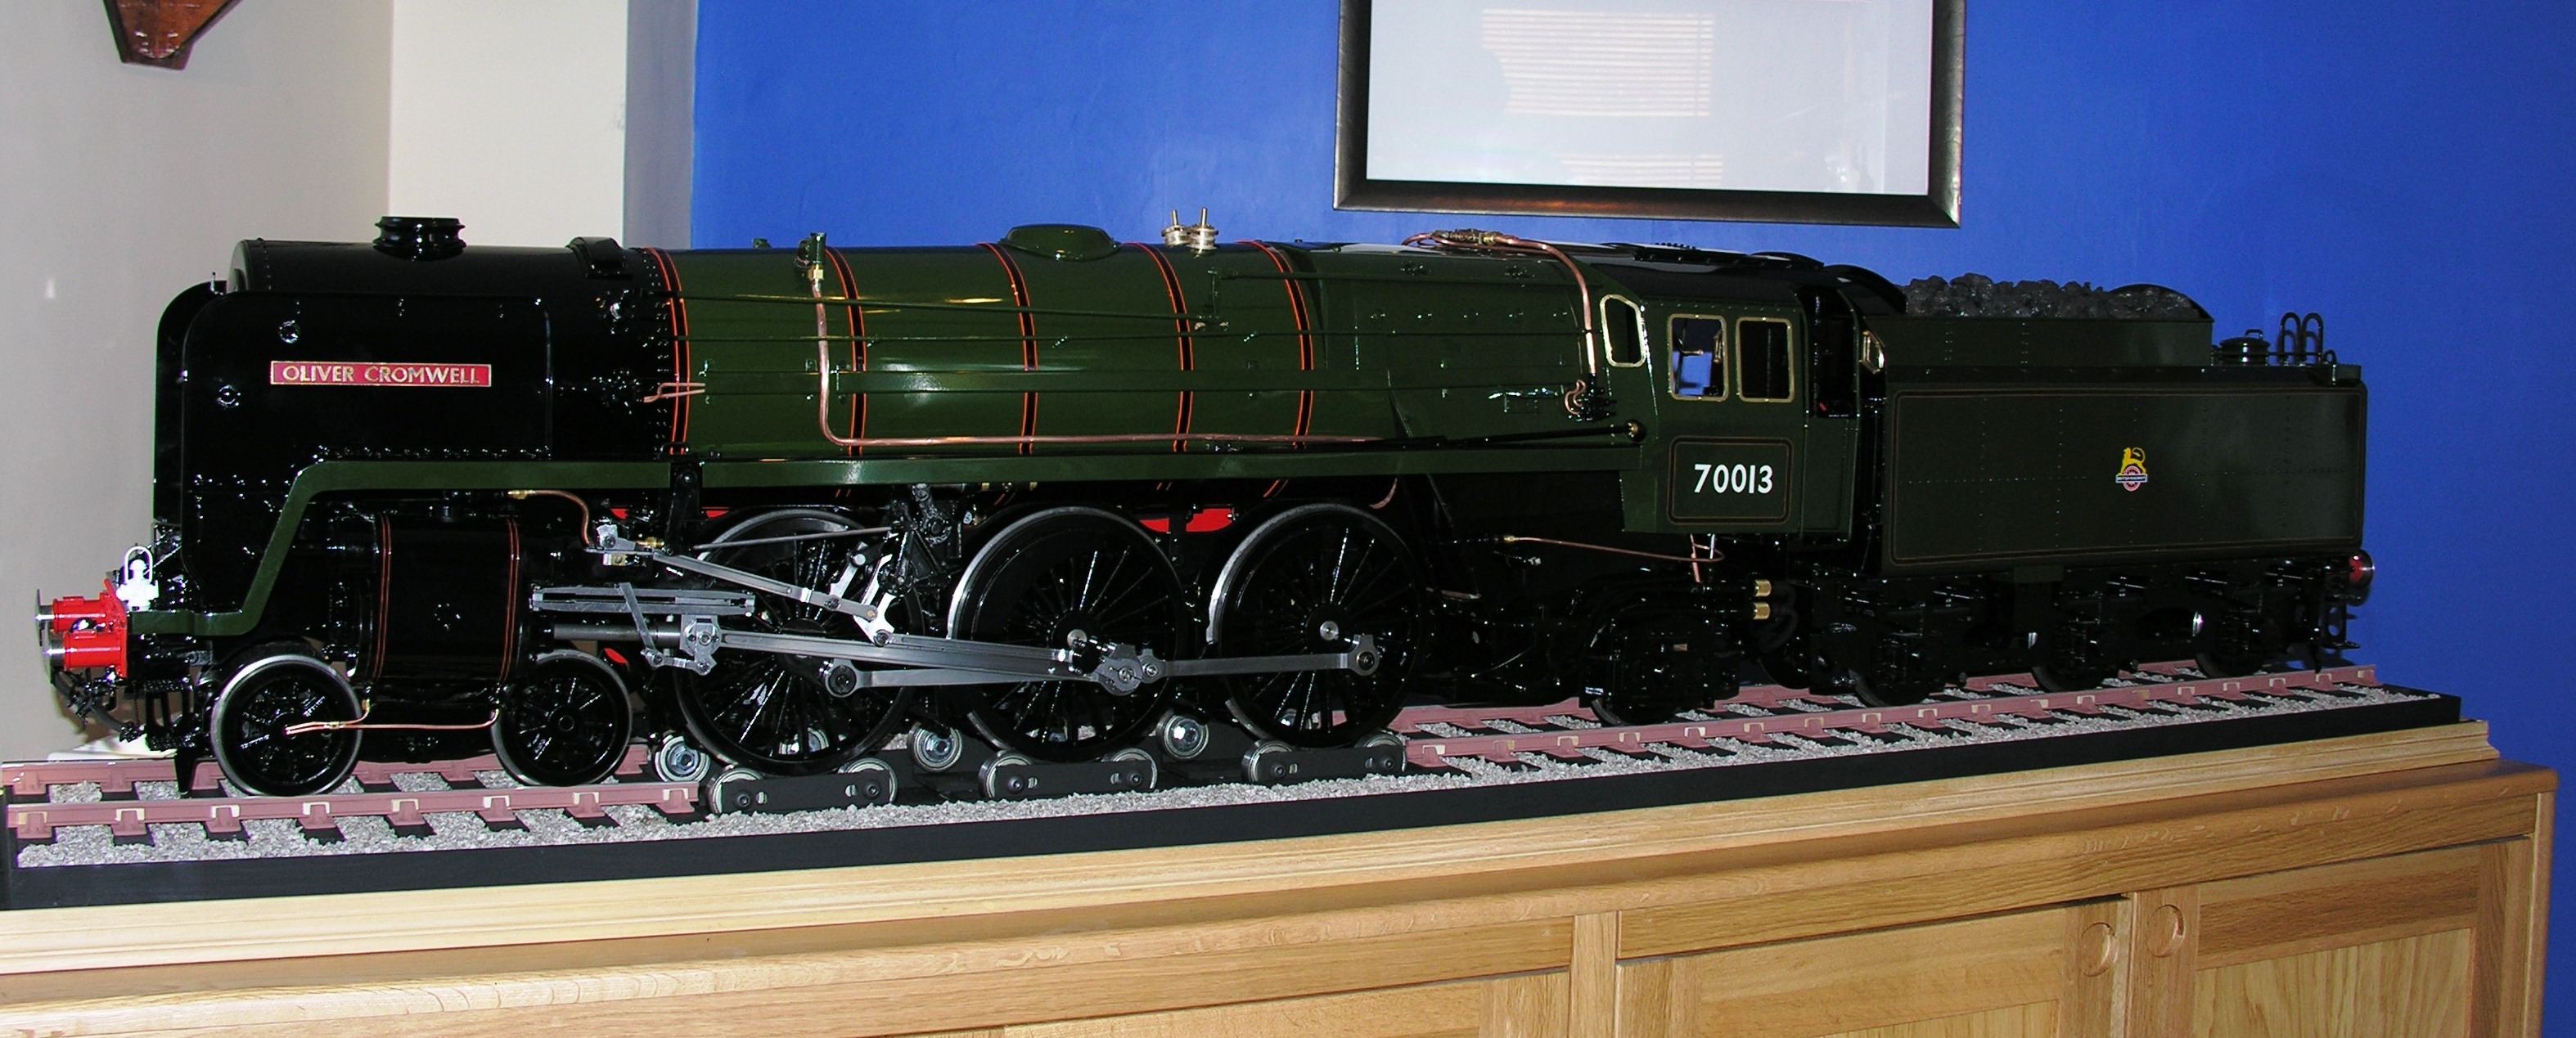
Mark T sent me this photo of his completed Britannia - it looks superb and will help motivate me to finish my painting once the weather warms up. Mark has run the model on compressed air on its display stand, which incorporates the rolling road. He tells me that he decided to omit the orange lining on the edges of the running boards, because he couldn't get an acceptable standard and didn't want to spoil the finish. He used Tamiya masking tape to paint the boiler bands, and the transfers are from Phoenix.
5/1/10
Mark T sent me this photo of his completed Britannia - it looks superb and will help motivate me to finish my painting once the weather warms up. Mark has run the model on compressed air on its display stand, which incorporates the rolling road. He tells me that he decided to omit the orange lining on the edges of the running boards, because he couldn't get an acceptable standard and didn't want to spoil the finish. He used Tamiya masking tape to paint the boiler bands, and the transfers are from Phoenix.
11/1/10
I've now fitted the new boiler bands made from 1/4" x 22g brass strip. I doubled over the ends and then made the right-angled bends and soldered them to give stronger mountings for the fixing screws. I fitted the two additional bands on the firebox, one covering the joint between the throatplate and the firebox cladding, and the other immediately in front of the manifold. I fixed this latter band to the firebox sides with 2 10BA bolts low down. One of the (few) advantages of the relatively thick steel cladding is that it can be tapped for screw threads, so that fittings can be added and removed without dismantling the cladding. I repositioned the left-hand firebox step centrally over the boiler band, and moved the right-hand step further forward. This photo shows how the right-hand step was repositioned on the prototype to keep it clear of the steam heating valve - the original mounting holes and the cutout to clear the washout plug can still be seen.
 19/1/10
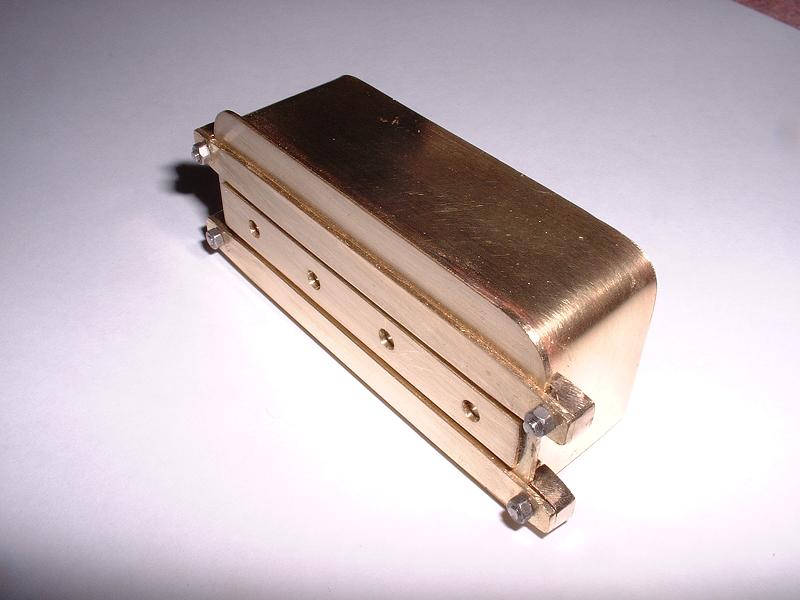
I've fabricated the AWS battery box which sits on the right-hand running board in front of the firebox, as shown here. The main body of the box is 60mm long, 27mm high and 20mm deep, which I think is about right. I used a strip of 1" x 1/8" brass for the back with a bracket along the lower edge tapped to take the screws through the running board, then bent the shell around the top and sides and soldered it, then soldered the front face on and finally fixed the front decorations with Loctite to avoid disturbing the soldered joints.
19/1/10
I've fabricated the AWS battery box which sits on the right-hand running board in front of the firebox, as shown here. The main body of the box is 60mm long, 27mm high and 20mm deep, which I think is about right. I used a strip of 1" x 1/8" brass for the back with a bracket along the lower edge tapped to take the screws through the running board, then bent the shell around the top and sides and soldered it, then soldered the front face on and finally fixed the front decorations with Loctite to avoid disturbing the soldered joints.
23/1/10
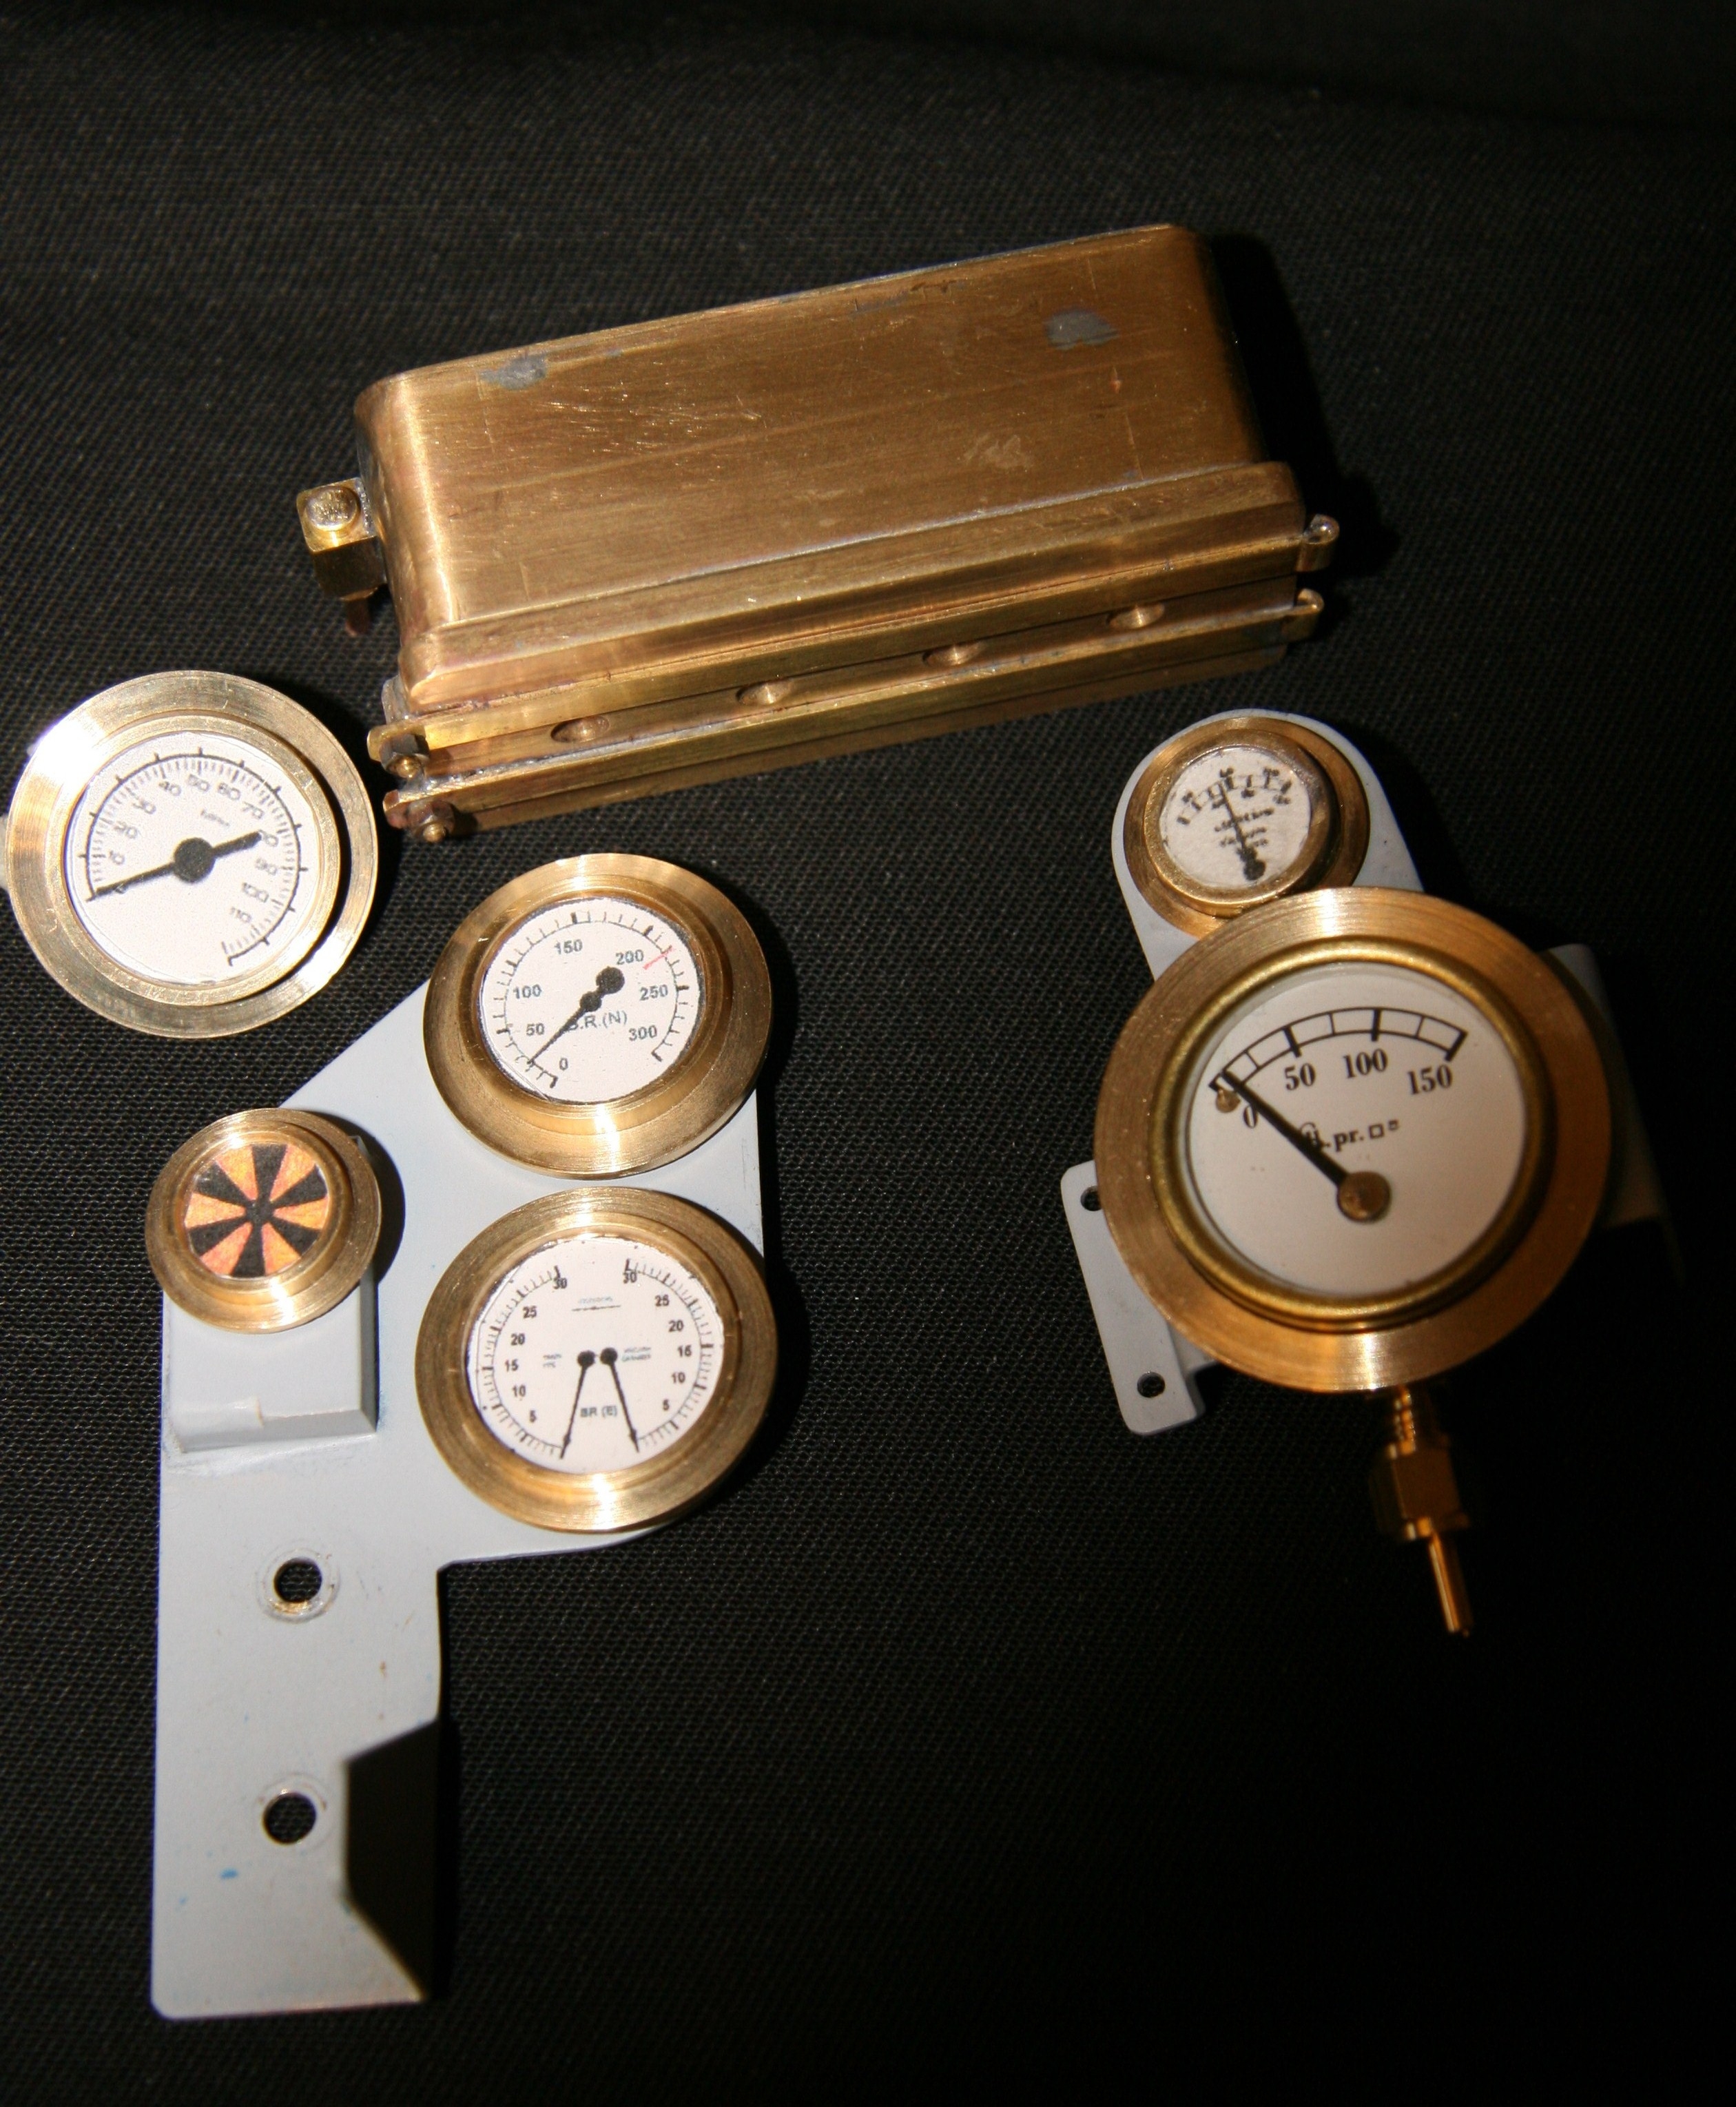
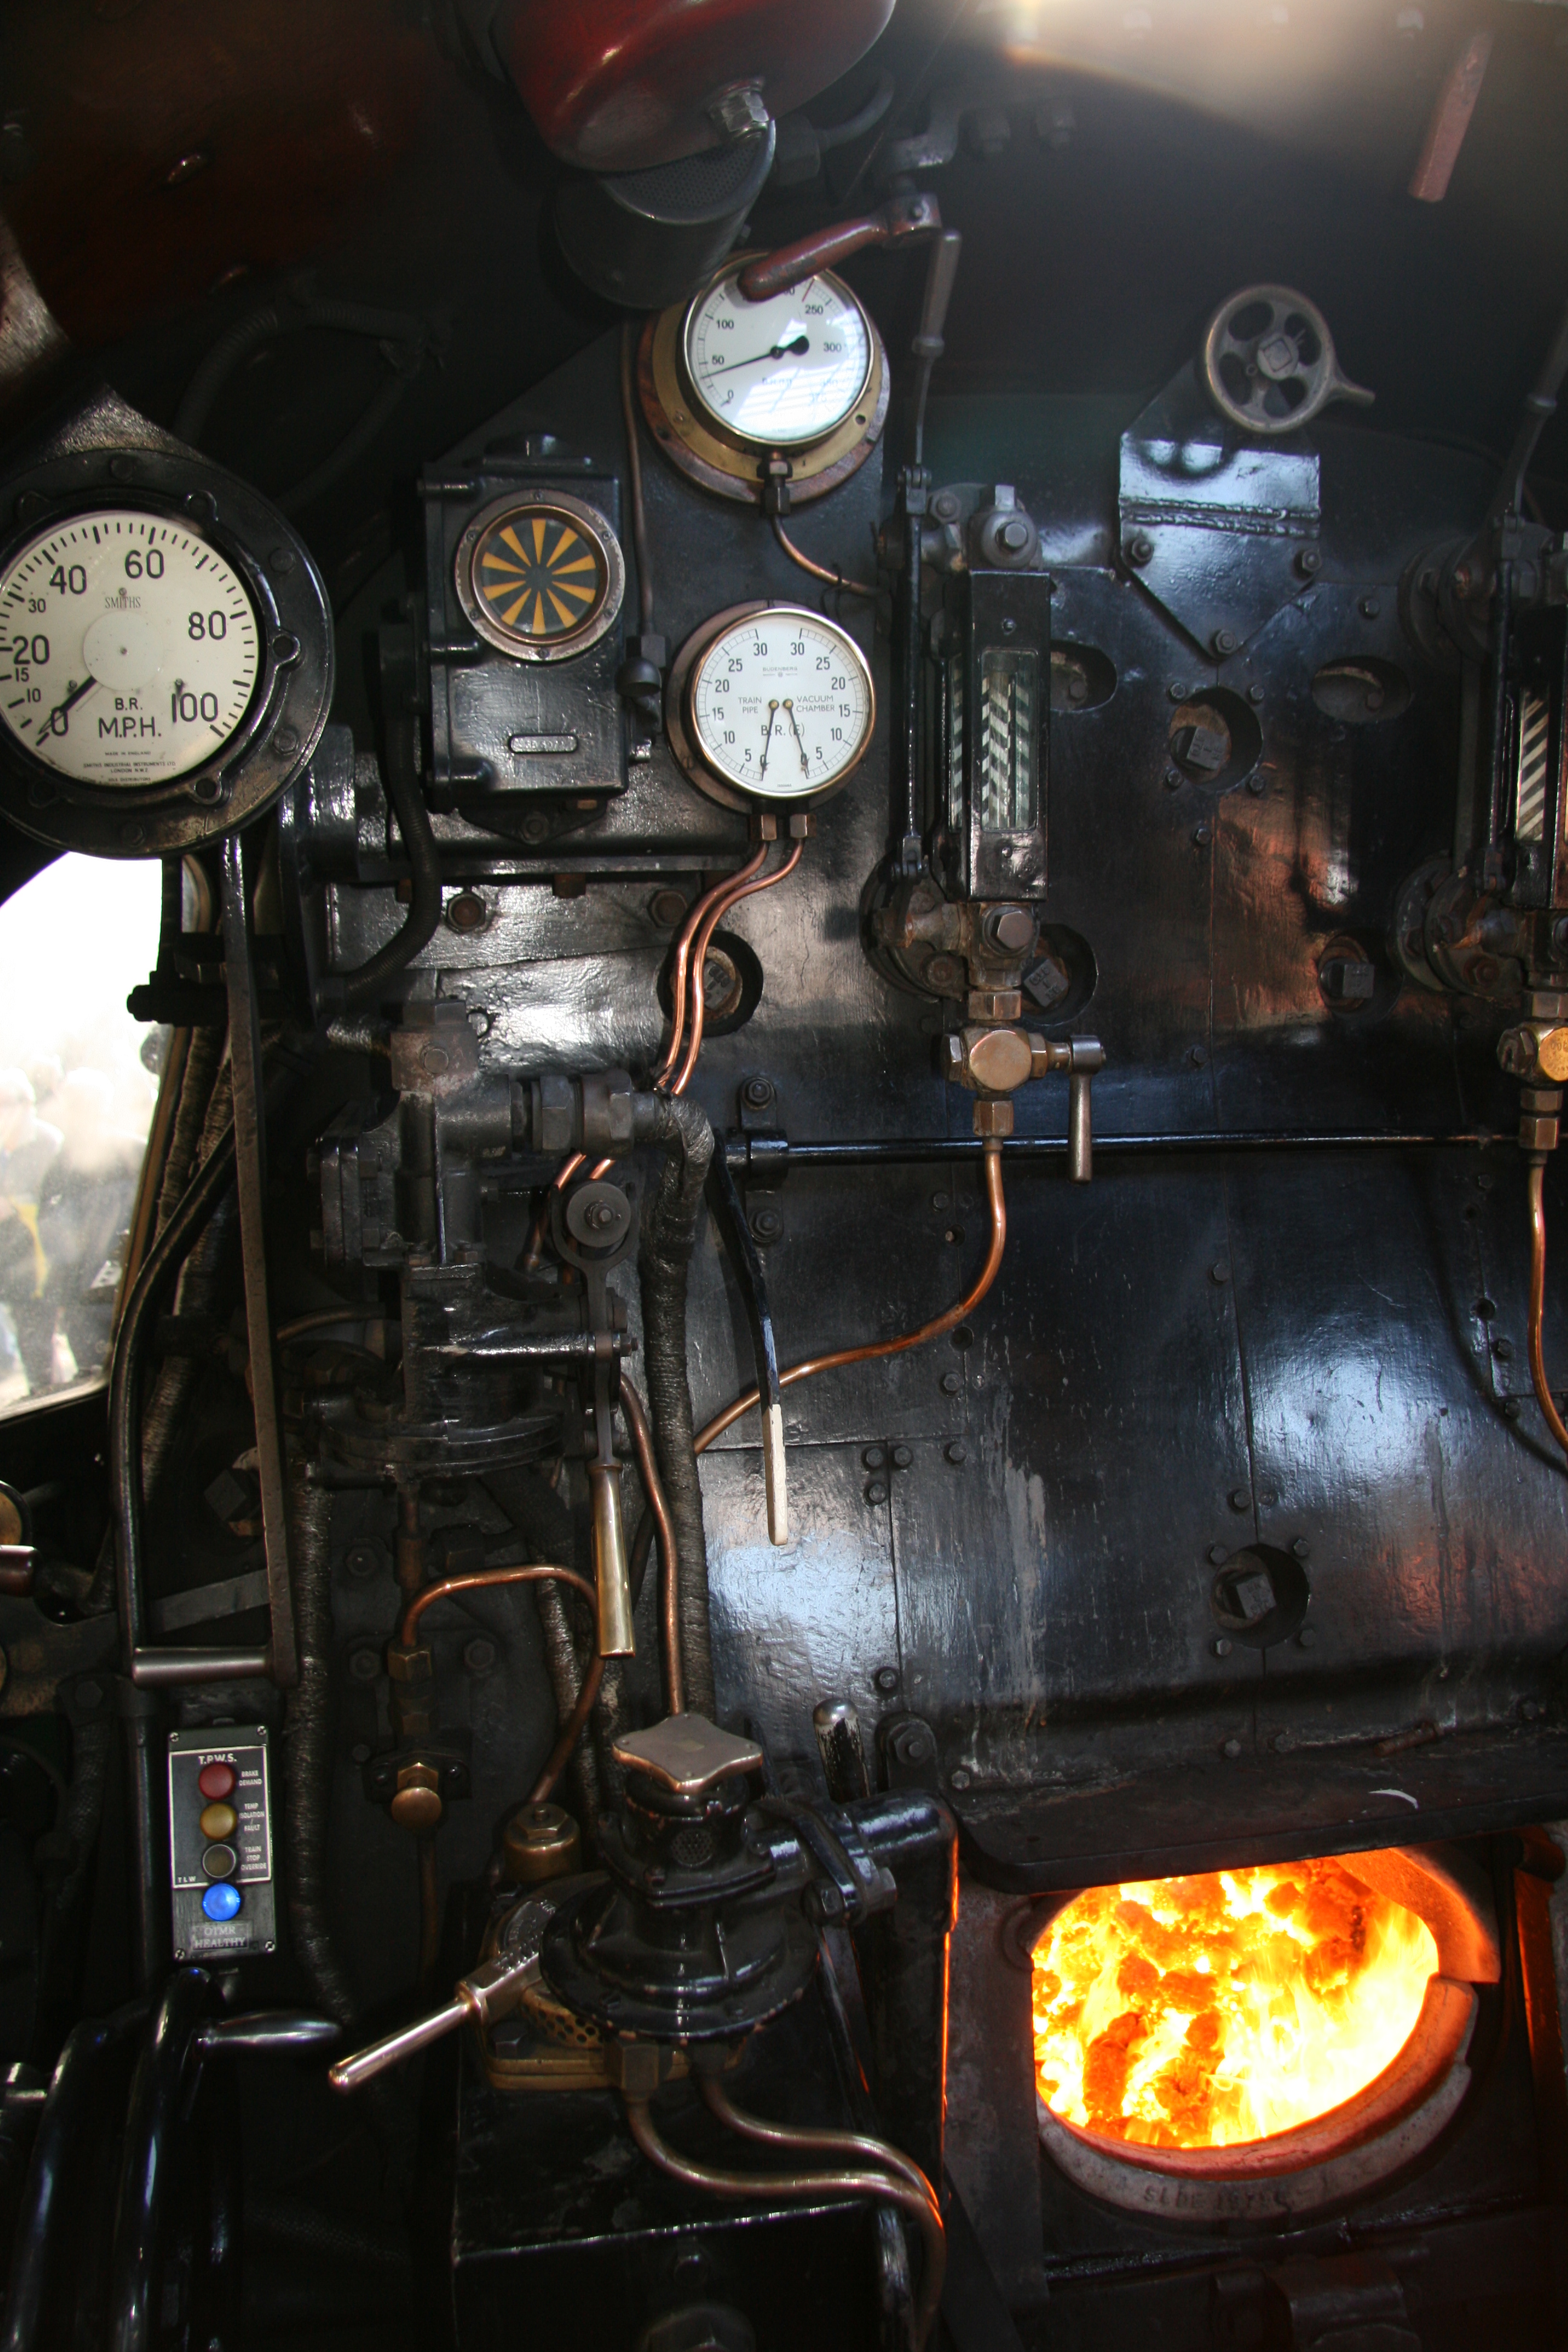
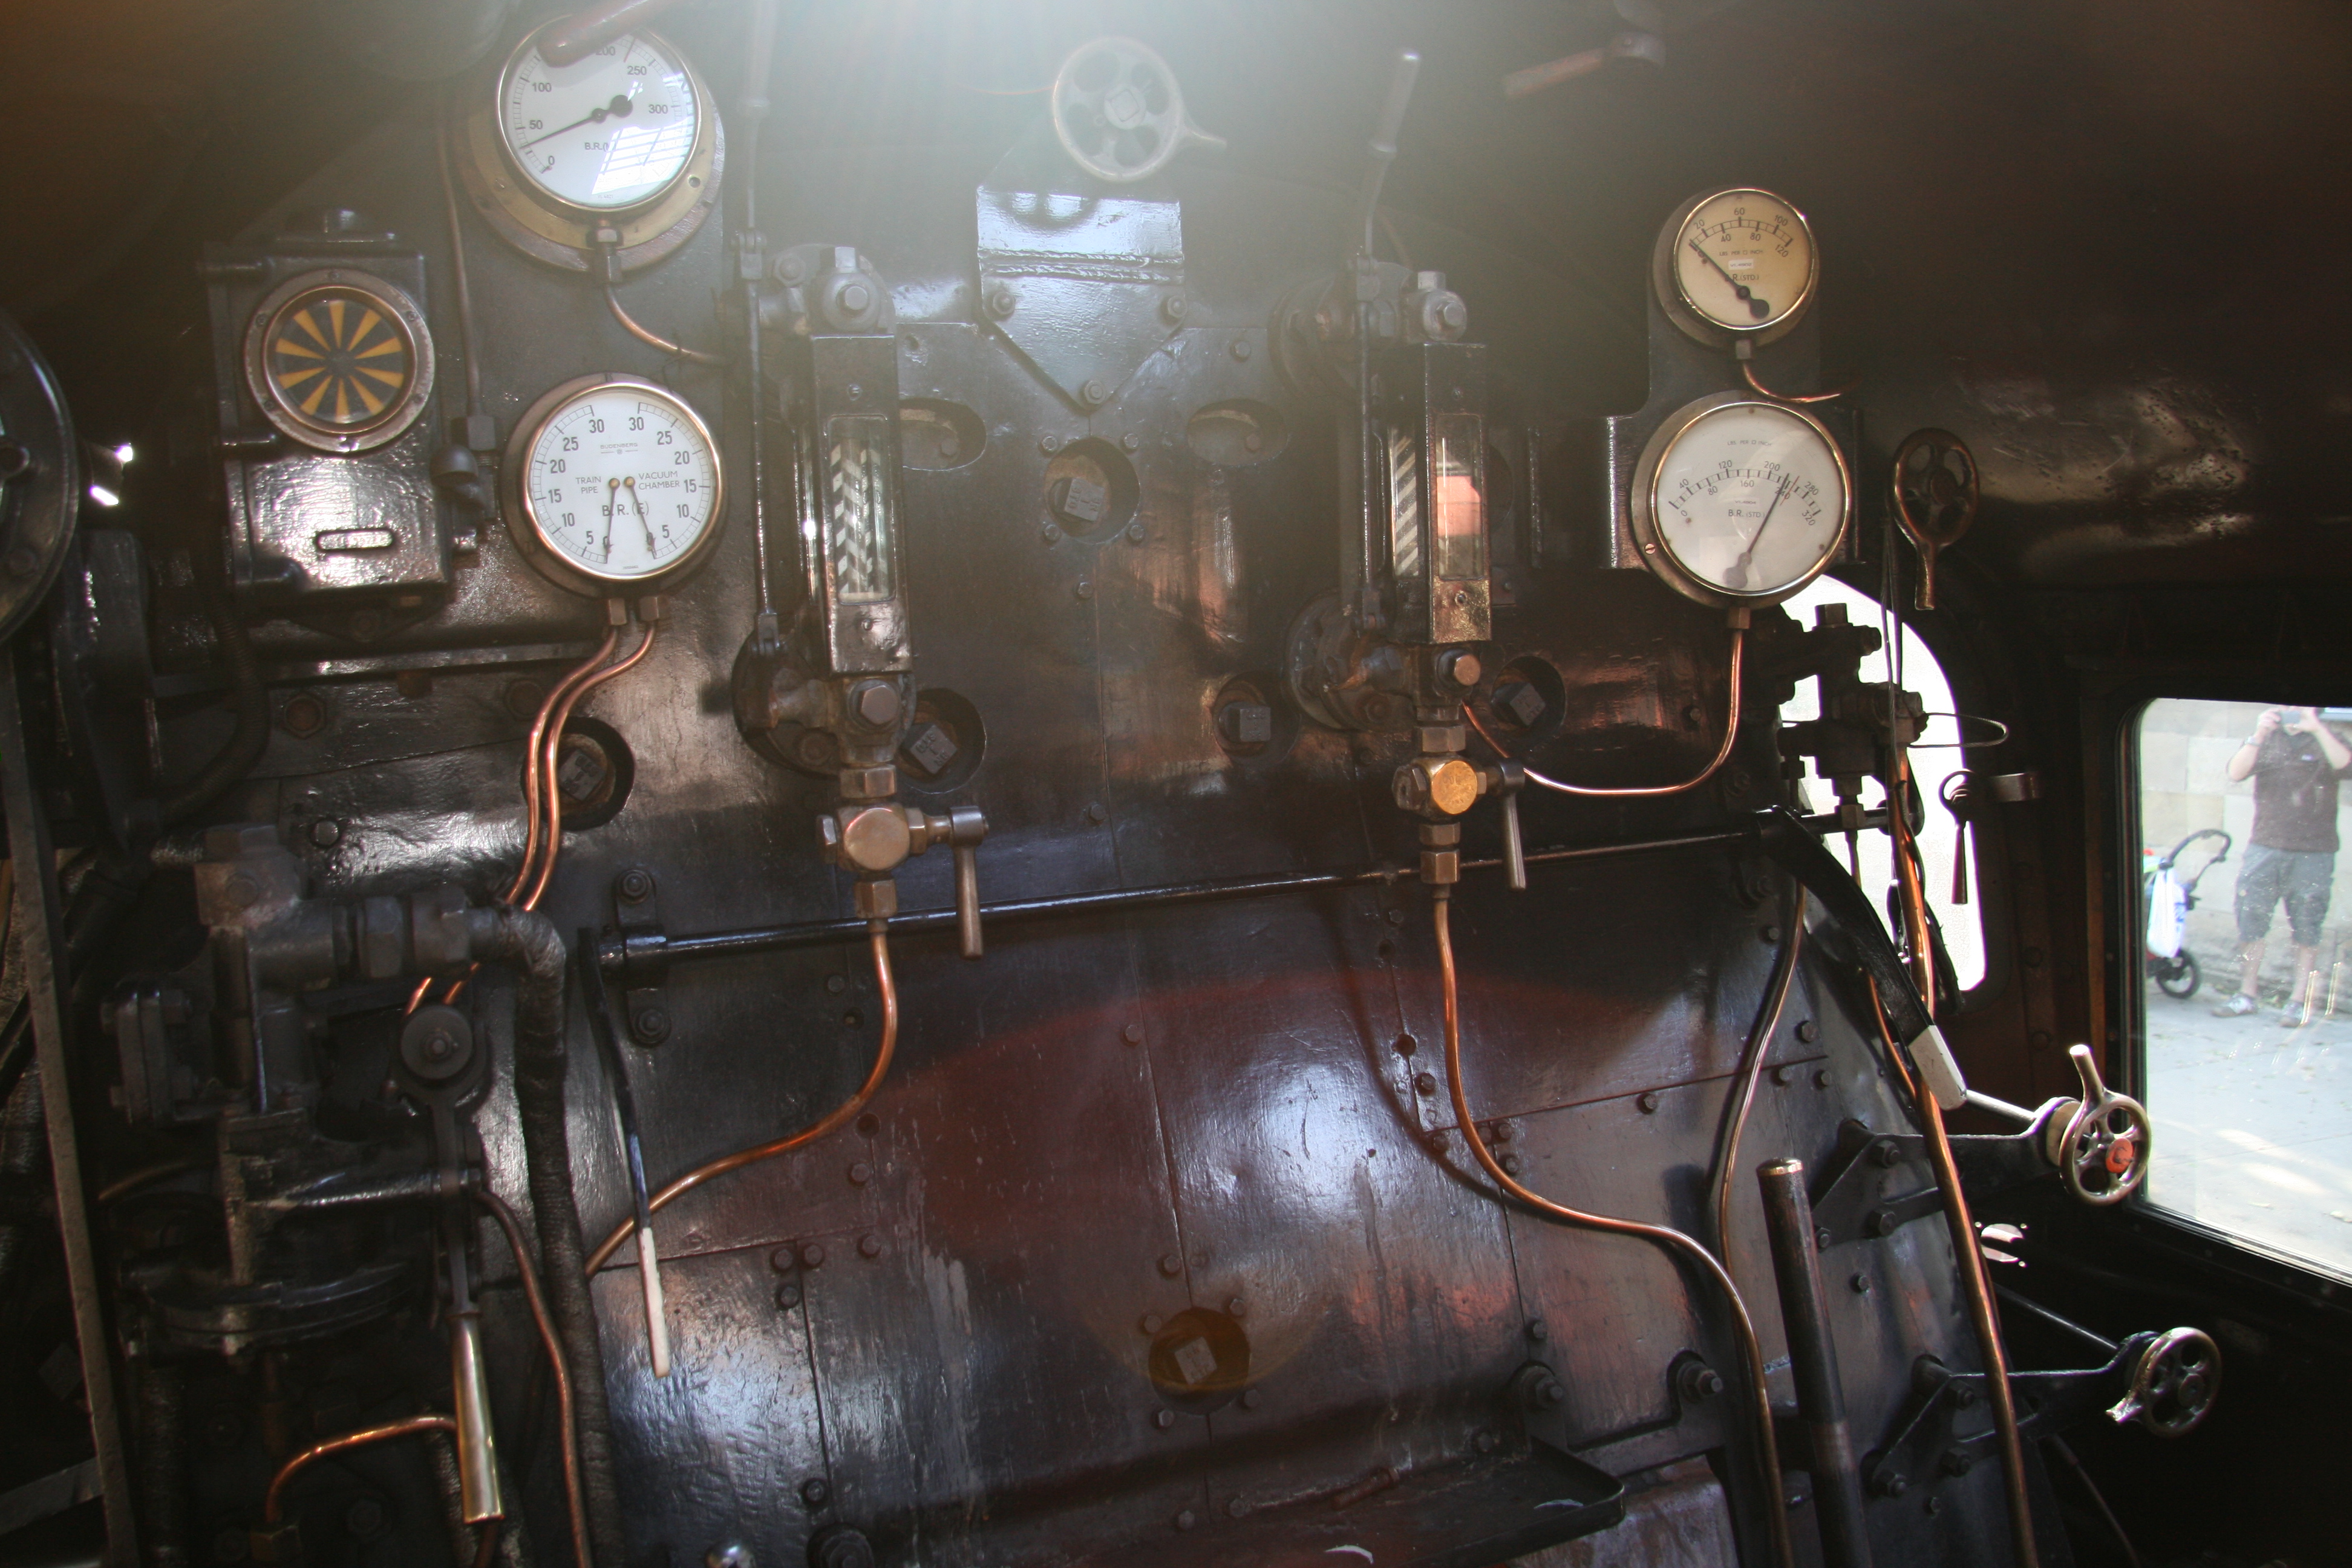
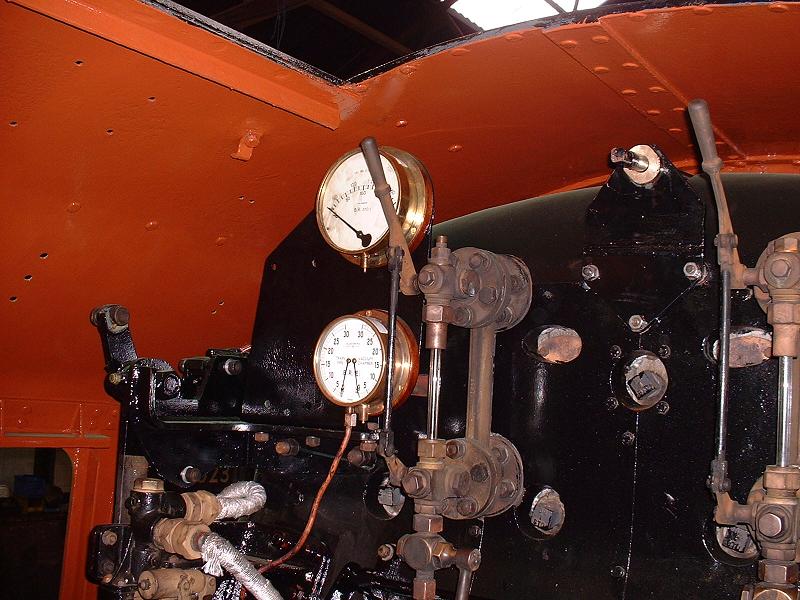
I've started to clean up the backhead fittings and fire doors in preparation for painting, and I'm making a set of dials for the gauges. Harry L has kindly sent me scans of the dial drawings that he made - he drew them out in a larger size and then reduced them on a photocopier, and the impressive results are shown here, along with his battery box. He's also turned new bodies for his gauges on the lathe. He sent me photos of the gauges currently fitted to 70013 which he took at Pickering in October 2009. This photo shows the speedometer, the black and yellow AWS indicator dial, the dual vacuum gauge and the cylinder steam pressure gauge above it, and this one also shows the boiler pressure gauge with the steam heating pressure gauge above it. Interestingly the cylinder pressure gauge has been changed since this photo that I took during the restoration.
 26/1/10
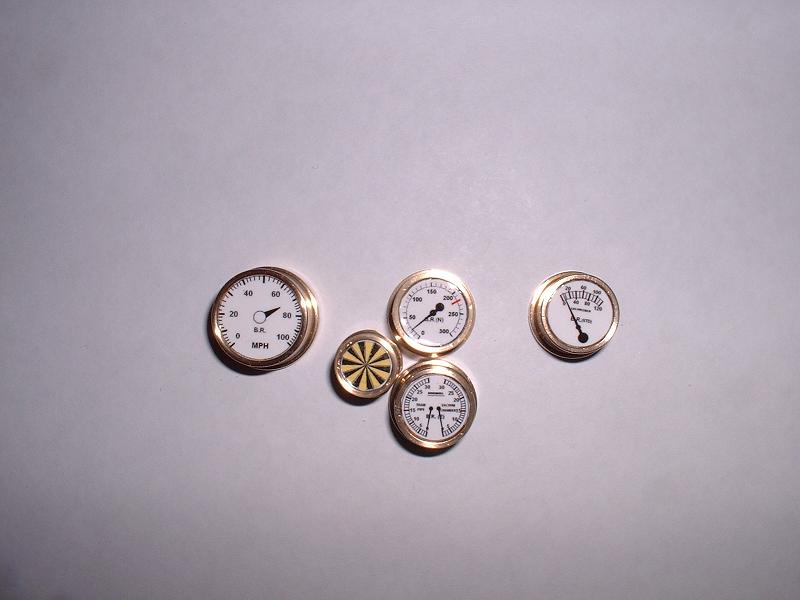
I've now made the dials for the gauges, as shown here. After trying without much success to reduce Harry's scans on the computer, I used Microsoft Paint to draw out the dials at a size of about 3" across on the computer screen and then used the scaling option on Paint's page setup to print them on glossy photo paper at the correct size, which is only 11mm diameter for the medium sized dials. I then brushed on clear nail varnish (actually 'Rimmel nail rescue' which I found on my wife's dressing table) to protect the printing. The definition of the inkjet printer is remarkably good - it's possible to read the word 'BUDENBERG' near the top of the dual vacuum gauge with a magnifying glass. If anyone would like to use the artwork to print their own dials, let me know. The speedometer is set at 70mph, which is rather optimistic with a cylinder chest steam pressure of only 20psi and no vacuum in the braking system!
26/1/10
I've now made the dials for the gauges, as shown here. After trying without much success to reduce Harry's scans on the computer, I used Microsoft Paint to draw out the dials at a size of about 3" across on the computer screen and then used the scaling option on Paint's page setup to print them on glossy photo paper at the correct size, which is only 11mm diameter for the medium sized dials. I then brushed on clear nail varnish (actually 'Rimmel nail rescue' which I found on my wife's dressing table) to protect the printing. The definition of the inkjet printer is remarkably good - it's possible to read the word 'BUDENBERG' near the top of the dual vacuum gauge with a magnifying glass. If anyone would like to use the artwork to print their own dials, let me know. The speedometer is set at 70mph, which is rather optimistic with a cylinder chest steam pressure of only 20psi and no vacuum in the braking system!
8/2/10
I've started to fit the four mudhole doors to the top of the firebox cladding - I bought the lost-wax castings from Doug Hewson. Doug pointed out that there are two further mudhole doors at the front of the boiler between the smokebox and the top feeds, but I've decided to fit just the four on the firebox - this photo shows the two on the driver's side. I suspect that the Spink plans don't show the two at the front of the boiler, which is why they are often omitted. The castings should really be fixed with eight tiny rivets through the cladding, but I just cut the hole in the cladding and then fixed the casting behind it with two 10BA screws fitted through the flange of the casting from the inside and tapped into the cladding and filed flush. Photo to follow when I've done the other three.
 16/2/10
I've finished fitting the mudhole doors and I've etch-primed the firebox cladding and the backhead cladding and some other fittings. The can of U-Pol #8 etch primer seemed to spray quite happily in the almost-freezing garage, although I did warm up the can in warm water first, and kept the components warm indoors until the last moment. I've dismantled the plastic spraying tent that I'd built in the garage because I've come to the conclusion that it wasn't really helping to keep the dust at bay - indeed Brian B told me that they seem to attract dust if left standing. I plan to paint the backhead cladding with the Halfords high temperature black gloss that I used on the bare stainless steel of the ashpan - I'm not sure if it is intended to go on top of etch primer, but we'll see. My perception is that the etch primer sticks like a limpet to brass or steel - in one or two cases where I've chipped the Phoenix gloss or lifted it when removing masking tape, the gloss has separated from the primer, rather than the primer from the metal.
16/2/10
I've finished fitting the mudhole doors and I've etch-primed the firebox cladding and the backhead cladding and some other fittings. The can of U-Pol #8 etch primer seemed to spray quite happily in the almost-freezing garage, although I did warm up the can in warm water first, and kept the components warm indoors until the last moment. I've dismantled the plastic spraying tent that I'd built in the garage because I've come to the conclusion that it wasn't really helping to keep the dust at bay - indeed Brian B told me that they seem to attract dust if left standing. I plan to paint the backhead cladding with the Halfords high temperature black gloss that I used on the bare stainless steel of the ashpan - I'm not sure if it is intended to go on top of etch primer, but we'll see. My perception is that the etch primer sticks like a limpet to brass or steel - in one or two cases where I've chipped the Phoenix gloss or lifted it when removing masking tape, the gloss has separated from the primer, rather than the primer from the metal.
19/3/10
Sorry for the lack of updates. We're just back from holiday and the weather finally seems to be warming up, so I'll resume the painting now. I'll start with the black gloss on the backhead and the lower section of the firebox cladding below the running boards, before starting on the green parts.
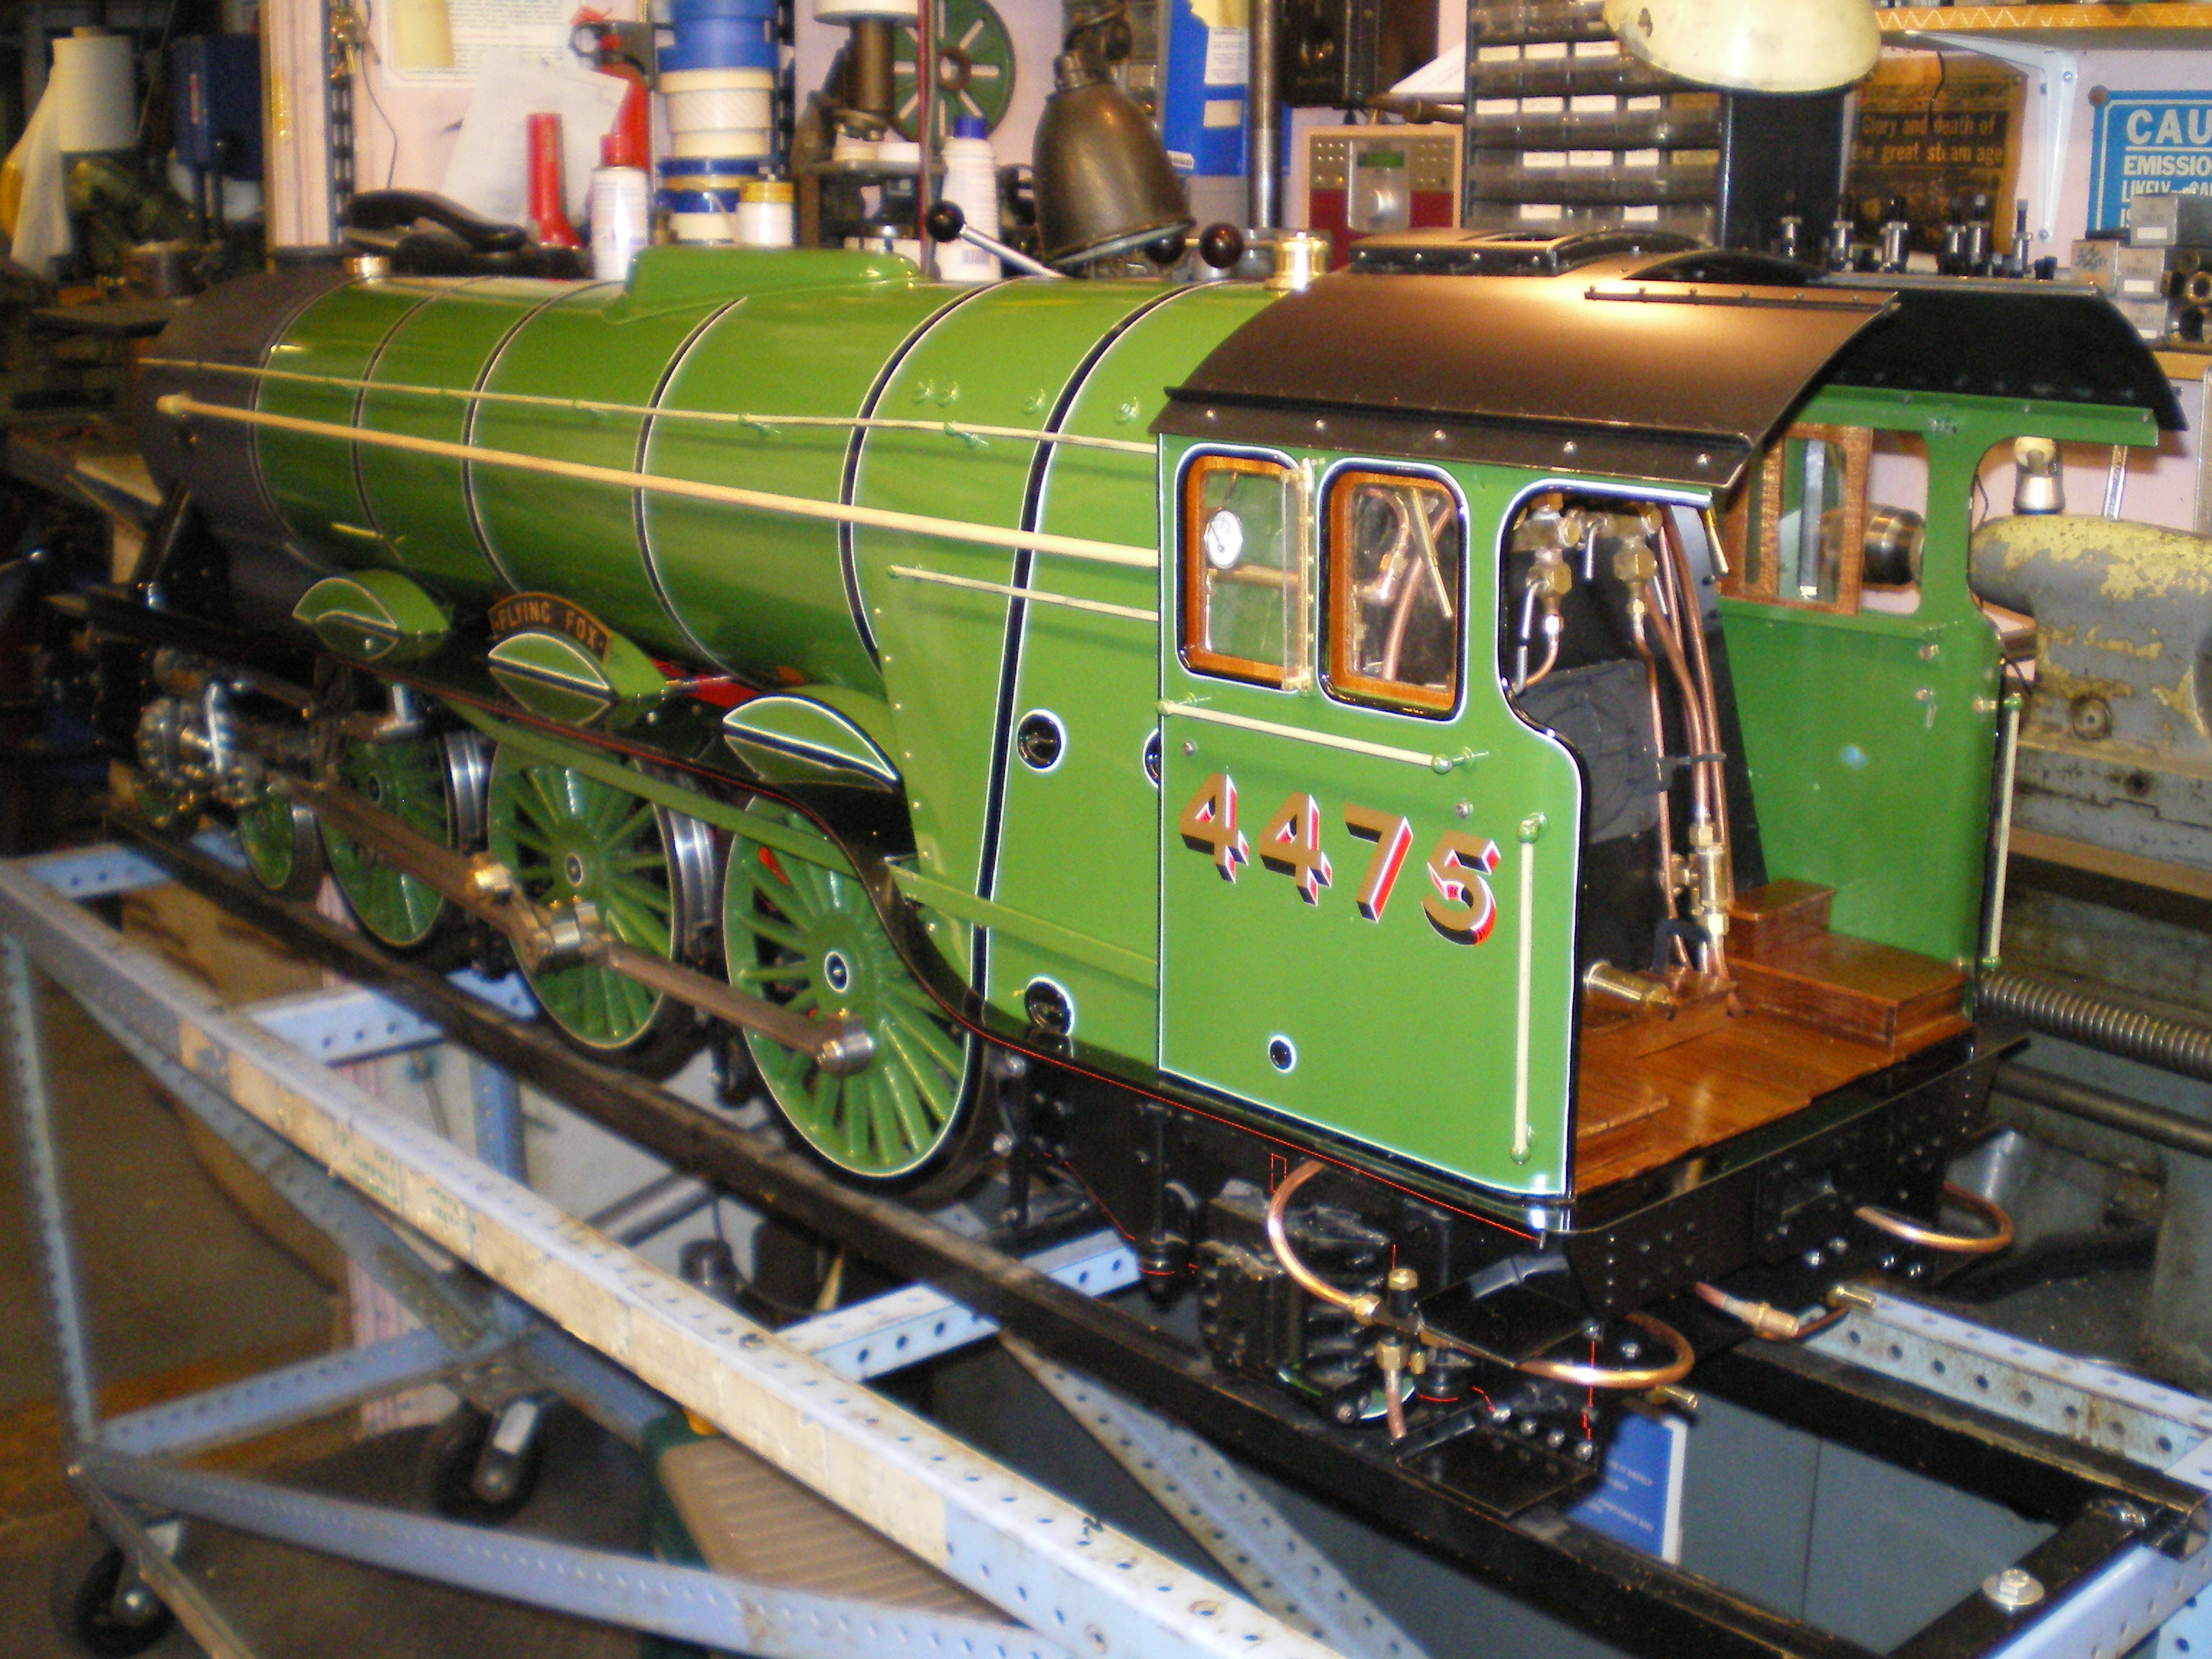
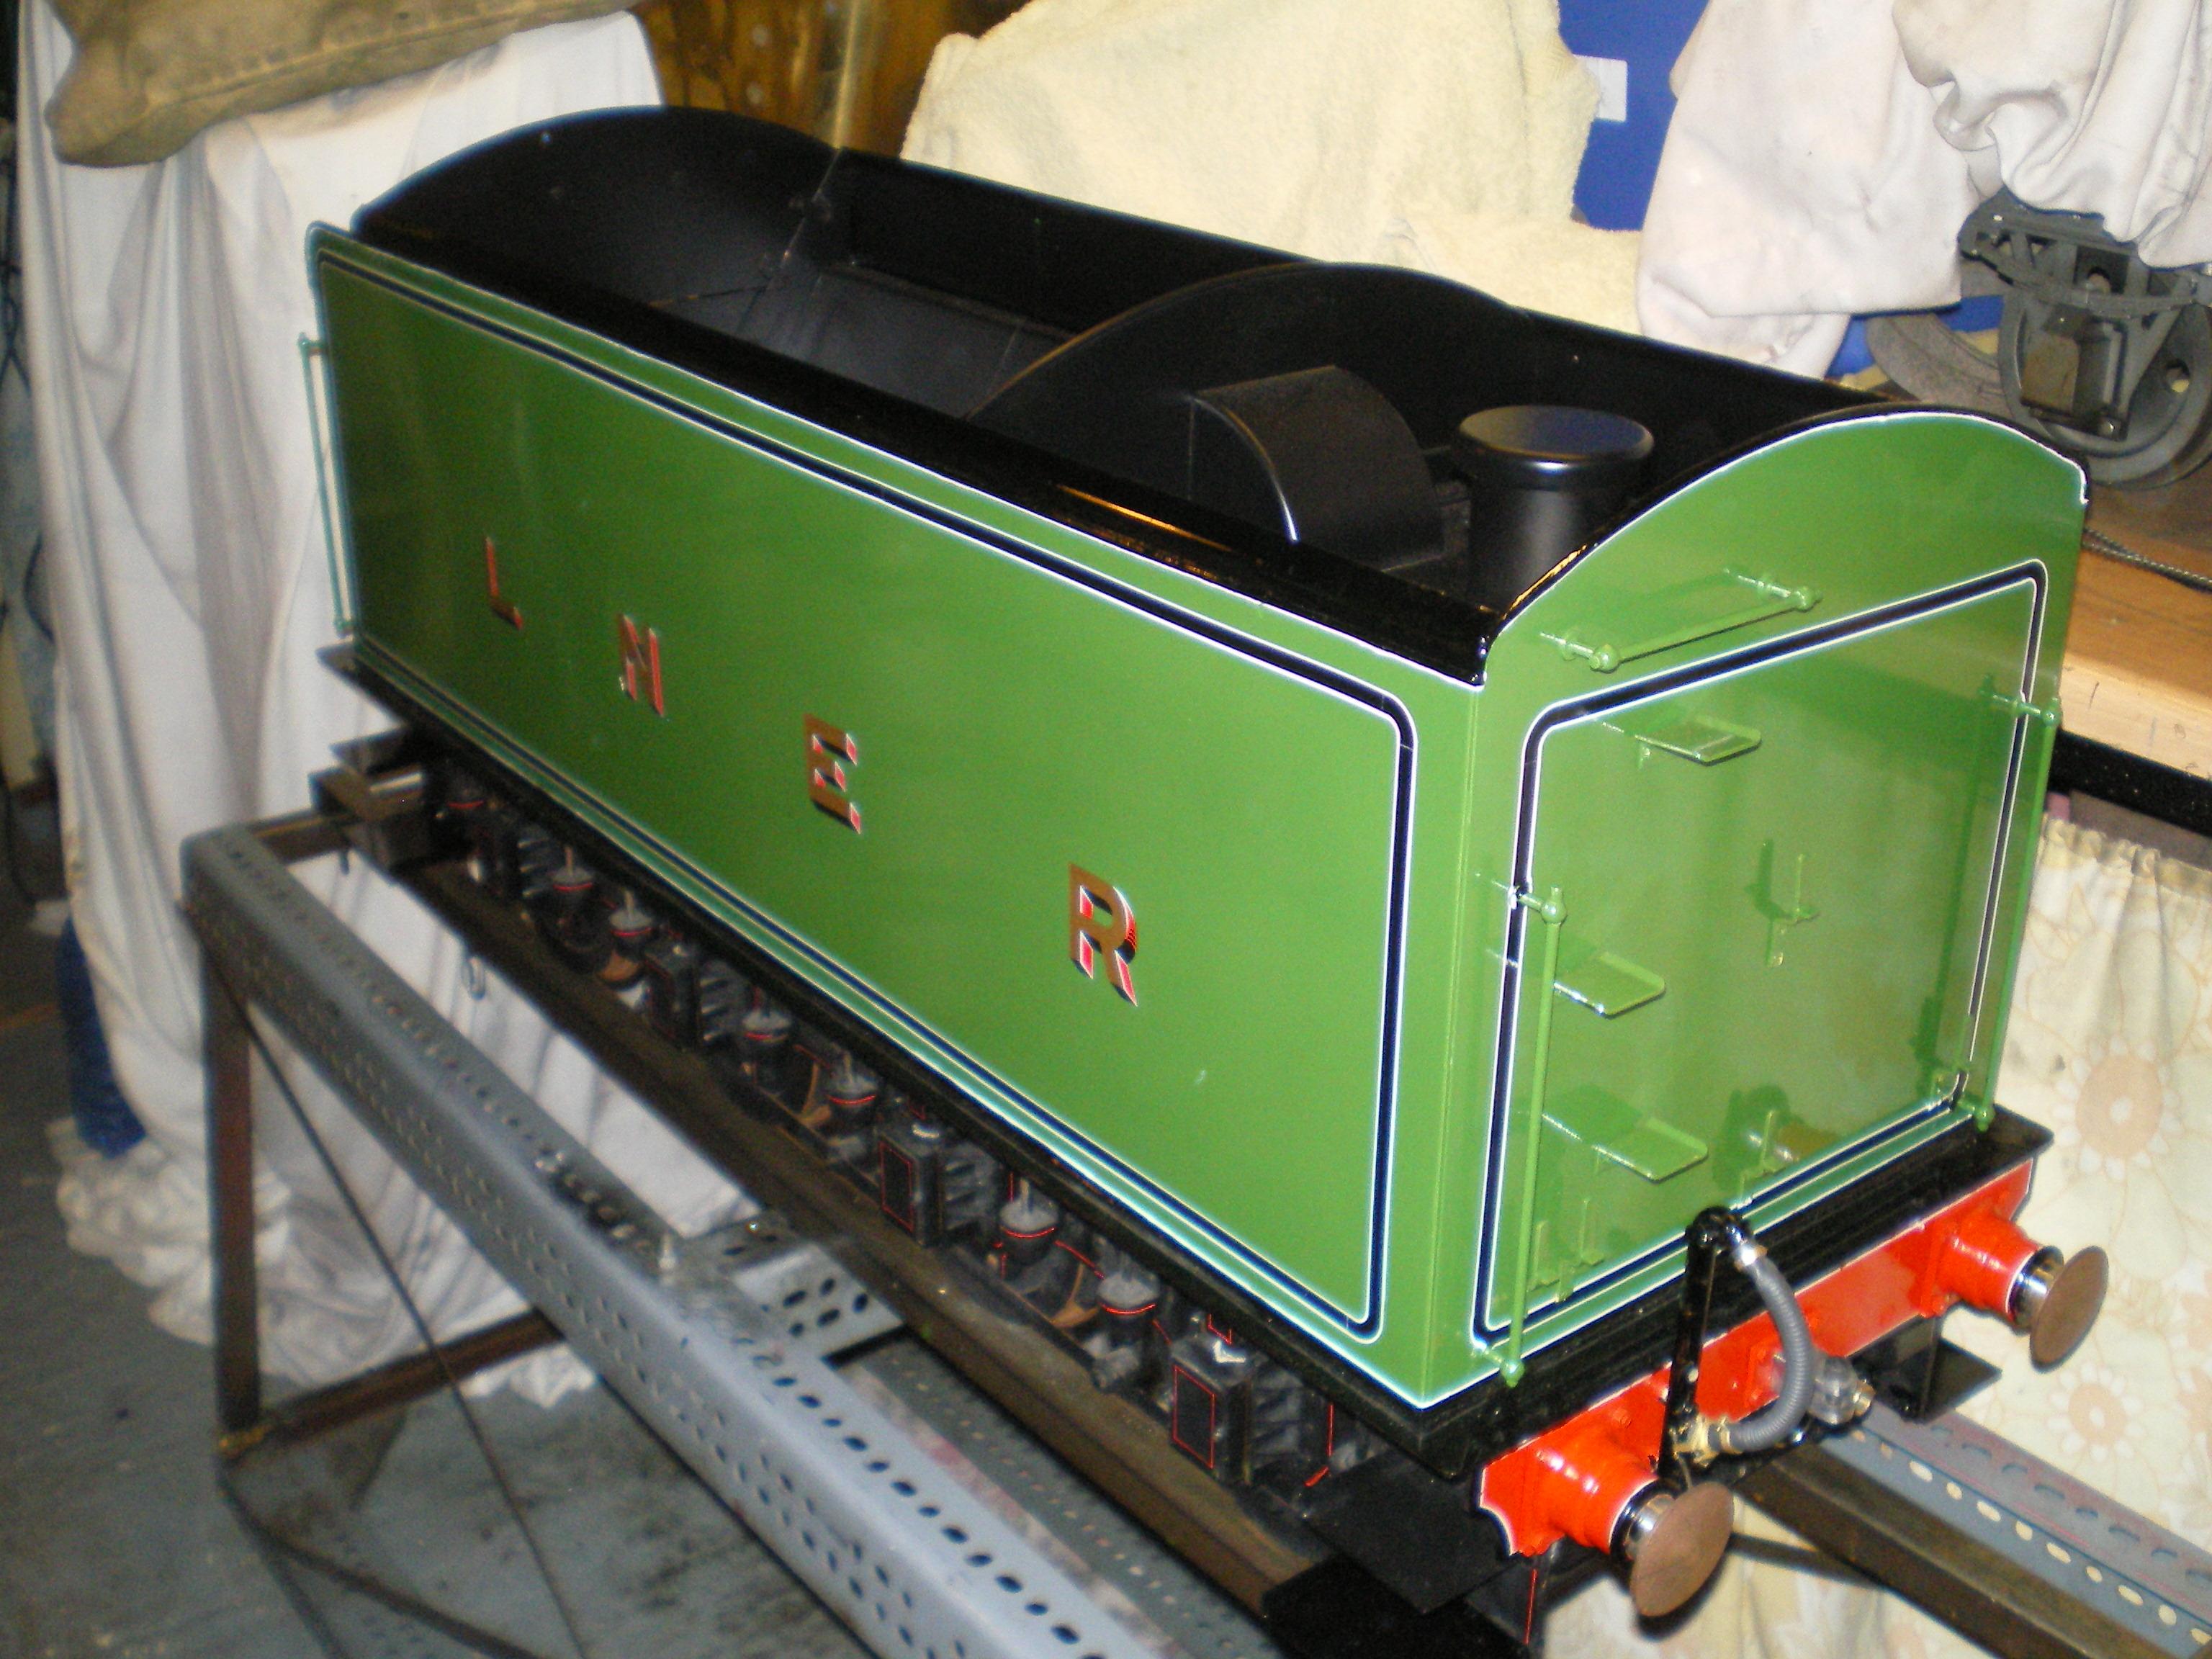
25/3/10
Brian B has sent me photographs of his superb 7 1/4" gauge Modelworks A3 'Flying Fox', which is nearing completion. The locomotive is here and the tender here. Brian is also building 7 1/4" A4 'Sir Nigel Gresley', finished in the blue livery with red wheels of the original preservation. It's very pleasing to see that the A3 and A4 builders have been able to complete their models after the demise of Modelworks, with the help of Wilkev Engineering who produced the final kits.
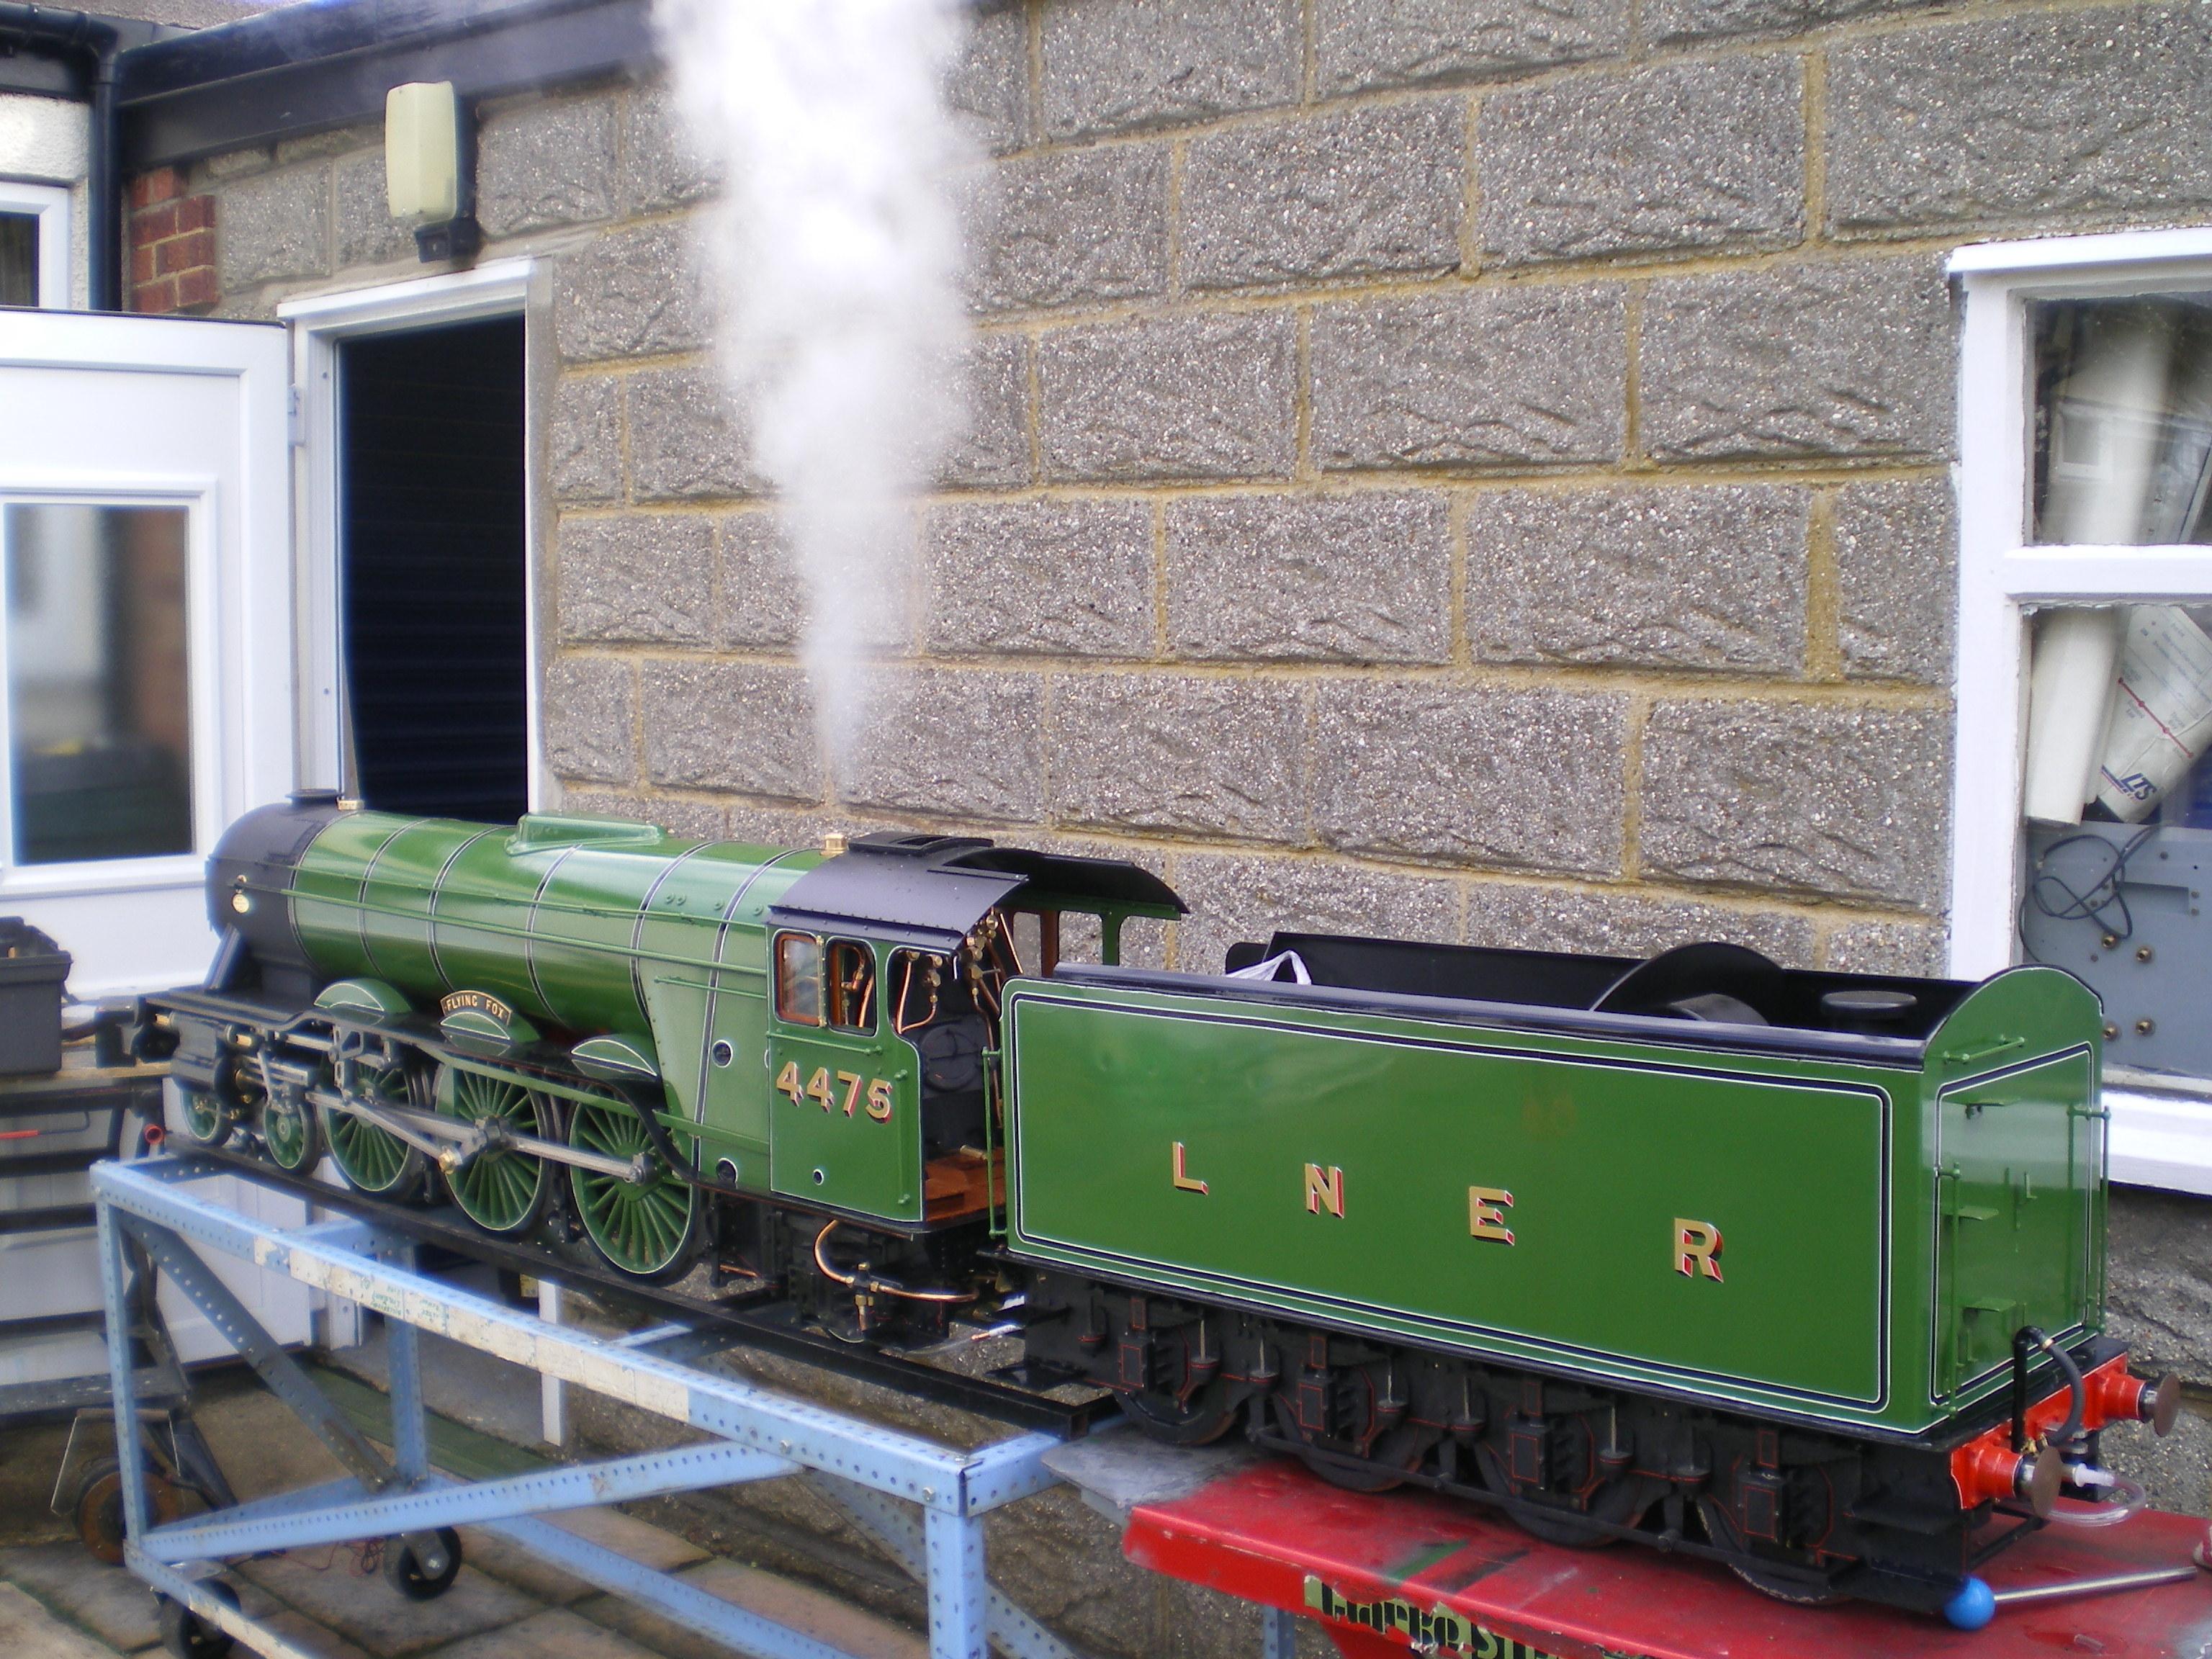
 4/4/10
Brian has sent me this photo of 'Flying Fox' steaming for the first time. I've now painted the backhead and reassembled the fittings - I just need to touch in the bolt heads, which I'll leave until later in case I need to dismantle anything again. I'll now continue painting the firebox and boiler cladding. I'm not sure yet whether I'll leave the copper pipes unpainted, or paint them to match the platework behind. 70013 currently seems to have a mixture - some painted, some lagged, and some (particularly below the running boards) in bright copper.
4/4/10
Brian has sent me this photo of 'Flying Fox' steaming for the first time. I've now painted the backhead and reassembled the fittings - I just need to touch in the bolt heads, which I'll leave until later in case I need to dismantle anything again. I'll now continue painting the firebox and boiler cladding. I'm not sure yet whether I'll leave the copper pipes unpainted, or paint them to match the platework behind. 70013 currently seems to have a mixture - some painted, some lagged, and some (particularly below the running boards) in bright copper.
13/4/10
I've now etch primed the boiler cladding, which was the last major piece waiting to be primed. I've also sprayed the boiler bands black and I'm experimenting with the orange lining on the hidden underside of one of the bands. I'm using one of the strips from the double pinstriping tape that I bought for the cylinder lining, which happens to be 5/32" wide, to mask the centre of the 1/4" band. The resulting 3/64" lines are far wider than scale - the lines on the full size prototype are only 1/8" wide - but I think they look reasonably realistic. I bought a tinlet of Humbrol number 18 Orange Gloss and applied it by brush, but it's a bit thin to give a solid covering in one coat. I've now ordered a tinlet of Humbrol 82 Orange Lining Matt to see if that is any thicker. I read somewhere that it's best to let the Humbrol paint settle in the tin and then remove the thin layer at the top to get a thicker paint for lining. I could alternatively airbrush it, as Mark did on his model pictured above, or splash out on the Phoenix lining paint which is probably thicker.
16/4/10
The tinlet of Humbrol 82 Orange Lining Matt has arrived. I removed about 25% of the thin paint at the top of the tin by soaking it up with kitchen towel before stirring the pot. This gives a much better consistency which brushes on easily to give a solid covering in one coat, so I'll proceed with this.
 24/4/10
I've now started spraying the green paint on the cladding and running boards, using my Kite spraygun. I completed the boiler cladding in just two sessions - one of those rare times when everything seems to come right and the paint flows to a nice flat gloss with no runs, orange peel or dust (well perhaps a few specks, but I now know when to stop). I supported the boiler cladding on a long cardboard tube over a square plastic pipe which allowed me to turn it with one hand while spraying with the other - the photo shows the set-up, where I've reverted to the small plastic greenhouse that I used originally. The paint is a much darker and glossier green than it appears here under the flash.
24/4/10
I've now started spraying the green paint on the cladding and running boards, using my Kite spraygun. I completed the boiler cladding in just two sessions - one of those rare times when everything seems to come right and the paint flows to a nice flat gloss with no runs, orange peel or dust (well perhaps a few specks, but I now know when to stop). I supported the boiler cladding on a long cardboard tube over a square plastic pipe which allowed me to turn it with one hand while spraying with the other - the photo shows the set-up, where I've reverted to the small plastic greenhouse that I used originally. The paint is a much darker and glossier green than it appears here under the flash.
19/5/10
We're just back from holiday, and I've completed painting the firebox cladding and fittings and am ready to start reassembling it all. Rod A sent me this photo of his completed boiler being lowered onto the frames with the aid of an engine hoist. He's aiming to have his Britannia reassembled and steaming again very soon, so he's some way ahead of me.
23/5/10
I've now painted the orange lines on 3 of the 5 boiler bands. Instead of applying the 5/32" masking tape along the centre of each band as described on 13/4/10 above, I've applied fine plastic masking tape over the full width of the band and then trimmed 1mm off each side using a small Stanley knife with a packing piece and edge guide clamped to the blade. This enabled me to get a uniform line, exactly the same width on each edge. I think the result is better than trying to apply a narrow band of tape exactly along the centre of the boiler band. I've also bought a relatively inexpensive bow-pen in order to experiment with drawing the fine orange lines on the flanges of the running boards.
 27/5/10
I've bought a new regulator valve for the reasons described on 19/12/09 above. The good news is that it only cost �3.15 + P&P from www.chandleryworld.co.uk (search for ITAP) and is identical to the original - an ITAP 1/4" BSP F/F PN50 valve - but the bad news is that it still has the same slightly tight spot just as it closes, presumably caused by a slight lip on the edge of the PTFE seal. I'd be interested to hear whether other builders have the same issue with their valves - if not, I might order a couple more to see if I can find a better one, since they are so cheap, but if they are all like this, I guess that I can live with it.
27/5/10
I've bought a new regulator valve for the reasons described on 19/12/09 above. The good news is that it only cost �3.15 + P&P from www.chandleryworld.co.uk (search for ITAP) and is identical to the original - an ITAP 1/4" BSP F/F PN50 valve - but the bad news is that it still has the same slightly tight spot just as it closes, presumably caused by a slight lip on the edge of the PTFE seal. I'd be interested to hear whether other builders have the same issue with their valves - if not, I might order a couple more to see if I can find a better one, since they are so cheap, but if they are all like this, I guess that I can live with it.
20/6/10
We're just back from a couple of weeks cruising along the South coast, from Lymington via Portland and Torquay to Plymouth, then back via Dartmouth and Weymouth - our furthest west so far. The photograph shows the 2-8-0 GWR tank engine 'Goliath' on the Dartmouth to Paignton steam railway, which is beautifully turned out. I've started reassembling the boiler cladding and fittings, and I'll then refit the boiler to the frames and finish painting the cab, running boards and smoke deflectors.
 29/6/10
I've now refitted the boiler and smokebox to the frames as shown in this photograph - I just need to touch in the bolt heads, and I also need to remove the handrails, respray them and open out the holes in the stanchions, since the paint was scraped off when I pushed them through the first time. I did replace the regulator valve and the new one is less stiff than the original. I still need to buy some 4mm or 5/32" steel rod to replace the current rather springy 3mm regulator rods - I need to find a mail order supplier who sells in lengths greater than 12".
29/6/10
I've now refitted the boiler and smokebox to the frames as shown in this photograph - I just need to touch in the bolt heads, and I also need to remove the handrails, respray them and open out the holes in the stanchions, since the paint was scraped off when I pushed them through the first time. I did replace the regulator valve and the new one is less stiff than the original. I still need to buy some 4mm or 5/32" steel rod to replace the current rather springy 3mm regulator rods - I need to find a mail order supplier who sells in lengths greater than 12".
1/7/10
I discovered that Macc Models sell metal in 24" lengths, so I ordered some 5/32" steel rod from their website the evening before last and it arrived this morning - very good service. I've cut an M4 thread on this (5/32" is just under 4mm) and a matching M4 thread in the existing brass clevis, and it pushes the regulator closed using the original 8mm crank with no hint of flexing. I'll also need to make a new intermediate bracket to get the rod parallel to the handrail, having raised the mounting for the bracket to line up with the holes in the boiler cladding.
18/7/10
I've completed the new regulator linkage and continued painting this and the pipework above the running board level. I'm painting the pipework green above the running boards and leaving it in bare copper below, which is broadly what the 70013 restoration has done. Incidentally 70013 is currently out of service having some fairly major repairs done to the rear corners of its firebox. I've been practising drawing the orange lines on the edges of the running boards with my Jakar ruling pen, and these are starting to look quite promising. I taped a guide rod to the side of the pen and this makes it easy to follow the edge, even around the complicated curves of the front plates. So far I've been wiping the lines off with white spirit, but I should soon be ready to do them properly. It's a question of getting the paint consistency, the pen width and the amount of paint right, and then drawing the line with a very steady motion. The saving grace is that it takes no time to wipe the line off and try again if necessary, assuming that the underlying green paint has been left to harden well. Pinstriping tape would not have handled the curved lines on the front plates, and a Beugler tool (even if I'd been prepared to pay the price) would not have got into the concave bends of the front plates.
30/7/10
I've now finished all the green painting on the loco. I had to buy a third tin of P101 Loco Green from Phoenix recently (I'm probably using a lot more paint than a more experienced spraygun user would) and I was disappointed to find that it gives a slightly lighter shade than the previous tins - not really noticeable unless you study it closely, but I've had to respray one or two earlier pieces to avoid obvious boundaries, such as between the running boards and the front platework. There's not much more that I can do about it now, because I'm not going to dismantle all the cladding to respray it, and if I sent the tin back to Phoenix I'd probably get the same colour from the current batch. I suppose the moral is to buy more paint than you think you might need in a single batch, or perhaps as Rod did get the paint from a supplier (Marcel Guest in Manchester, in his case) who will mix it to order in the required quantity. I now need to order the transfers for the cab sides and also line out the running boards before reassembling these parts to complete the loco, and then I need to give a final coat of paint to the tender body and apply the transfers to it. The end is in sight!
14/8/10
I've removed the tender tank and coal bunker and given them a final coat of green paint. I've ordered the transfers from Phoenix and will apply these before refitting the tank to the chassis. I've also bought some stainless M5 screws to fix the tank to the chassis, since the steel screws supplied had rusted. I've started to fit perspex to the cab windows - Modelworks supplied these pieces in kit 18c, although they came from the 9F and need trimming to fit the Britannia. I'll probably just glaze the windows in the spectacle plates and the front side windows. I've finished the orange lining on the running boards on one side, and it looks quite presentable.
 26/8/10
I'm still waiting for the transfers from Phoenix - apparently they have run out of cabside numbers - but in the meantime I've completed the lining of the running boards and I've planked the cab floor as shown in this photo. I've also fitted a few remaining items such as the speedometer (fitted on a bracket attached to the pivot bolt of the regulator handle) and the copper pipes running forward from the water filter boxes on the tender sides. Once the transfers have been applied I should be ready to start preparing for a steam test on the rolling road, over two years since I last steamed.
26/8/10
I'm still waiting for the transfers from Phoenix - apparently they have run out of cabside numbers - but in the meantime I've completed the lining of the running boards and I've planked the cab floor as shown in this photo. I've also fitted a few remaining items such as the speedometer (fitted on a bracket attached to the pivot bolt of the regulator handle) and the copper pipes running forward from the water filter boxes on the tender sides. Once the transfers have been applied I should be ready to start preparing for a steam test on the rolling road, over two years since I last steamed.
1/9/10
The transfers have arrived and I've successfully applied the lining and numbers to the cab sides. I wasted quite a lot of the lining corners and straights because of difficulty in sliding them into the correct position - it is quite a fraught process. The transfers have a thin clear coating over the artwork and Phoenix give the option of removing this by peeling it off using a piece of masking tape applied to one corner, after leaving the transfer to dry for 24 hours. I was a bit doubtful about this because it would ruin the job if part of the transfer was lifted as well, so I asked Rod and he said that he had done it without any problem. I tried it with some spare numbers successfully, but when I came to try it on the lining I found that one of the fine orange lines started to lift away. Presumably Rod's were more firmly stuck down than mine. Luckily I was able to patch in a replacement without the damage being obvious, but I've decided to play safe and leave the coating in place. If the transfers are trimmed before application to remove any excess coating from around the edges and in the middle of items such as the digit '0' the results still look very good. Phoenix also recommend varnishing over the transfers, irrespective of whether the coating has been removed, for added durability. Rod tried this but decided not to continue because the brush marks spoiled the appearance, and he says that his transfers have not suffered after numerous steamings. I shall follow his example.
4/9/10
Rod tells me that he in fact only used transfers for the numbers and the BR crest, and used his Bob Moore lining pen with templates to paint the lining on the cab and tender sides. This probably gives a better result, since the Humbrol Orange gloss that I've used on the boiler bands and running boards is much brighter than the rather muted orange lines on the transfers. Brian B says that he too has had problems removing the transparent covering from the Phoenix transfers, and now leaves it in place. I've now applied the final touches to the locomotive - touching in bolt heads, varnishing the floor boards etc - and I just need to apply the transfers to the tender and reassemble it. I've also ordered a set of plates from Bill Hall - shed plate 32A (Norwich) for the smokebox, 'Built Crewe 1951' plates for the front frames, tender number 773 etc. 70013 had shed code 32A when it completed restoration at Loughborough as seen on my photo on the front page of this site, although I notice that it's since been replaced by 12A (Carlisle). 773 is the tender currently fitted to 70013, although it originally belonged to 70014 'Iron Duke'.

 13/9/10
It's all finally completed, almost five years after I started. I applied the transfers to the tender and reassembled it and fitted Bill Hall's plates, which look very nice. Applying the BR totem transfers over the rivet heads on the tender sides was rather fraught, but I cut holes for the rivets and managed to slide the transfers into place successfully. I then mixed red and cream colours to match and painted in the rivet heads (or half of the rivet head, in the case of the lion's nose), and the result looks good. I'll now move the locomotive back onto the rolling road in the garage and prepare for another steaming.
13/9/10
It's all finally completed, almost five years after I started. I applied the transfers to the tender and reassembled it and fitted Bill Hall's plates, which look very nice. Applying the BR totem transfers over the rivet heads on the tender sides was rather fraught, but I cut holes for the rivets and managed to slide the transfers into place successfully. I then mixed red and cream colours to match and painted in the rivet heads (or half of the rivet head, in the case of the lion's nose), and the result looks good. I'll now move the locomotive back onto the rolling road in the garage and prepare for another steaming.